
Lawn
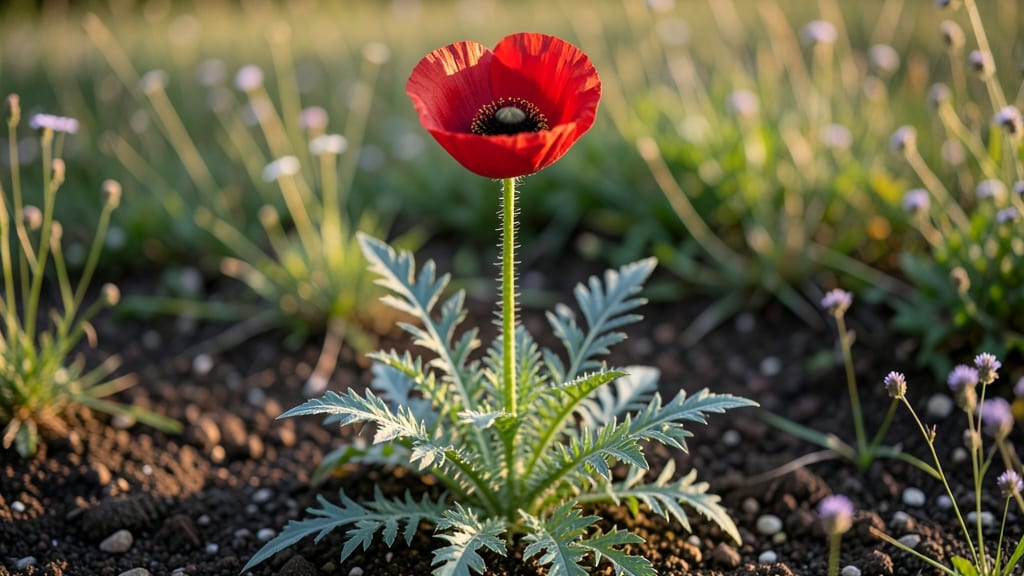
Cold-stratified bread seed poppies (Papaver somniferum) are the secret to reliable blooms next spring—no more waiting months for germination. 🌱 I’ve learned the hard way that skipping this step means weak seedlings or no poppies at all, but once you master it, you’ll have fragrant, edible blooms ready for harvest in just a few months.
The process starts with seed prep: place your poppy seeds in a damp paper towel, seal them in a bag, and refrigerate for 4-6 weeks to mimic winter’s natural cold period. This breaks dormancy so they sprout faster and stronger once planted.
Most gardeners overlook this step, but it’s the difference between a patch of poppies and a handful of sad, slow starters.
By spring, you’ll be planting these prepped seeds in well-draining soil with full sun, where they’ll grow into sturdy plants with bright blue, pink, or white blooms—perfect for harvesting seeds for baking or simply enjoying their delicate beauty.
The key is patience; these poppies take about 90 days to mature, but the payoff is worth it.
Whether you’re growing them for poppy seed bread or just love their old-fashioned charm, this method ensures reliable results. Just be sure to research local regulations—some varieties have legal restrictions, so always check before planting.
📚 In This Guide
- What you need
- Instructions
- Tips and common mistakes
- Wrapping up and next steps
What you need
- ● Bread seed poppy seeds – 1–2 packets (about 100–200 seeds), preferably from a trusted supplier for best germination rates.
- ● Cold-stratification method: Option 1: Paper towels or dampened coffee filters (2–3 sheets per batch of seeds).
- ● Option 2: Plastic bag with a damp growing medium (e.g., peat moss or coconut coir).
- ● Small containers or resealable bags – For holding seeds during stratification (e.g., ziplock bags or seedling trays).
- ● Labeling tags – To mark seed varieties and stratification dates.
- ● Spray bottle – For lightly misting seeds (keep them damp, not soggy).
- ● Fine-mist setting – If using a spray bottle, this ensures gentle hydration.
- ● Refrigerator or cold frame – A consistent 35–40°F (2–4°C) space for 4–8 weeks.
- ○ Growing trays or pots – Optional, for transplanting after stratification (3–4" depth recommended).
- ● Potting mix – Well-draining, like a cactus/succulent blend or perlite-peat mix.
- ● Grow lights or sunny windowsill – For post-stratification sprouting (if indoors).
How to cold-stratify bread seed poppies for strong, reliable germination
Cold-stratification is the secret to breaking poppy seeds' dormancy—here's how I do it every fall for guaranteed spring blooms.
🌱 Step 1: Collect and Prepare the Seeds
Harvest mature poppy seed pods when they're dry and brown but before they split open. I wear gloves—poppy seeds cling everywhere—and gently twist pods to release seeds. Store them in a paper envelope to prevent moisture buildup, which causes mold. Poppy seeds need this dry storage for 2-4 weeks before stratification to mimic their natural winter cycle.
Don't rush this step. If seeds are still green or moist, they won't stratify properly. You'll know they're ready when they're completely dry and rattling inside the pod. Spread them on a paper towel to air-dry for an extra day if needed.
💧 Step 2: Moisten and Mix With Moisture-Retentive Medium
Fill a quart-sized resealable plastic bag with 1 cup dampened peat moss or coconut coir—just enough moisture to feel like a wrung-out sponge. Add the poppy seeds, then seal the bag tightly. I shake it gently to distribute seeds evenly through the medium.
This moisture level is critical. Too dry and seeds won't germinate; too wet and they'll rot. You'll see condensation form inside the bag—that's perfect. Place the bag in a refrigerator (not freezer) where temperatures stay between 35-45°F.
⏰ Step 3: Stratify for 6-8 Weeks in Cold, Dark Conditions
Store the bag upright in your refrigerator's crisper drawer for 6-8 weeks. Check it weekly—you'll see seeds begin to plump slightly after 3-4 weeks, signaling dormancy is breaking. This cold treatment mimics winter's natural chilling period, which poppies need to germinate.
Resist the urge to peek more often. Every time you open the bag, you release moisture and warmth that disrupts the process. Mark your calendar now—poppies need this full cold period to ensure strong, healthy seedlings next spring.
☀️ Step 4: Sow Stratified Seeds in Early Spring
Once stratified, remove seeds from the bag and sow them directly in the garden or containers. Scatter seeds on prepared soil (lightly raked and free of weeds) at a depth of just ¼ inch. Poppy seeds are tiny—don't bury them deeper or they'll struggle to emerge.
Keep soil consistently moist but not soggy until germination, which typically occurs in 10-21 days. You'll see the first true leaves appear as small, rounded cotyledons. Thin seedlings to 6 inches apart once they reach 2 inches tall—this prevents overcrowding and ensures strong stems for those iconic blooms.
🌿 Step 5: Provide Sun and Minimal Care for Established Plants
Poppies thrive in full sun (6+ hours daily) and well-draining soil. Once seedlings establish, water only when the top 1 inch of soil feels dry. Overwatering causes rot, especially in heavy clay soils—poppies hate soggy feet.
Let the plants go dormant in summer. They'll return with vigor in fall, producing those classic papery blooms. I always mark their location because they self-seed prolifically—next year's garden will have poppies popping up everywhere without effort.
Tips & tricks for perfect bread seed poppy germination
Here's what nobody tells you about getting poppies to sprout reliably every year—these tricks make all the difference.
Timing Secret: Start your 2-4 weeks of dry storage in early fall when temperatures naturally begin dropping. This mimics the seeds' natural exposure to autumn's cooling. I begin mine the first week of October, which means they're ready for stratification by mid-November—just in time for the coldest months.
Moisture Control: The key to that perfect "wrung-out sponge" moisture level is squeezing the peat moss or coconut coir until water just begins to drip out when pressed. Too dry and seeds won't wake up; too wet and they'll rot before germination. I use a clean kitchen towel to blot excess moisture if needed—this is where most people go wrong.
Stratification Strategy: Place your sealed bag in the coldest part of your refrigerator, not just the crisper drawer. I use the back shelf where temperatures stay most consistently between 35-45°F. This steady cold is what breaks dormancy—fluctuations can confuse the seeds. Mark your calendar exactly 6-8 weeks from when you started to avoid over-stratifying.
Sowing Success: When sowing those tiny ¼-inch-deep seeds, I use a fine-mesh sieve to distribute them evenly. This prevents clumping and ensures each seed gets proper contact with moist soil. After sowing, I gently press the soil with my fingers to create good seed-to-soil contact without burying them deeper than that critical ¼ inch.
Pro Tips for Bread Seed Poppies
- Here's what nobody tells you about getting poppies to sprout reliably every year—these tricks make all the difference.
- Timing Secret: Start your 2-4 weeks of dry storage in early fall when temperatures naturally begin dropping. This mim...
- Moisture Control: The key to that perfect "wrung-out sponge" moisture level is squeezing the peat moss or coconut coi...
Frequently asked questions
Got questions about growing bread seed poppies? You’re not alone!
Here are some of the most common queries—plus straightforward answers to help you succeed with these delicate yet resilient blooms.
Why do bread seed poppies need cold stratification?
Cold stratification mimics winter’s natural conditions, breaking seed dormancy. Without it, many bread seed poppy seeds won’t germinate—even if planted in ideal soil. Think of it as a "wake-up call" for seeds that need a chill to bloom reliably. Skip this step, and you might wait years (or never see flowers!).
How long should I cold-stratify bread seed poppy seeds?
For best results, refrigerate moistened seeds in a sealed bag for 4–6 weeks. Check them weekly—if mold appears, pat them dry and restart. Pro tip: Label your bags with the date to avoid over-stratifying (too long = lower germination rates).
Can I plant bread seed poppies directly in the ground without cold stratification?
Technically yes, but success rates plummet. If you’re impatient, try sowing seeds in fall (they’ll naturally stratify over winter). Otherwise, opt for the fridge method for 90%+ germination. For gardeners in mild climates, a winter outdoor sowing can work—just cover seeds lightly with soil and hope for freeze-thaw cycles.
My seeds sprouted, but the seedlings look weak or leggy. What went wrong?
Leggy seedlings usually mean too much light or heat during germination. Move them to a cool, shaded spot (like a seedling tray under a grow light) until they develop true leaves. Overcrowding can also stunt growth—thin seedlings to 2–3 inches apart once they’re 2–3 inches tall. No drama! Poppies are tough once established.
Will bread seed poppies self-seed aggressively like other poppies?
Not typically! Bread seed poppies (Papaver somniferum) are less aggressive than native poppies (like Papaver rhoeas). However, they will self-sow if left undisturbed. To control spread, deadhead spent blooms before seed pods form. If you love their wild charm, let nature take its course—but expect a few surprises next year!
What’s the best alternative if I can’t cold-stratify?
Try scarification: Gently nick the seed coat with sandpaper or a knife to mimic natural wear-and-tear. Soak seeds in warm water for 24 hours first, then plant. This method works 50–70% of the time, but cold stratification remains the gold standard. For a backup, mix seeds with sand or perlite in the fridge—it improves air circulation and reduces mold.
Wrapping up and next steps
Growing bread seed poppies from cold-stratified seeds is a rewarding way to ensure vibrant blooms next season—without the guesswork! By mimicking nature’s chilling process, you’ll unlock faster, healthier germination and a stunning lawn or garden.
Whether you’re a seasoned gardener or just starting, this method is your ticket to effortless success. 🌱
Ready to transform your outdoor space? Grab your seeds, follow the steps, and watch your poppies thrive. Start small—plant a test patch this fall—and let the magic unfold! Happy gardening! 🌸