
Lawn
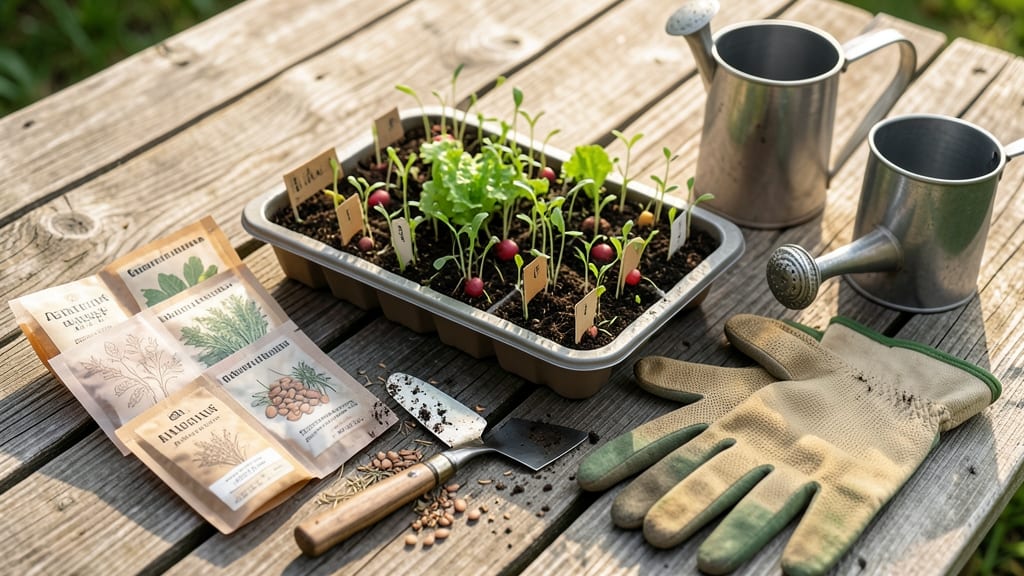
Skipping the nursery entirely saves money and grows stronger plants. 🌱 Direct seed planting lets you bypass the shock and expense of transplants while giving roots a head start right where they'll stay.
My first attempt with beans proved it—plants thrived without the transplant stress that wipes out so many seedlings. The secret starts with loose, fertile soil and the right seeds. You'll need a garden fork, a rake, your chosen seeds, and a watering can.
Timing matters too—plant when soil reaches 60°F and stays consistently warm. Beans, carrots, and marigolds are perfect starters because they handle direct sowing beautifully. Once planted at the right depth and spacing, keep soil moist but not soggy. Within 10-14 days, you'll see sprouts pushing through.
The payoff? Plants grow 20-30% stronger than transplants because they never experience the shock of being moved. Avoid overcrowding and planting too deep—both kill germination. With these basics, you'll grow a garden that's more productive and resilient than anything from a flat.
📚 In This Guide
- What you need
- Instructions
- Tips and common mistakes
- Wrapping up and next steps
What you need
- ● Seed: Choose high-quality, grass seed suited to your climate (e.g., Kentucky Bluegrass, Fescue, or Bermuda). Quantity: ~10–15 lbs per 1,000 sq ft (check seed bag for exact rates).
- ● Lawn Rake: A bow rake with ¼"–½" tines to loosen soil and cover seeds.
- ○ Broadcast Spreader: For even seed distribution (manual or drop-type). Optional: Handheld spreader for small areas.
- ● Soil Test Kit: Test pH (ideal: 6.0–7.0) and nutrients. Adjust with lime or fertilizer if needed.
- ○ Topsoil or Compost: ¼" layer to improve seed-to-soil contact (optional but highly recommended for poor soil).
- ● Watering Supplies: Hose with fine mist nozzle or sprinkler.
- ● Water: ~½ inch daily (or as needed to keep soil moist).
- ● Weather Check: Plant when soil temps are 50–65°F (spring/fall for cool-season grasses; late spring/summer for warm-season).
- ● Soil Prep: Remove debris (rocks, weeds, or thatch).
- ● Loosen soil to ¼–½" depth with a rake or tiller.
- ● Sunlight: Ensure the area gets 6+ hours of direct sun daily (most grasses thrive here!).
- ○ Optional Extras: Starter fertilizer (low-nitrogen, high-phosphorus like 10-20-10).
- ● Erosion control blanket for slopes or windy areas.
Step-by-Step guide to direct seed planting success
Skip the transplant hassle and grow sturdy plants straight from the soil—here’s how.
🌱 Step 1: Prepare the Soil for Seeds
Loosen the top 6 inches of soil with a garden fork or tiller to create a fine, crumbly texture. Seeds need good contact with soil to germinate, so break up any clumps or hardpan. I like to work in a little compost or aged manure (about 2-3 inches mixed in) to give seedlings a nutrient boost without overwhelming them.
Smooth the surface with a rake or your hands, then press down gently to remove air pockets. The goal is a firm but loose bed where seeds can settle just below the surface. If your soil drains poorly, add a 1-inch layer of coarse sand or perlite to improve drainage—seeds rot if they sit in soggy soil.
☀️ Step 2: Plant Seeds at the Right Depth and Spacing
Check the seed packet for depth—most small seeds (¼ inch deep) need barely any cover, while larger seeds (½ inch or deeper) can handle more. Use your finger to make small furrows or individual holes, spacing them according to the packet (usually 1-3 inches apart for small seeds, 4-6 inches apart for larger ones).
Drop seeds in gently—don’t toss them. I tap the packet lightly to release one seed at a time, then cover with soil using the back of a spoon or your fingers. Press lightly to secure the seeds but don’t compact the soil too much. Overcrowding leads to weak, leggy seedlings, so resist the urge to squeeze extra seeds into tight spaces.
💧 Step 3: Water Gently and Maintain Moisture
Water immediately after planting using a fine-mist spray nozzle or a watering can with a gentle stream. The soil should be damp but not soggy—think of a wrung-out sponge. Seeds need consistent moisture to germinate, so aim for 1 inch of water per week, delivered in light applications rather than heavy soakings that can wash seeds away.
Mulch the area with ½ inch of straw or shredded leaves to lock in moisture and keep soil temperatures stable. This is especially important in hot climates where soil can dry out quickly. Check moisture daily by sticking your finger 1 inch deep—if it feels dry, water lightly again. Avoid letting the surface crust over, as this blocks air and light from reaching the seeds.
⏰ Step 4: Monitor for Germination and Thin as Needed
Most seeds germinate within 7-14 days, though some (like carrots or parsley) can take 3-4 weeks. Watch for the first true leaves—these look different from the initial seed leaves (cotyledons) and signal it’s time to thin. Use a small tool or your fingers to gently remove weaker seedlings, leaving the strongest one in each spot with 2-4 inches of space between plants.
Thinning might seem cruel, but crowded seedlings compete for light and nutrients, leading to weak stems and poor yields. If you’re planting larger seeds like beans or peas, you can skip thinning and just space them properly from the start. Once seedlings have 2-3 sets of true leaves, they’re ready to fend for themselves—just keep the soil moist and watch them grow!
🌿 Step 5: Support Growth Through the Season
Direct-sown plants develop deep roots naturally, so they’re more drought-tolerant than transplants. Water at the base (not overhead) to prevent fungal diseases, and fertilize lightly with a balanced organic fertilizer (like 10-10-10) when seedlings are 3-4 inches tall. Too much fertilizer too soon can burn tender roots, so start with half the recommended dose.
As plants mature, watch for signs of stress—yellowing leaves often mean overwatering, while wilting in hot weather signals thirst. Mulch again in midsummer to retain moisture and suppress weeds. The payoff? Stronger, hardier plants that outperform transplants because they’ve grown exactly where they’re meant to be.
Tips & tricks for perfect direct seed planting
Here's what nobody tells you about getting seeds to thrive from the ground up.
Soil Prep Secret: The 6-inch deep loosening in Step 1 is crucial, but don't overwork the soil—you're creating pockets for roots, not turning it into sand. I like to test my soil's readiness by making a small ball with moistened soil; if it holds shape but crumbles easily, it's perfect. For clay-heavy soil, mix in 1 inch of compost to improve structure before planting.
Seed Placement Precision: When planting at the recommended ¼ inch depth for small seeds, use a toothpick to make tiny holes—this prevents over-deep planting which can delay germination. For larger seeds needing ½ inch depth, press gently with your thumb to ensure consistent coverage. I find using a small spoon helps avoid burying seeds too deeply or unevenly.
Watering Wisdom: The 1 inch of water per week guideline in Step 3 is a great starting point, but morning watering works best—it gives seeds time to dry slightly before evening, reducing fungal risks. I use a spray bottle for delicate seedlings and gradually switch to a gentle stream as they grow stronger. Always water at soil level, not the leaves, to prevent disease.
Thinning Timing: Waiting for 2-3 sets of true leaves before thinning (Step 4) gives seedlings enough energy to recover. I use clean scissors to snip at soil level rather than pulling, which reduces shock to remaining plants. If you're nervous about thinning, try planting seeds slightly farther apart initially—it's better to have a few empty spots than stunted plants.
Pro Tips for Direct Seed Planting
- Here's what nobody tells you about getting seeds to thrive from the ground up.
- Soil Prep Secret: The 6-inch deep loosening in Step 1 is crucial, but don't overwork the soil—you're creating pockets...
- Seed Placement Precision: When planting at the recommended ¼ inch depth for small seeds, use a toothpick to make tiny...
Frequently asked questions
Got questions about direct seed planting? You’re not alone—this method can feel tricky at first! Below, we tackle the most common concerns to help you skip the guesswork and get straight to growing a lush, thriving lawn.
What’s the best time of year to direct seed my lawn?
The ideal window depends on your climate, but early fall (late summer to early October) is often the sweet spot for cool-season grasses like fescue or ryegrass. For warm-season grasses (like Bermuda or Zoysia), aim for late spring to early summer when soil temps hit 65°F+. Check your seed packet for specifics—timing is key to avoiding heat stress or frost damage!
How long does it take for grass to germinate after direct seeding?
Germination time varies by grass type:
- Cool-season grasses: 7–21 days (faster in moist, 60–75°F soil).
- Warm-season grasses: 10–30 days (needs soil temps above 70°F).
Do I need to water my seeds 24/7 after planting?
Nope! Overwatering can drown seeds or wash them away. Instead, aim for light, frequent watering (about ¼ inch per day) to keep the top ½ inch of soil damp. Use a gentle sprinkler or misting nozzle to avoid disturbing seeds. Once seedlings sprout, gradually reduce to 1 inch per week (including rain).
What if weeds pop up before my grass does?
Weeds are a common frustration, but don’t panic! Pre-emergent herbicides shouldn’t be used until after germination (they’ll kill your grass too). Instead, hand-pull weeds carefully or use a vinegar-based spray (spot-treat only). Once your grass is 3–4 inches tall, it’ll outcompete weeds naturally. Mulch lightly with straw to suppress weeds while protecting seeds.
Can I direct seed over existing grass, or do I need to tear it out first?
Overseeding can work for thinning or patchy lawns, but thick, healthy turf may block sunlight and water from reaching new seeds. For best results:
- Mow existing grass short (but not scalped) to reduce competition.
- Rake or dethatch to loosen soil and improve seed contact.
- Use a slit seeder to plant seeds below the thatch layer.
Wrapping up and next steps
Direct seed planting is your gateway to a hardier, more resilient lawn—no fuss, no transplants, just nature’s way of growing strong! By skipping the nursery step, you save time, money, and effort while giving your grass the best start possible.
Whether you’re a seasoned gardener or a beginner, this method proves that great lawns begin with great roots.
Ready to roll up your sleeves? Start small—pick one section of your lawn this season, test the soil, and dive in! Watch as your direct-seeded grass thrives, and soon, you’ll be the envy of the neighborhood with that lush, low-maintenance green you’ve always dreamed of. 🌱