
Lawn
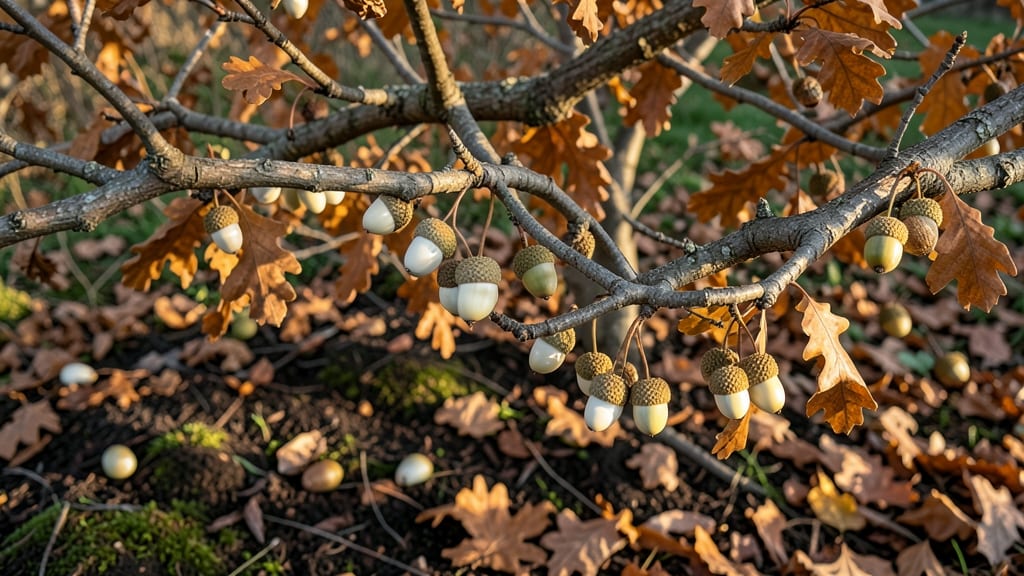
Growing oak trees from seed pods means you're planting a future that will outlive you—literally. 🌳 The trick to success lies in mimicking nature's timing with cold stratification, a process that unlocks the seed's potential after months of dormancy.
I've struggled with oak seeds before, but this method finally gave me those first green shoots I'd been waiting years for.
The secret isn't complicated—just patience and the right conditions. You'll need a mix of sand and peat moss, a sealed container, and a fridge for the cold treatment.
Most oak species need 60-90 days of cold stratification before they'll even think about sprouting, and some stubborn varieties take twice as long. The payoff? Seedlings that grow into mighty oaks instead of withering away.
By the time you see those first leaves in spring, you'll understand why this process matters. The seedlings will be delicate but determined, and with proper care—keeping them moist but not soggy—they'll develop strong roots before their first winter.
This is where the real magic happens: watching something so small become a towering shade tree.
Works for red, white, or pin oak varieties, though timing varies slightly by species. The key is consistency—don't rush the stratification, and you'll see results. Here's how to make it happen without the guesswork.
📚 In This Guide
- What you need
- Instructions
- Tips and common mistakes
- Wrapping up and next steps
What you need
- ● Oak tree acorns (seed pods): Freshly harvested acorns (preferably from Quercus species like white oak, red oak, or pin oak). Aim for 50-100 acorns to account for natural variability in germination rates.
- ● Cold stratification container: A ziplock bag (quart-sized or larger) or a small plastic or ceramic pot with drainage holes. If using a pot, ensure it’s at least 6 inches deep to accommodate moisture and substrate.
- ● Moisture-retentive substrate: Option 1: Peat moss or coco coir (1-2 cups).
- ● Option 2: A mix of sand and peat moss (50/50 ratio) for better drainage.
- ● Option 3: Vermiculite (1 cup) for moisture control.
- ● Water: Room-temperature, distilled, or dechlorinated water (to avoid chemical exposure). Keep it handy for consistent moisture checks.
- ● Labeling supplies: Waterproof markers or tags to label your container with the date and acorn type (e.g., "White Oak – Stratified 10/2023").
- ○ Refrigerator or cold stratification setup: A standard home fridge (set to 34-40°F) with a humid environment. A seed stratification box (optional but helpful for organization).
- ● Humidity tray: A shallow tray filled with water and pebbles to place your container on (keeps moisture levels stable).
- ● Germination mat or heat pad: For post-stratification warming (if you’re eager to speed up sprouting).
- ● Grow lights or sunny windowsill: For transplanting seedlings after stratification (ensure 12+ hours of light daily).
- ○ Fungicide (optional): A mild solution of hydrogen peroxide (3%) to soak acorns for 10 minutes before stratification (prevents mold).
- ● Journal or tracking app: To log dates, moisture levels, and sprouting progress (because science is fun!).
Step-by-Step instructions for cold stratifying oak tree seed pods
Cold stratification tricks oak seeds into thinking winter's passed—here's how to do it right.
🌱 Step 1: Harvest and Prepare the Seed Pods
Collect oak acorns in late fall when they've naturally fallen but haven't sprouted. Look for plump, firm acorns with intact caps—shriveled or insect-damaged ones won't germinate. Remove any remaining husks or debris, then rinse the acorns gently under cool water to remove any dirt or sap.
Spread them on a paper towel to dry completely for 24 hours at room temperature. This prevents mold during stratification. Store them in a breathable container like a mesh bag or paper envelope—plastic traps moisture and causes rot. Label with the date and oak species if known.
💧 Step 2: Moisten and Layer for Cold Treatment
Place the acorns in a shallow container and cover them with dampened but not soggy peat moss or vermiculite. The mix should feel like a wrung-out sponge—water drips out when squeezed but doesn't pool. This mimics natural spring moisture without drowning the seeds.
Layer the acorns in a single layer with the pointed ends up (the root will emerge from this end). If using a sealed container, poke small holes in the lid for airflow. Place the container in a refrigerator set to 34-40°F—the coldest section works best. This mimics winter's natural chilling period.
⏰ Step 3: Stratify for 60-90 Days
Keep the acorns refrigerated for 60-90 days, checking monthly. The peat moss should stay consistently moist but never wet. If it dries out, mist lightly with water and return to cold storage. You'll know stratification is working when tiny white roots appear—this usually happens after 4-6 weeks.
Don't rush this step. Oak seeds need prolonged cold to break dormancy. If you remove them too early, they'll rot instead of germinate. I've seen acorns sprout after just 45 days in ideal conditions, but most need the full 90 days for reliable results.
☀️ Step 4: Plant Stratified Acorns
After stratification, plant the acorns 1 inch deep in well-draining potting mix in small pots. Use individual containers to avoid transplant shock later. Place them in a bright, indirect light spot—6-8 hours of filtered sunlight daily is ideal. Too much direct sun now will scorch the tender sprouts.
Keep the soil lightly moist but never soggy. Water gently at the base to avoid disturbing the seeds. Germination can take 2-4 weeks after planting, so patience is key. You'll see the first true leaves emerge as small, rounded cotyledons—this is your signal the seedling is established.
🌿 Step 5: Transplant Young Seedlings
Once seedlings have 3-4 true leaves and are 4-6 inches tall, they're ready to transplant. Choose a permanent outdoor location with full sun exposure and well-draining soil. Oak seedlings thrive in slightly acidic to neutral soil—test your garden soil if possible.
Dig a hole twice as wide as the root ball but only as deep as the container. Gently remove the seedling, keeping the root ball intact, and place it in the hole. Backfill with soil and water deeply to settle everything. Mulch around the base with 2-3 inches of organic mulch to retain moisture and protect the young roots.
Tips & tricks for perfect oak seedling germination
These simple strategies will help you maximize your oak acorn germination success rate.
Selection Matters: When harvesting acorns in Step 1, focus on those that feel heavy for their size—this indicates a higher oil content and better viability. I've found that acorns with intact, slightly rough caps have the highest germination rates. If you're unsure, do a quick float test: place acorns in water—those that sink are more likely to germinate. Discard any that float immediately.
Moisture Management: In Step 2, maintaining the right moisture level is critical. The peat moss or vermiculite should feel like a wrung-out sponge—if it feels damp but not dripping, you're good. Too much moisture causes rot, while too little prevents germination. I like to use a spray bottle for misting rather than pouring water directly, as this gives better control over how much moisture the acorns receive.
Temperature Consistency: The 34-40°F range in Step 2 is non-negotiable for reliable results. If your refrigerator isn't cold enough, consider using a dedicated seed stratification fridge or even a root cellar. I've seen germination rates drop significantly when temperatures fluctuate above 45°F. Place a thermometer in your fridge to monitor the temperature continuously—some fridges have hot spots where temperatures can vary by 10°F or more.
Visual Germination Cues: In Step 3, watch for those tiny white roots as your signal that stratification is working. These typically appear after 4-6 weeks, but don't be surprised if they show up earlier—especially if your acorns are from a particularly cold climate. Once you see roots, it's time to prepare for planting. I've found that acorns with roots that are 1/4 inch long or more have the best chance of successful transplantation.
Pro Tips for Oak Tree Seed Pods
- These simple strategies will help you maximize your oak acorn germination success rate.
- Selection Matters: When harvesting acorns in Step 1, focus on those that feel heavy for their size—this indicates a h...
- Moisture Management: In Step 2, maintaining the right moisture level is critical. The peat moss or vermiculite should...
Frequently asked questions
Got questions about oak tree seed pods? You’re not alone! Here are some of the most common queries—plus straightforward answers to help you tackle germination like a pro.
What’s the best time to collect oak tree seed pods?
Harvest oak acorns (seed pods) in late fall to early winter (October–December), when they’ve fully matured but haven’t sprouted. Look for heavy, brown caps—these are ripe and ready for stratification. Avoid green or worm-infested pods, as they won’t germinate well.
How long does cold stratification take for oak seed pods?
Oak seeds need 60–90 days of cold stratification (40°F/4°C) to break dormancy. Use a mix of moist peat moss and sand in a sealed container, then refrigerate. Pro tip: Check moisture weekly—soggy pods rot, while dry ones fail to sprout. Patience pays off!
Can I skip cold stratification and plant oak pods directly?
Not recommended! Oak seeds require cold stratification to germinate. Planting them directly in soil without this step will likely result in 0% success. If you’re impatient, try soaking pods in water for 24 hours before stratification—it might speed up the process slightly.
Why are my oak seed pods sprouting mold or bugs?
Mold or pests (like weevils) mean your pods are too damp or contaminated. Fix it:
- Drain excess water—use a well-ventilated container with holes.
- Inspect pods—discard any with holes or slimy textures.
- Add food-grade diatomaceous earth (lightly!) to deter bugs.
What’s the fastest way to germinate oak seed pods?
Combine cold stratification with warmth for a boost:
- Stratify pods for 60 days in the fridge.
- Afterward, soak them in warm water (80°F/27°C) for 12 hours.
- Plant in well-draining soil and keep moist (not wet).
Wrapping up and next steps
From understanding the magic of cold stratification to gathering the right tools, you’re now equipped to unlock the full potential of oak tree seed pods! 🌱 Whether you’re a seasoned gardener or a curious beginner, these steps ensure your seeds sprout with confidence and vitality.
Ready to plant the seeds of success? Grab those pods, follow your blueprint, and watch your backyard transform into a thriving oak forest—one tiny sprout at a time.
Next step: Start planting your prepped seeds and nurture them with patience and care!