
Lawn
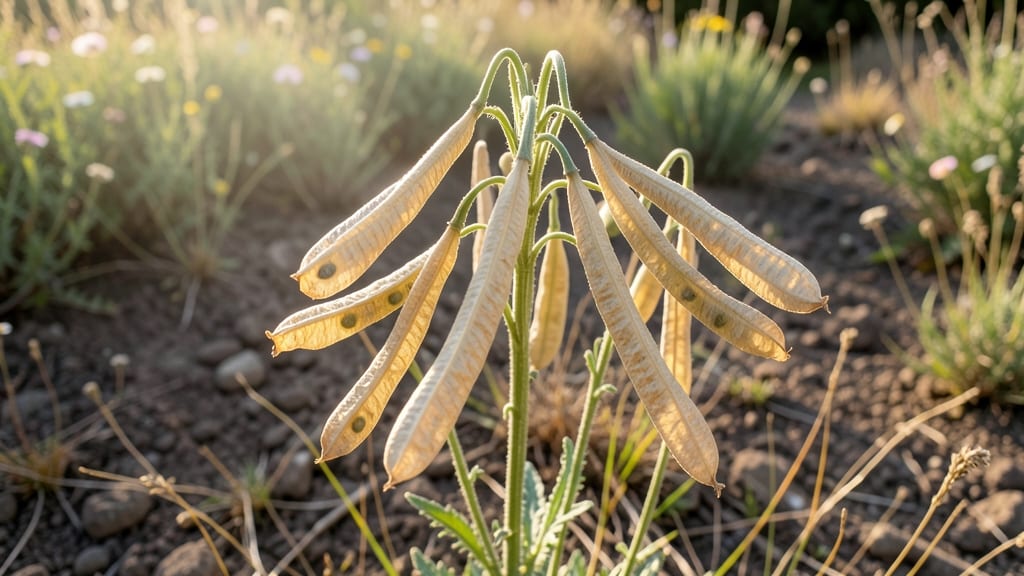
Poppy seed pods that twist before they're ready mean wasted seeds. 🌸 The secret to storing viable poppy seeds is knowing exactly when to harvest—when the pods are dry but haven't started their natural twist.
This simple test ensures you save seeds that'll sprout next spring instead of brittle husks that crumble at the touch.
Timing is everything: harvest when pods turn from green to papery tan but before they split open. Morning is best—dew-free pods are easier to handle. You'll need a clean tray, a sharp knife, and a dry, dark storage spot.
The right moment makes all the difference between a successful seed harvest and a sad pile of empty husks.
Once you've collected the pods, let them dry completely indoors for a week before storing. The seeds inside should rattle when shaken—this means they're ready. Store them in a sealed container in a cool, dark place, and they'll stay viable for up to three years.
No more guessing if your seeds will grow!
This method works for all poppy varieties, from delicate opium poppies to hardy California poppies. You'll end up with seeds that sprout reliably, plus dried pods perfect for crafts or bird feeders. Here's how to make it work every time—no wasted effort, just perfect seeds.
📚 In This Guide
- What you need
- Instructions
- Tips and common mistakes
- Wrapping up and next steps
What you need
- ● Freshly harvested poppy seed pods: Collect 10–15 mature, dry pods (ensure they’re fully dried and slightly papery to the touch).
- ● Pruning shears or sharp scissors: A pair with clean, sharp blades to snip stems without crushing the pods.
- ● Small paper bags or envelopes: 2–3 lightweight, breathable bags (brown paper works best for airflow).
- ● Pencil or marker: For labeling bags with pod sources or harvest dates.
- ● Flat, dry workspace: A clean table or tray to lay out pods for inspection.
- ○ Magnifying glass (optional but helpful): To closely examine pod seams and viability.
- ● Ruler or measuring tape: To check pod length (viable pods are typically 1–2 inches long).
- ● Small bowl or container: For separating viable seeds from chaff (if testing seed release).
- ● Paper towels or parchment paper: To line your workspace and catch stray seeds.
- ● Silica gel packets: 1–2 packets to absorb moisture in sealed storage containers.
- ● Air-tight containers (e.g., glass jars with lids): For preserving pods after testing.
- ○ Humidity monitor (optional): To track storage conditions (ideal: <30% humidity).
How to test poppy seed pods for viability before storing
Here's the simple trick I use every fall to save poppy seed pods that'll still produce flowers next year.
🌱 Step 1: Harvest Pods at Peak Dryness
Wait until the poppy seed pods turn from green to a papery tan or light brown color—this means they're fully mature and ready for harvest. I test pods by gently squeezing them; when they feel light and hollow with a slight crinkle, they're perfect. Harvest on a dry, sunny morning when dew has evaporated to prevent moisture from ruining them.
Use clean, sharp pruning shears to snip the stems about 2 inches below the pods. Avoid pulling or twisting the stems, which can damage the delicate seed chambers inside. Lay the harvested pods on a clean towel in a single layer, out of direct sunlight, to dry for 24 hours before testing.
💧 Step 2: Perform the Twist Test
This is the moment that matters: hold a pod firmly between your thumb and forefinger at the base where it attaches to the stem. With your other hand, gently twist the pod in a slow, steady motion. A viable pod will twist off cleanly with a slight pop sound, leaving the stem intact. If the pod resists or feels mushy, it's not ready for storage.
Real talk: if a pod snaps instead of twisting off, it's still too green and needs more time on the plant. Discard any pods that feel heavy or damp—these won't store well and may develop mold. I test 5-10 pods from each plant to ensure consistency before storing the whole batch.
☀️ Step 3: Store Only the Viable Pods
Place the twist-tested pods in a paper bag (not plastic—it traps moisture) and store them in a cool, dry place like a pantry or closet. Keep them away from direct sunlight or heat sources, which can cause the seeds inside to spoil. I label each bag with the harvest date so I know how old they are when I check them in spring.
Check the stored pods monthly for any signs of mold or soft spots. If you notice even a hint of musty smell or dark spots, remove those pods immediately and discard them. Viable pods should stay lightweight and dry for 6-12 months—some even last until the next growing season if stored properly.
⏰ Step 4: Test for Germination Readiness in Spring
When you're ready to plant, soak the pods in warm water for 12 hours to soften them. Then, gently squeeze the pods—if they crack open easily and release seeds, they're ready to plant. If they still feel hard or refuse to open, they've lost viability and should be discarded. Plant the seeds ¼ inch deep in well-draining soil and keep them moist but not soggy until germination.
Here's the thing—if your pods pass the twist test but fail this spring germination test, it means they dried out too much during storage. Next time, store them in a slightly more humid environment (like a breathable cotton bag) to preserve moisture just enough for viability.
Tips & tricks for perfect poppy seed pod storage
These simple tricks will help you save your poppy seed pods for next year's garden—no guesswork involved!
Harvest Timing is Everything: The 24-hour drying period after harvest is crucial—don't skip it! This final drying step ensures any lingering moisture evaporates completely, preventing mold during storage. I've learned this the hard way after storing damp pods that developed mold within weeks. Place your pods on a clean towel in a well-ventilated area, away from direct sunlight which can cause uneven drying.
Twist Test Precision: When performing the twist test in Step 2, use a steady, even pressure—don't twist too quickly or you might snap immature pods. The clean separation with that satisfying pop sound is your green light for storage. I've found that testing 5-10 pods from each plant gives me the most consistent results, as some plants mature slightly faster than others.
Storage Environment Matters: While paper bags work well, you can also use breathable cotton bags or even mesh produce bags for slightly better airflow. The key is maintaining that cool (around 60-65°F), dry environment—basements or pantries work perfectly. I've had success storing pods in the vegetable crisper drawer of my fridge for even longer viability, though this is optional.
Spring Germination Test: The 12-hour warm water soak before your spring germination test is your final quality check. If pods crack open easily, you're good to go! If they resist, it's better to discard them than risk poor germination. I like to soak a small sample of pods first to test viability before committing to planting the entire batch.
Pro Tips for Dry Poppy Seed Pods
- These simple tricks will help you save your poppy seed pods for next year's garden—no guesswork involved!
- Harvest Timing is Everything: The 24-hour drying period after harvest is crucial—don't skip it! This final drying ste...
- Twist Test Precision: When performing the twist test in Step 2, use a steady, even pressure—don't twist too quickly o...
Frequently asked questions
Got questions about those dry poppy seed pods in your garden? You’re not alone! Here are some of the most common queries—and their straightforward answers—to help you navigate storage, testing, and everything in between.
Why do poppy seed pods need to be dry before storing?
Dry poppy seed pods (Papaver spp.) are highly sensitive to moisture. If stored damp, they’ll rot, mold, or attract pests like rodents or insects. A dry viability test ensures only healthy seeds survive—saving you time and money on replanting. Think of it as a quality control step for your seed stash!
How long does it take for poppy seed pods to fully dry?
Timing depends on your climate, but most pods dry in 7–14 days after harvesting. Place them in a well-ventilated, dry spot (like a mesh bag under a shade cloth) and check daily. If humidity is high, extend drying to 3–4 weeks. Pro tip: Don’t rush it! Overly hasty drying can crack pods and scatter seeds prematurely.
What’s the best way to test if poppy seeds are still viable?
The float test is your best friend: Fill a jar with water, add seeds, and stir. Viable seeds sink (plant them!), while hollow or dead ones float. For poppies, aim for 80%+ viability before storing. Bonus: Label your jars with the test date to track freshness over time!
Can I store poppy seed pods in paper bags or plastic?
Paper bags are ideal
—they’re breathable, preventing mold and condensation. Avoid plastic (like Ziploc bags), as trapped moisture will ruin seeds. For long-term storage (1+ years), add a desiccant packet (like silica gel) to absorb lingering humidity. Store in a cool, dark place, like a basement or fridge.
What do I do if my stored poppy seed pods get moldy?
Don’t panic! Discard any moldy pods immediately—they’re unsafe for planting. For light surface mold, try this: Spread seeds on a clean, dry towel in a single layer, then place in a sunny, breezy spot for 2–3 days to air-dry completely. If mold persists, start fresh with new seeds. Prevention is key: Always test for moisture before sealing storage containers.
Wrapping up and next steps
Dry poppy seed pods are a simple yet effective way to test seed viability before storing them—no fancy tools required!
Whether you're a gardener or just love the charm of these delicate blooms, this twist-free method ensures you’re saving only the best seeds for next season. Now that you’re equipped with the know-how, why not take the next step? Gather your pods, perform the test, and share your findings with fellow plant enthusiasts.
Happy gardening! 🌱✨
- Next step: Start your seed viability test today—your future garden will thank you!