
Transplanting
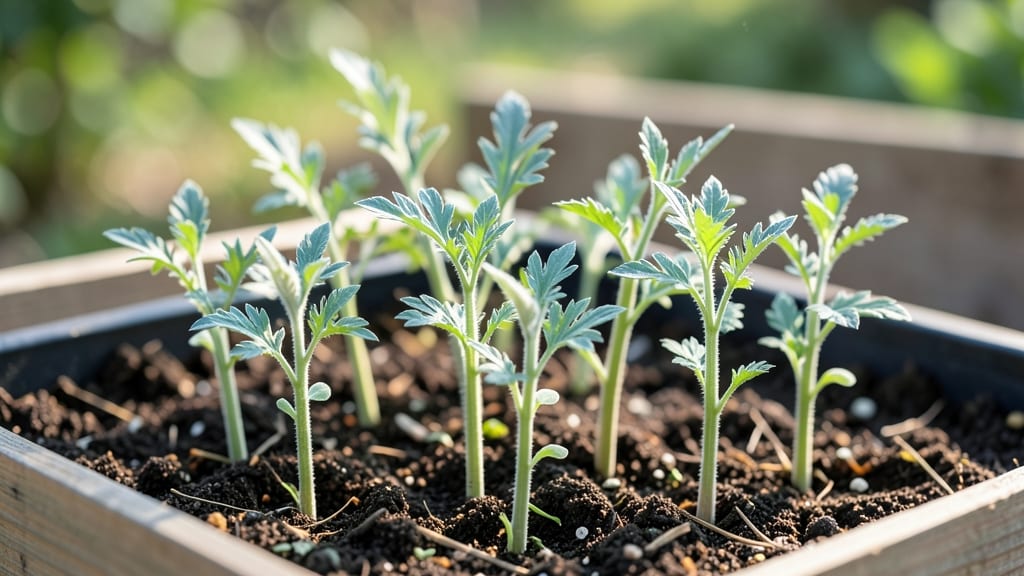
Growing breadseed poppy seedlings from seed is like unlocking a secret garden of bold, papery blooms that last all summer. 🌻 The key to stress-free transplanting starts with knowing exactly when and how to handle those delicate young plants—because poppies don’t like being moved once they’re established.
These seedlings are tougher than they look: they thrive in poor soil, shrug off drought, and produce those iconic black-centered blooms with almost no fuss.
But the first few weeks after germination are critical—too much water or too little light, and you’ll end up with leggy, weak plants that flop instead of standing tall. Once you’ve got the timing right, transplanting becomes a breeze.
You’ll be pinching back those first true leaves and watching your poppies grow into those dramatic, long-stemmed beauties that cut flowers envy. The secret is patience and a little preparation—no black thumbs required. Perfect for cottage gardens, wildflower meadows, or even container plantings.
Let’s get those seedlings in the ground the right way!
📚 In This Guide
- What you need
- Instructions
- Tips and common mistakes
- Wrapping up and next steps
What you need
- ● Seedlings: 4–6 week-old breadseed poppy seedlings (ensure they’re sturdy with 2–4 true leaves).
- ● Seedling trays or pots: 2–3 inch diameter containers (biodegradable pots or peat pots work great!).
- ● High-quality potting mix: Well-draining, sterile mix (avoid garden soil—it can harbor diseases).
- ● Transplanting tool: A small hand trowel or spoon for gentle soil handling.
- ● Watering can or spray bottle: With a fine rose nozzle to avoid disturbing seedlings.
- ○ Fertilizer (optional but helpful): Balanced, water-soluble fertilizer (5-5-5 or 10-10-10) for a quick nutrient boost.
- ● Gloves: To keep hands clean and protect seedlings from oils.
- ● Pruning shears (sterilized): For trimming leggy seedlings if needed.
- ○ Shade cloth (optional): 30–50% shade fabric to protect seedlings from harsh afternoon sun.
- ○ Grow lights (optional): LED or fluorescent lights for indoor hardening-off.
How to transplant breadseed poppy seedlings without shock
Here's my foolproof method to move delicate poppy seedlings outdoors while keeping them thriving.
🌱 Step 1: Harden Off Seedlings Gradually
Start hardening off 10-14 days before your last frost date. Move seedlings outside to a sheltered spot for 1-2 hours the first day—choose a spot with dappled shade to avoid harsh afternoon sun. I like to place them on a patio or under a tree where they get indirect light.
Watch for wilting or leaf curling—this means they're getting too much sun or wind. If you see this, move them to a shadier spot immediately. Poppies are sensitive to stress, so gradual exposure is key. Over the next 7-10 days, slowly increase their outdoor time by 1 hour daily until they can handle a full day outside.
☀️ Step 2: Choose the Right Transplant Day
Pick a cool, overcast day for transplanting—this reduces stress on the seedlings. If you must transplant on a sunny day, do it in the early morning or late afternoon to avoid peak sun. I always check the weather forecast and avoid days with high winds or extreme heat.
Poppies prefer well-draining soil, so avoid transplanting after heavy rain. If the ground is waterlogged, wait 2-3 days for the soil to dry out slightly. You'll know it's ready when the top 1 inch of soil feels slightly damp but not soggy.
🪴 Step 3: Dig Holes and Transplant Carefully
Dig holes twice as wide as the seedling's root ball but only as deep as the container they're in. Gently remove each seedling by grasping the base of the stem, not the leaves, and slide it out of the container. Poppies have delicate roots, so avoid pulling or twisting.
Place each seedling in its hole and fill the gap with soil, pressing lightly around the base to remove air pockets. Water deeply right after transplanting to help settle the soil and reduce shock. You'll see new growth within 7-10 days if everything went well.
💧 Step 4: Water and Protect Newly Transplanted Seedlings
Water seedlings every 2-3 days until they're established, keeping the soil evenly moist but not waterlogged. Poppies hate soggy roots, so always check the top 1 inch of soil before watering—if it feels dry, it's time. I use a gentle spray nozzle to avoid disturbing the soil around the plants.
To protect young seedlings from pests like slugs or deer, I place a thin layer of dried grass clippings or straw mulch around the base of each plant. This also helps retain moisture and keeps weeds down. Avoid heavy mulch, as poppies prefer lean soil and may rot if smothered.
✂️ Step 5: Monitor and Support Growth
Once seedlings are 4-6 inches tall, they'll start to develop their iconic papery buds. At this stage, you can thin them if needed, leaving the strongest plants 6-12 inches apart depending on the variety. Poppies don't like competition, so give them space to grow.
If stems start to flop as the flowers mature, gently tie them to small stakes or let them lean naturally—their unique, nodding blooms look stunning when they sway in the breeze. With proper care, your breadseed poppies will reward you with bold, long-lasting blooms that last well into fall.
Tips & tricks for stress-free poppy seedling transplanting
Here's what nobody tells you about keeping those delicate poppy seedlings happy during the big move.
Seedling Stress Signals: During the hardening-off process in Step 1, watch for subtle signs of stress beyond just wilting—look for leaves that start curling at the edges or seedlings that suddenly droop even after watering. This often means they're getting too much direct sunlight or wind. I've learned to move them to a shadier spot immediately when I notice these early warning signs, rather than waiting for full wilting. Remember, those 1-2 hours on day one should be gentle exposure, not a full sunbath.
Transplant Timing Secret: When choosing your transplant day in Step 2, I recommend checking the forecast for not just temperature but also humidity levels. Poppies handle transplanting better in cooler, drier conditions—think 60-65°F with low humidity. If your forecast shows high humidity, consider moving your transplant to the next day. The soil moisture check (that 1-inch dampness test) becomes even more critical on humid days, as poppies are prone to fungal issues when their roots stay too wet.
Root Care Technique: In Step 3, when removing seedlings from their containers, I've found that gently squeezing the sides of the container helps loosen the root ball without damaging those delicate poppy roots. If you're working with stubborn seedlings that won't come out easily, try running a small knife around the edge of the root ball first. The key is to maintain that original soil structure around the roots—poppies establish best when their roots aren't disturbed more than necessary. This careful handling pays off when you see that new growth within 7-10 days.
Watering Wisdom: For the post-transplant watering in Step 4, I've developed a simple trick: water in the early morning using a fine mist setting on your hose or watering can. This gives the soil time to absorb moisture without creating surface puddles that can lead to rot. I also like to water at the base of the plant rather than overhead—this helps prevent fungal spores from splashing onto the leaves. The "every 2-3 days" guideline works best when you're checking that top inch of soil, but I've found poppies often need slightly less frequent watering once they're established.
Pro Tips for Breadseed Poppy Seedlings
- Here's what nobody tells you about keeping those delicate poppy seedlings happy during the big move.
- Seedling Stress Signals: During the hardening-off process in Step 1, watch for subtle signs of stress beyond just wil...
- Transplant Timing Secret: When choosing your transplant day in Step 2, I recommend checking the forecast for not just...
Frequently asked questions
Got questions about transplanting breadseed poppy seedlings? You’re not alone! Here are the most common concerns—plus expert tips to keep your poppies thriving.
When is the best time to transplant breadseed poppy seedlings?
Transplant them after the last frost when soil temps hit 50°F (10°C) or warmer. These delicate seedlings hate being moved too early—wait until they’ve got 2-3 true leaves (not just the initial "seed leaves"). Morning transplants reduce stress, and avoid hot afternoons!
Can I transplant breadseed poppies in cold or rainy weather?
Nope! Poppies despise soggy soil or chilly temps. If rain’s in the forecast, wait 24-48 hours for the ground to dry. Cold soil (<45°F/7°C) stunts root growth—opt for a sunny, dry day instead. Pro tip: Transplant in the early morning to give roots time to settle before evening dew.
How deep should I plant breadseed poppy seedlings?
Poppy seedlings are light-loving—bury them only ½ inch deep (1.25 cm). Deeper planting risks rot or leggy stems. Space them 8-12 inches apart (20-30 cm) for full, dramatic blooms. Bonus: Gently firm soil around stems to eliminate air pockets.
Why are my breadseed poppy seedlings wilting after transplanting?
Wilted seedlings usually mean one of three things:
- Shock: Poppies are sensitive—give them 1-2 weeks to recover in partial shade before full sun.
- Overwatering: Let soil dry between waterings; poppies hate wet feet.
- Root damage: Handle seedlings by leaves (not stems!) and keep them shallow.
If leaves turn yellow, cut back on water and mulch lightly to retain moisture.
Are there alternatives if my seedlings fail to thrive?
No stress! Try these low-maintenance swaps:
- Direct sowing: Scatter seeds ¼ inch deep in spring—they germinate faster than seedlings.
- Interplant: Mix poppies with fast-growing annuals (like larkspur) for instant color.
- Dried flowers: Skip seedlings entirely—poppy seeds last 2-3 years in packets!
Pro tip: Poppies self-seed wildly—let a few bloom, then deadhead for more next year!
Wrapping up and next steps
Growing breadseed poppy seedlings into vibrant, long-lasting blooms is a rewarding journey—especially when you master the stress-free transplanting techniques shared here! 🌱 With the right timing, gentle handling, and a little patience, you’ll soon enjoy bold, golden flowers that brighten any garden.
Ready to take the next step? Mark your calendar for your local transplanting window and gather your supplies. Then, watch your seedlings thrive—and soon, you’ll be sharing your stunning blooms with neighbors (or even cutting them for bouquets!). Happy gardening! 🌸