
Propagation
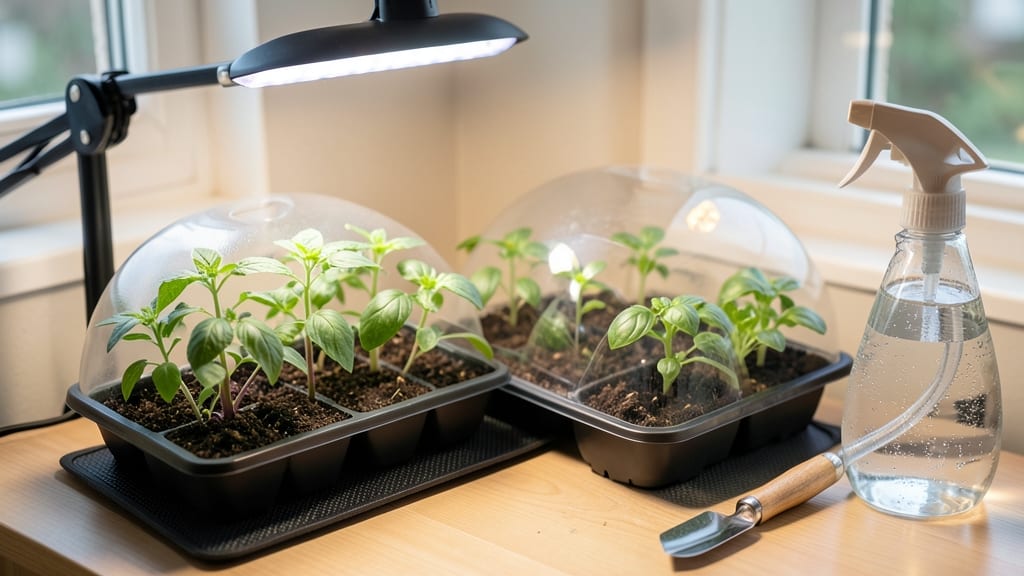
Seed starting warming mats cut seed germination time in half—no more waiting weeks for stubborn seeds to sprout. 🌱 I’ve used them for tomatoes, peppers, and herbs, and the difference is night and day: seedlings emerge in 5-7 days instead of 14. The secret lies in consistent warmth, which mimics the cozy soil conditions seeds crave before they push through. You’ll need a seed tray, warming mat, heat mat pad, and a thermometer to monitor temps. Place the mat under your tray, plug it in, and set your thermometer to 70-80°F—most seeds germinate best in that range. No fancy setup required, just steady warmth and patience. Even my slow-to-start basil seeds now pop up reliably. Once sprouts appear, keep humidity high with a plastic dome or spray bottle, but avoid soggy soil. After the first true leaves form, transition to bright light (grow lights or a sunny window) to prevent leggy seedlings. The mat stays in place until seedlings are sturdy enough to handle cooler temps. This method works for almost any seed, from finicky peppers to fast-growing lettuce. Just match the heat to your plant’s needs—cool-season crops like broccoli need less warmth than tropical tomatoes. Ready to speed up your growing season?
📚 In This Guide
- What you need
- Instructions
- Tips and common mistakes
- Wrapping up and next steps
What you need
- ● Seed starting warming mat – Choose one with adjustable heat settings (typically 65–85°F) and a size that fits your seedling tray (e.g., 10"x20" or 12"x24").
- ● Seedling trays or containers – 1–2 trays with drainage holes (biodegradable pots or plastic trays work great).
- ● Seed starting mix – 1–2 bags of sterile, well-draining potting mix (avoid garden soil).
- ● Seeds – Your chosen varieties (check planting depth requirements).
- ● Spray bottle – For gentle watering (avoid soaking the mix).
- ○ Clear plastic dome or plastic wrap – Optional but helpful for humidity (1 sheet per tray).
- ● Grow lights or sunny windowsill – After germination, seedlings need ~12–16 hours of light daily.
- ● Thermometer – To monitor soil temperature (ideal range: 70–85°F for most seeds).
- ● Heat mat cover – Insulates the mat for better efficiency (especially in cooler climates).
- ● Seedling heat mat with timer – Automates warmth cycles for consistency.
- ● Humidity tray – Elevates trays for airflow while retaining moisture.
- ● Plant labels & markers – Track varieties and planting dates.
How to use seed starting warming mats for faster germination
Here’s my go-to method for using warming mats to coax stubborn seeds into sprouting—no guesswork, just reliable heat.
💧 Step 1: Set Up Your Seed Tray and Moisten the Soil
Fill your seed-starting tray with the provided seed-starting mix (about 1/4 inch below the rim of each cell). Press it down gently so it’s firm but not compacted—you want roots to push through easily. I like to use a spray bottle to moisten the mix until it’s damp like a wrung-out sponge. Overwatering now will just create a soggy mess that invites mold.
Place the tray on the warming mat, making sure the mat’s surface is fully covered by the tray bottom. Most mats have temperature controls, so set it to 75-85°F—this is the sweet spot for most seeds to germinate in 5-10 days. If your mat doesn’t have a dial, check the manufacturer’s recommended setting. Let the mat warm up for 10-15 minutes before sowing seeds so the soil temperature stabilizes.
🌱 Step 2: Sow Seeds at the Right Depth and Cover
Follow the seed packet’s depth guidelines—usually twice the seed’s diameter. I use a toothpick to poke tiny holes for tiny seeds like lettuce or a finger to make deeper indentations for larger seeds like beans. Drop one seed per cell (or two if the packet says to) and cover lightly with a sprinkle of soil. Press gently so the seed makes good contact with the warm mat.
Mist the surface again with water until it’s just damp. The warming mat will help maintain moisture, but don’t drown the seeds. If the soil looks like a swamp, let it dry out slightly before covering again. Place the tray back on the mat and cover it with a clear plastic dome or plastic wrap to trap heat and humidity. This creates a mini greenhouse effect that speeds up germination.
☀️ Step 3: Monitor Heat and Humidity Daily
Check the soil moisture every 1-2 days—it should feel damp but not wet. If condensation forms on the dome, it’s too humid. Remove the dome for 10-15 minutes to let excess moisture escape, then replace it. Keep the mat plugged in continuously; fluctuations in temperature slow down germination. If your seeds haven’t sprouted in 2 weeks, they might need more warmth or light—some seeds, like tomatoes, need 85°F for best results.
Once you see the first green shoots, remove the dome immediately. Too much humidity now can cause damping-off, a fungal disease that rots seedlings at the stem. Place the tray under a grow light or in a sunny window (6+ hours of light daily) to keep them from getting leggy. The warming mat can stay on for another 3-5 days to help young seedlings establish strong roots, but turn it off once they’ve developed their first true leaves.
⏰ Step 4: Transition to Room Temperature and Light
After 5-7 days of growth (when seedlings have 2-3 sets of true leaves), it’s time to wean them off the warming mat. Reduce the mat’s temperature to 65-75°F for 2-3 days to mimic outdoor conditions. This helps seedlings adjust before transplanting. During this time, water from the bottom of the tray—place it in a shallow dish of water for 10-15 minutes to encourage deep root growth.
Watch for signs of stress like yellowing leaves or wilting. If you see this, the transition is too fast—keep the mat on a little longer. Once seedlings are thriving at room temperature, you can remove the mat entirely. They’re now ready for their next phase: hardening off before moving outdoors. This whole process cuts germination time in half compared to waiting for soil to warm naturally.
Tips & tricks for perfect seed starting with warming mats
These simple tricks will help you get the most out of your warming mat and avoid common germination pitfalls.
Soil Temperature Stability: The 10-15 minute warm-up period for your mat is crucial—it lets the entire soil mass reach the ideal 75-85°F range evenly. I've seen seeds sprout unevenly when people skip this step, especially with larger trays. Use an infrared thermometer if you're unsure; the soil temp should match your mat's setting at the bottom of the cells. This consistency is what cuts germination time in half compared to outdoor soil.
Depth and Contact Matters: In Step 2, when planting seeds, press them gently into the soil so they make firm contact with the warming mat. I've learned the hard way that seeds planted too loosely may not get enough direct heat to germinate. For tiny seeds like lettuce, use a toothpick to create precise planting holes—this ensures they're at exactly twice their diameter depth without being buried too deeply. The mat's heat works best when seeds are in direct contact with its surface.
Humidity Balance: The plastic dome creates a greenhouse effect, but too much condensation means it's too humid. Check daily and remove the dome for 10-15 minutes if you see water droplets forming on the inside. I've lost entire trays to damping-off when I ignored this sign. Once you see those first green shoots, remove the dome immediately—this prevents fungal growth at the stem while still maintaining warmth for another 3-5 days through the mat.
Seed-Specific Temperature: While 75-85°F works for most seeds, some like tomatoes and peppers need the upper end (85°F) for optimal germination. Check your seed packets—they often specify ideal temperatures. For these heat-lovers, keep the mat set to 85°F continuously until germination occurs. The transition period in Step 4 can then start at the slightly cooler 75°F range to prevent shock to these warm-weather seedlings.
Pro Tips for Seed Starting Warming Mats
- These simple tricks will help you get the most out of your warming mat and avoid common germination pitfalls.
- Soil Temperature Stability: The 10-15 minute warm-up period for your mat is crucial—it lets the entire soil mass reac...
- Depth and Contact Matters: In Step 2, when planting seeds, press them gently into the soil so they make firm contact ...
Frequently asked questions
Got questions about seed starting warming mats?
You’re not alone! Here are answers to the most common queries—so you can jumpstart your garden with confidence.
How long should I keep my seeds on a warming mat?
Most seeds need warmth for 5–14 days to germinate, depending on the type. Check your seed packet for specifics—some, like peppers, may need up to 2 weeks, while fast germinators (like radishes) might only require 5–7 days. Once sprouts appear, remove the mat to prevent overheating.
What’s the ideal temperature for a warming mat?
Warming mats typically maintain 65–85°F (18–29°C), but the sweet spot for most seeds is 70–75°F (21–24°C). Avoid exceeding 85°F—it can scorch seeds or stunt growth. A built-in thermostat helps regulate heat, but always monitor for consistency.
Can I use a warming mat without a heat mat?
Yes! Warming mats are standalone, but pairing them with a seedling heat mat (a thin, insulated pad) boosts efficiency by trapping warmth. Place the mat under your seed trays—never directly on them—to avoid moisture buildup. For extra insulation, use a clear plastic dome or humidity tent.
Why aren’t my seeds germinating, even with a warming mat?
Check these common culprits:
- Moisture: Keep soil damp (not soggy)—use a spray bottle to avoid disturbing seeds.
- Depth: Plant seeds too deep? Follow packet guidelines (usually 2x their width).
- Freshness: Old seeds may fail—test viability by soaking a few in water (sink = good, float = bad).
- Light: Some seeds (like lettuce) need light to germinate; others (peppers, tomatoes) prefer darkness until sprouted.
Are warming mats reusable, or should I replace them yearly?
High-quality warming mats last 3–5 years with proper care—clean them after use to remove mold/mildew (wipe with a damp cloth and mild soap). Avoid bending or folding the wires, and store them dry. Replace if the mat feels brittle, overheats unevenly, or stops maintaining temperature.
Wrapping up and next steps
Seed starting warming mats are a game-changer for gardeners eager to kickstart their growing season without the guesswork or delays. With consistent warmth and precise control, you’ll enjoy faster germination, healthier seedlings, and a head start on the competition. 🌱
Ready to grow with confidence? Grab a warming mat, follow the steps, and watch your seeds transform into thriving plants—no waiting required! Next up: Experiment with different seed varieties and track your germination success for an even greener thumb next year.