
Propagation
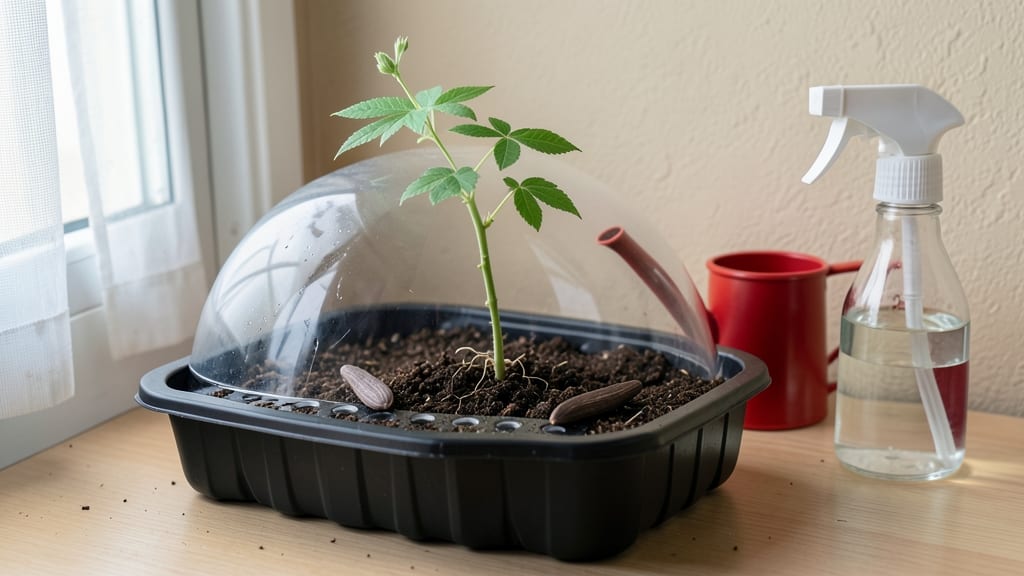
Wisteria seed germination turns stubborn seeds into reliable starters—here's how to crack the code. 🌱 I spent years struggling with wisteria seeds until I discovered the exact cold treatment that finally broke their dormancy. The secret isn't complicated: it's about mimicking winter's slow thaw in your own setup.
You'll need just three things: clean seeds, a damp paper towel, and your fridge's crisper drawer. The process takes 6-8 weeks of patience, but the payoff is worth it—tiny green sprouts that grow into strong seedlings ready for planting.
Most gardeners skip this step and wonder why their seeds never sprout.
By spring, you'll have seedlings that outpace store-bought plants because they started with your careful preparation. The first blooms might take 3-5 years, but the journey is what makes it rewarding. Each step builds confidence for your next gardening challenge.
This method works for all wisteria varieties, from the classic purple to rare white types. Whether you're growing in containers or directly in the ground, the same principles apply. Let's get those seeds sprouting!
📚 In This Guide
- What you need
- Instructions
- Tips and common mistakes
- Wrapping up and next steps
What you need
- ● Wisteria seeds: Fresh, mature seeds (preferably harvested in fall or purchased from a reputable supplier). Aim for at least 10 seeds to account for germination variability.
- ● Cold stratification setup: A ziplock bag or small container with a breathable lid (e.g., a plastic bag with holes poked in it).
- ● Moistened peat moss, perlite, or vermiculite: Fill the container with 2–3 inches of the medium (keep it damp but not soggy).
- ● Seeds: Place seeds 1/4 inch deep in the medium, spacing them evenly.
- ● Refrigerator or cold frame: A space to maintain temperatures between 35–45°F (2–7°C) for 6–12 weeks.
- ● Potting soil: A well-draining mix (e.g., 50% peat moss, 30% perlite, 20% compost) for transplanting post-stratification.
- ● Small pots or seed trays: 3–4 inch pots or trays with drainage holes for each seedling.
- ● Misting bottle or spray nozzle: To keep soil consistently moist without overwatering.
- ● Seed germination mat: Speeds up warming post-stratification (e.g., 70–75°F (21–24°C)).
- ● Humidity dome or plastic wrap: Retains moisture during early growth stages.
- ● pH testing kit: Ensures soil pH is 6.0–7.0 (wisteria prefers slightly acidic to neutral).
- ● Fertilizer (low-dose): A balanced 10-10-10 or 5-5-5 fertilizer for young seedlings (use half-strength at first).
- ● Grow lights: If natural light is limited (12–16 hours/day for optimal growth).
Step-by-step instructions for wisteria seed germination
Cold stratification unlocks wisteria seeds' dormancy—here's how to break it properly for reliable sprouts.
🌱 Step 1: Harvest and Clean the Seeds
Collect mature wisteria pods when they turn brown and split open naturally, usually in late summer or early fall. Extract the seeds inside and remove any remaining pod fragments or debris. I like to soak them in lukewarm water for 24 hours to soften the outer shell—this helps prevent cracking later. After soaking, rinse them thoroughly under running water to remove any residual pulp or sugars that could attract mold.
Spread the cleaned seeds on a paper towel in a single layer and let them air-dry for 2-3 days in a well-ventilated area. You'll know they're ready when the outer coating feels slightly firm to the touch but not brittle. This drying step is critical—it prevents rot during stratification. Store them in a labeled paper envelope or breathable fabric bag until you're ready to begin the cold treatment.
❄️ Step 2: Perform Cold Stratification
Place the dried seeds in a sealed plastic bag with a moistened but not soggy paper towel or vermiculite. The goal is to keep the medium damp enough to simulate winter moisture without creating anaerobic conditions. I use a quart-sized zip-top bag and add just enough water to dampen the towel—squeeze out excess to avoid pooling. Seal the bag and place it in your refrigerator's crisp drawer (around 35-40°F) for 3-4 months.
Check the seeds monthly to ensure the paper towel remains moist but not wet. If it dries out, add a few drops of water and reseal the bag. The cold stratification mimics the natural winter chilling period wisteria seeds require to break dormancy. After 12 weeks, the seeds should show signs of swelling or slight softening—this confirms they're ready for planting. If they remain hard, extend the stratification by another 4-6 weeks.
🌿 Step 3: Sow Stratified Seeds
Fill small pots (about 3-4 inches deep) with a sterile seed-starting mix and moisten it until evenly damp. Plant the stratified seeds ½ inch deep, spacing them 1 inch apart in their pots. I use biodegradable peat pots to avoid disturbing roots later. Gently press the soil around each seed to ensure good contact but don't compact it—wisteria roots need loose, airy soil to establish.
Place the pots in a warm, bright location with indirect light (around 65-70°F). A seedling heat mat can help maintain consistent warmth if your home runs cooler. Keep the soil consistently moist but never waterlogged—you'll know it's right when the surface feels damp to the touch but doesn't glisten. Germination can take 4-8 weeks, so patience is key. Once sprouts appear, move them to a south-facing window or under grow lights for 14-16 hours daily.
☀️ Step 4: Transition to Outdoor Conditions
After the last frost date, harden off the seedlings by gradually exposing them to outdoor conditions over 10-14 days. Start with 1-2 hours of shade on the first day, then increase exposure by 1 hour daily. Watch for signs of stress like wilting or yellowing leaves—if you see these, extend the acclimation period. Wisteria seedlings are sensitive to transplant shock, so I recommend waiting until they have 4-5 true leaves before moving them to their permanent location.
Plant them in a spot with full sun and well-draining soil, spacing them 10-15 feet apart to allow for their vigorous growth. The first year, focus on root establishment rather than blooms—you won't see flowers until the plant is at least 3-5 years old. Mulch around the base with 2-3 inches of organic matter to retain moisture and regulate soil temperature. Water deeply once weekly during the first growing season, ensuring the soil stays moist but not soggy.
Tips & tricks for perfect wisteria seed germination
These little-known details make all the difference in breaking dormancy and getting reliable sprouts.
Soaking Precision: When soaking your seeds for the required 24 hours, use lukewarm water that's warm enough to feel comfortable to your hand but not hot. Hot water can scald the delicate seed coats, while cold water won't effectively soften them. I place my seeds in a glass jar with water at about 85°F—this temperature range is ideal for breaking down the hard outer shell without damaging the embryo inside. After soaking, give them a thorough rinse to remove any residual sugars that could attract mold during the drying process.
Stratification Environment: The 35-40°F temperature range in your refrigerator's crisp drawer is perfect for mimicking winter conditions, but consistency matters more than exact degrees. I've found that placing the sealed bag on the middle shelf (not the door) maintains the most stable temperature. If your fridge runs warmer, consider adding a small ice pack to the bag—just make sure it doesn't freeze the seeds. The key is to keep them cold but not frozen, as ice crystals can damage the seed structure.
Germination Timeline: While the instructions mention a 4-8 week germination window, I've noticed that seeds stratified for the full 3-4 months tend to sprout within the first 4-6 weeks of planting. If you're impatient, you can check for readiness by gently pressing a seed between your fingers—it should feel noticeably softer than when you started stratification. This is your signal that dormancy has broken and germination is imminent. The 65-70°F warmth during this stage is crucial for triggering the metabolic processes that lead to sprouting.
Pro Tips for Wisteria Seed Germination
- These little-known details make all the difference in breaking dormancy and getting reliable sprouts.
- Soaking Precision: When soaking your seeds for the required 24 hours, use lukewarm water that's warm enough to feel c...
- Stratification Environment: The 35-40°F temperature range in your refrigerator's crisp drawer is perfect for mimickin...
Frequently asked questions
Got questions about germinating wisteria seeds? You’re not alone—this process can be tricky! Here are answers to the most common concerns to help you succeed with your cold stratification and propagation efforts.
How long does cold stratification take for wisteria seeds?
Cold stratification for wisteria seeds typically requires 8–12 weeks in a moist, chilled environment (34–40°F). Some gardeners extend this to 16 weeks for tougher seeds. Monitor moisture levels—seeds should stay damp but not soggy. Patience is key!
Can I skip cold stratification and still germinate wisteria seeds?
While possible, skipping stratification drastically reduces success rates. Wisteria seeds rely on cold to break dormancy. If you’re impatient, try soaking seeds in warm water for 24 hours first, but combine this with a short (4-week) cold period for better results.
What’s the best soil mix for germinating wisteria seeds?
Use a light, well-draining mix like 50% perlite or sand and 50% peat moss or coconut coir. Avoid heavy garden soil—it can suffocate seeds. A sterile mix prevents mold, and adding a thin layer of vermiculite helps retain moisture without compacting.
Why aren’t my wisteria seeds sprouting after stratification?
Several factors could be at play: old seeds (use fresh or stored properly), improper moisture (too dry or waterlogged), or temperature fluctuations. Check for mold or rot—if present, start fresh with clean seeds and a sterile mix. Sometimes, seeds need another 4–6 weeks of cold.
How do I know when to transplant wisteria seedlings?
Transplant when seedlings have 2–3 true leaves and are about 3–4 inches tall. Harden them off for 1–2 weeks by gradually exposing them to outdoor conditions. Choose a spot with full sun and well-draining soil—wisteria hates soggy roots! Plant in early spring for best establishment.
Wrapping up and next steps
Growing wisteria from seed is a rewarding journey that combines patience and precision—especially with cold stratification as your secret weapon! 🌱 By following these steps, you’ll unlock the potential for vibrant blooms next spring, even if your seeds seem stubborn at first.
Remember, consistency is key, so stay attentive and nurture those sprouts with care.
Now that you’re armed with the know-how, why not take the next step? Start your seeds today, and in a year, you could be enjoying the sweet fragrance and stunning cascades of wisteria in your garden. Happy growing! 🌸