
Lawn
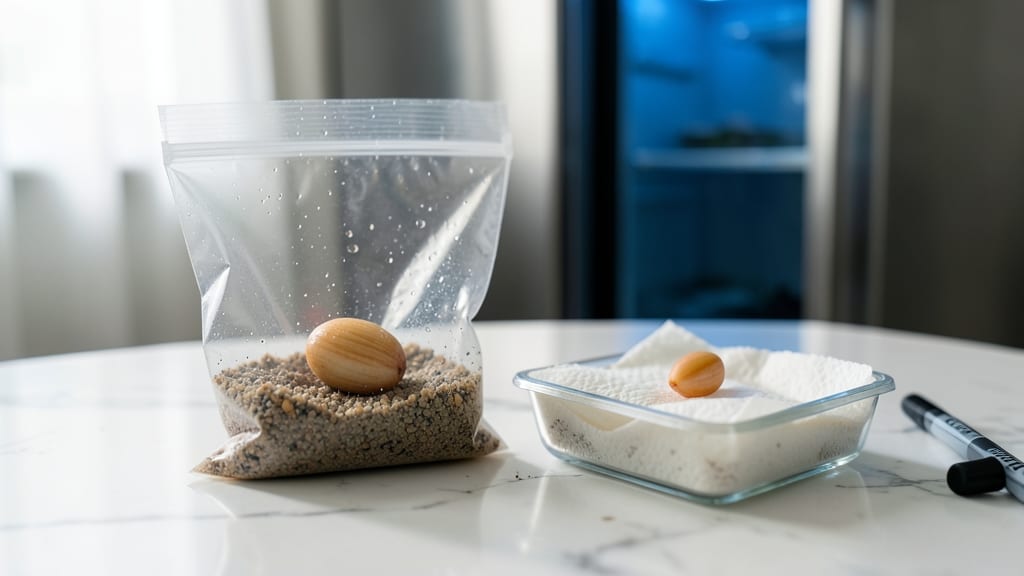
Peach seed stratification isn't just science—it's the secret to waking up those stubborn seeds after months of winter slumber. 🌱 I've learned the hard way that skipping this step means waiting years for a peach tree, if you ever get one at all.
The process mimics natural conditions, breaking dormancy so seeds germinate reliably when spring arrives.
You'll need just three things: peach pits (cleaned and dried), a damp paper towel or peat moss, and a sealed plastic bag or container. The key is keeping moisture consistent—too dry and the seeds won't wake, too wet and they'll rot.
Place them in the fridge for 6-8 weeks, checking occasionally to ensure they stay damp but not soggy.
When you pull them out in late winter, you'll see the magic happen—tiny roots breaking through the seed coat within 2-4 weeks. These aren't just any seedlings; they're peach trees with real potential, ready to grow into fruit-bearing giants with proper care.
The payoff? Fresh peaches straight from your backyard in just a few years.
This method works for any stone fruit—plums, cherries, apricots—so you can experiment with different varieties. Just remember: patience is key. The stratification period might feel long, but it's what turns those hard little pits into living plants. Here's how to do it right the first time.
📚 In This Guide
- What you need
- Instructions
- Tips and common mistakes
- Wrapping up and next steps
What you need
- ● Fresh peach pits (seeds): 5–10 clean, undamaged pits from ripe peaches (organic or pesticide-free preferred).
- ● Paper towels or coffee filters: 2–3 sheets (for moisture control).
- ● Plastic zip-top bags: 1–2 quart-sized bags (resealable).
- ● Water: Distilled or dechlorinated (tap water left out for 24 hours works too!).
- ● Refrigerator: A standard fridge with a consistent 34–40°F (1–4°C) temperature.
- ○ Small container or tray: Optional, for organizing seeds during stratification.
- ● Labeling markers: To track seed varieties or planting dates.
- ● Funnel: For easy seed transfer into bags.
- ● Thermometer: To monitor fridge temps (especially in warmer climates).
- ● Planting pots or seed trays: For transplanting germinated seeds (2–3" pots work well).
- ● Potting mix: Light, well-draining soil blend (e.g., 50% peat moss, 50% perlite).
Step-by-step instructions for peach seed stratification
Here's the foolproof method I use to break dormancy and ensure those peach pits sprout reliably.
🌱 Step 1: Extract and Clean the Seeds
Remove seeds from ripe peaches and rinse off any remaining fruit flesh. I like to soak them in lukewarm water for 24 hours to soften the outer shell—this helps prevent cracking during stratification. After soaking, pat them dry with a paper towel and let them air dry for 1-2 hours at room temperature.
Look for seeds that are firm and free of mold or soft spots. Discard any that feel mushy or smell off—these won't germinate. The good ones should have a smooth, slightly glossy shell. This step ensures you start with healthy seeds ready for the cold treatment.
💧 Step 2: Prepare the Stratification Mix
Fill a quart-sized container with a mix of 50% moist peat moss and 50% perlite. The peat should feel like a damp sponge—squeeze it gently and it should hold its shape but not drip water. Too much moisture causes rot, while too little prevents proper moisture absorption.
I like to layer the mix in the container, adding seeds about 1 inch apart and 1 inch deep. Cover them lightly with more of the mix, leaving about ½ inch of space between the seeds and the container's rim. This spacing prevents mold buildup and allows for easy monitoring.
⏰ Step 3: Cold Stratify for 8-12 Weeks
Place the container in a refrigerator (not the freezer) where temperatures stay between 35-45°F. Check the mix every 2-3 weeks—it should remain moist but not soggy. If it feels dry, lightly mist with water and stir gently to redistribute moisture evenly.
This cold treatment mimics winter conditions, breaking the seed's dormancy. You'll know it's working when tiny white roots appear after about 6-8 weeks. Don't rush this step—proper stratification is what guarantees strong, healthy seedlings in spring.
☀️ Step 4: Plant Stratified Seeds in Pots
Once roots are 1-2 inches long, transfer the seeds to individual 3-inch pots filled with seed-starting mix. Plant each seed ½ inch deep and water gently until the soil is evenly moist. Place the pots in a warm, bright spot (like a sunny windowsill or under grow lights) where temperatures stay above 65°F.
Keep the soil consistently moist but never waterlogged. You should see the first true leaves emerge within 2-4 weeks. This is your signal that the stratification worked—those leaves mean the seedling is ready to grow into a peach tree.
🌿 Step 5: Transition to Outdoor Conditions
After 4-6 weeks of indoor growth, when seedlings have 3-4 true leaves, start hardening them off. Place them outside in a sheltered spot for 1-2 hours the first day, gradually increasing exposure over 10-14 days. This slow transition prevents shock and helps them adapt to outdoor conditions.
Once hardened off, transplant seedlings into the garden in early spring, after the last frost date. Choose a sunny spot with well-draining soil—peach trees thrive in full sun and need room to grow. With patience, your stratified seeds will reward you with blossoms and (eventually) fruit in just a few years.
Tips & tricks for perfect peach seed stratification
Here's what nobody tells you about getting those peach seeds to sprout reliably—these tricks make all the difference.
The Soaking Secret: That 24-hour lukewarm water soak in Step 1 isn't just about cleaning—it's about softening the seed coat just enough to prevent cracking during stratification. I've found that using distilled water instead of tap can reduce mineral buildup that might inhibit germination. After soaking, I always double-check for any seeds that float—they're not viable, so discard them early to avoid disappointment.
Mix Consistency Matters: In Step 2, aim for that perfect "damp sponge" texture with your peat moss and perlite mix. Too wet and you risk mold; too dry and the seeds won't get enough moisture to break dormancy. I like to use a spray bottle to gently mist the mix during the 8-12 week period rather than soaking it—this keeps everything just right. The 1-inch spacing between seeds is crucial too; it prevents them from touching and potentially rotting.
Cold Treatment Precision: That refrigerator temperature range of 35-45°F is critical—any warmer and dormancy won't break properly, any colder and you risk damaging the seeds. I use a refrigerator thermometer to monitor this precisely, especially if your fridge runs hot or cold. The 2-3 week check-ins are your chance to adjust moisture levels—if the mix feels dry at the edges, give it a light mist but don't oversaturate.
Root Development Watch: When those tiny white roots appear after about 6-8 weeks, that's your first sign of success! I recommend using a clear container during stratification so you can easily spot root growth without disturbing the seeds. Once roots reach 1-2 inches, don't wait to transplant—procrastination can lead to overcrowded roots in the pots.
Pro Tips for Peach Seed Stratification
- Here's what nobody tells you about getting those peach seeds to sprout reliably—these tricks make all the difference.
- The Soaking Secret: That 24-hour lukewarm water soak in Step 1 isn't just about cleaning—it's about softening the see...
- Mix Consistency Matters: In Step 2, aim for that perfect "damp sponge" texture with your peat moss and perlite mix. T...
Frequently asked questions
Got questions about peach seed stratification? You’re not alone—this process can feel tricky at first! Below, we’ve rounded up the most common queries to help you grow those dreamy spring blooms with confidence.
How long should I stratify peach seeds before planting?
Peach seeds need 6 to 8 weeks of cold, moist stratification for best results. Place them in the fridge (not the freezer!) in a sealed container with damp paper towels or peat moss. Patience pays off—rushing this step can lead to poor germination or weak seedlings.
Can I use my freezer instead of the fridge for stratification?
Nope! Freezing peach seeds (below 32°F/0°C) can damage them, reducing germination rates. Stick to the fridge’s 34–40°F (1–4°C) range for safe, consistent cold moisture. Think of it like a cozy winter nap—just right, not too harsh!
What if my seeds mold during stratification?
Mold is a red flag! If you spot fuzzy growth, discard the seeds immediately—they’ve gone bad. To prevent mold, use sterilized materials (like boiled water-cooled paper towels) and keep the container slightly open for airflow. A tiny bit of moisture is key, not a swamp!
Do I need to remove the seed coat before stratification?
Nope! Peach seeds have hard, protective coats that soften naturally during stratification. Scratching or nicking the seed (a process called scarification) isn’t necessary unless you’re in a hurry—but it can speed things up by 1–2 weeks if you’re impatient. Just soak the seeds in warm water for 24 hours first if you try this!
When’s the best time to plant stratified peach seeds outdoors?
Wait until late spring or early summer after the last frost, when soil temps hit 60°F (15°C) consistently. Stratified seeds can sit in the fridge for up to 3 months if needed, but plant them as soon as they sprout indoors (in pots) to avoid transplant shock. Timing is everything—aim for blooms in 2–3 years!
Wrapping up and next steps
Mastering peach seed stratification is your golden ticket to unlocking vibrant spring blooms and thriving peach trees! 🌱 By mimicking nature’s cold, moist conditions, you’ve set the stage for faster germination and stronger roots—ensuring your garden rewards you with lush, fruitful growth.
Now that you’re armed with the know-how, why not take the next step? Grab those seeds, gather your supplies, and give this tried-and-true method a try. Your future peach tree (and future fruit harvests!) will thank you! 🍑✨