
Lawn
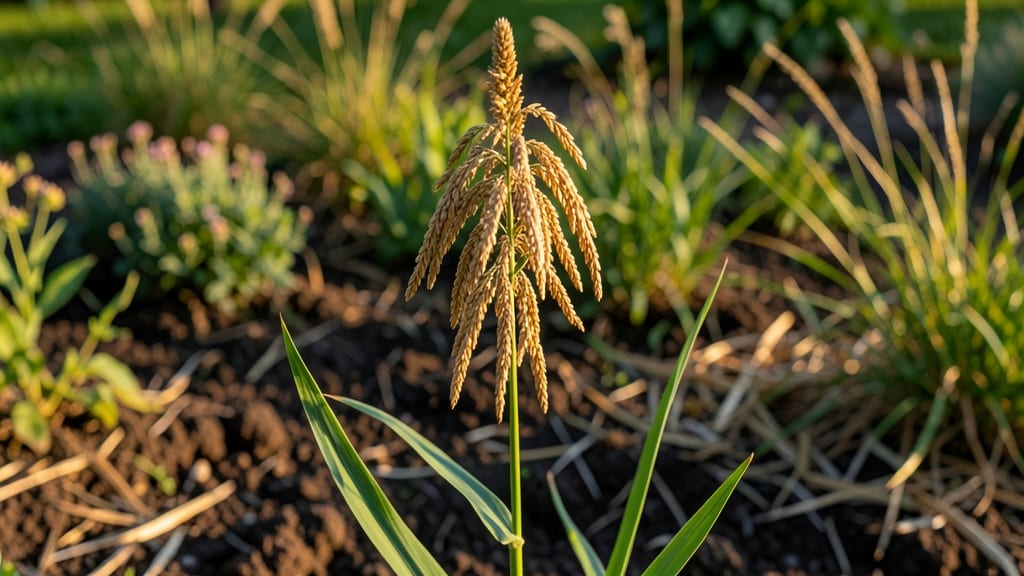
Your millet seed heads are the key to a year-round food source that grows faster than weeds and thrives where other grains struggle. 🌾 I’ve harvested enough millet to fill mason jars by late summer, and the secret isn’t complicated—it’s about letting the plants mature fully before cutting.
Too many gardeners snip too early, missing the plump, nutrient-packed seeds inside those feathery clusters.
The beauty of millet lies in its low-maintenance nature: it tolerates poor soil, drought, and even light shade better than wheat or corn. Once planted in spring, it grows aggressively—6 feet tall in 60 days—before forming those iconic seed heads.
The trick is patience: wait until the seed heads turn golden-brown and the feathery plumes start drying out before harvesting. That’s when the seeds are ripe and ready to save.
What you’ll end up with is a dry, storable grain that keeps for months in cool, dark places. Toast it for breakfast cereal, grind it into flour, or feed it to backyard birds—it’s that versatile.
The process turns a summer garden chore into a self-sufficient food source that outlasts any grocery shelf.
Works for backyard plots, raised beds, or even containers—just give it full sun and decent drainage. Here’s how to make the most of those seed heads without the guesswork.
📚 In This Guide
- What you need
- Instructions
- Tips and common mistakes
- Wrapping up and next steps
What you need
- ● Millet plants (mature, with fully developed seed heads—look for golden-brown, dry clusters). Quantity: Enough for your intended yield (e.g., 10–20 plants for a small harvest).
- ● Pruning shears or sharp scissors (clean, sterilized to prevent disease). Spec: 6–8" blades for precision cuts.
- ● Large paper bags or breathable mesh sacks (to dry seed heads naturally). Quantity: 2–4 bags, depending on harvest size.
- ● Tweezers or small fork (for gently separating seeds from chaff).
- ● Air-tight storage containers (glass jars, food-grade buckets, or resealable bags). Spec: 1–2 quart-sized containers per harvest.
- ● Labeling tags & permanent marker (to note variety and harvest date).
- ● Drying rack or screen (for faster air-drying if humidity is high).
- ● Fine-mesh sieve (to sift out debris post-harvest).
- ● Food dehydrator (for speedy drying in damp climates).
- ● Vacuum sealer (to extend seed viability for long-term storage).
- ● Gloves (if handling large quantities to avoid skin irritation).
Step-by-Step guide to harvesting millet seed heads
Here's how I collect and store millet seed heads year after year with minimal fuss.
🌾 Step 1: Identify and Select Mature Seed Heads
Millet seed heads are ready when the panicles turn from green to golden-brown and feel dry to the touch. Run your fingers through the seed clusters—if the seeds rattle inside, they're fully mature. I avoid harvesting when morning dew is still present, as damp seeds won't dry properly for storage.
Use clean, sharp scissors or pruning shears to cut the seed heads about 2-3 inches below the base. This prevents the stems from touching the ground and reduces rot risk. Harvest on a dry, sunny morning when humidity is low—this gives seeds the best chance to dry quickly and evenly.
☀️ Step 2: Dry the Seed Heads Properly
Spread the harvested seed heads in a single layer on a clean, dry surface like a mesh screen or cardboard box. Place them in a well-ventilated area with indirect sunlight—direct sun can overheat the seeds and reduce viability. I use a fan on low setting to circulate air and speed up drying without damaging the delicate seed heads.
Turn the seed heads every 2-3 hours to ensure even drying. They're ready when the seeds easily separate from the panicle with gentle pressure. If any seeds remain damp after a week, extend drying time or move to a warmer, drier location. Proper drying prevents mold and ensures long-term storage success.
✂️ Step 3: Thresh and Clean the Seeds
Once completely dry, rub the seed heads between your hands or use a clean cloth to gently thresh the seeds. I work in small batches to avoid losing seeds in the process. For larger quantities, a clean towel laid over a bucket works well—just shake the seed heads vigorously to release the seeds while containing the chaff.
Sift the threshed mixture through a fine-mesh screen or sieve to separate seeds from debris. Discard any discolored or damaged seeds—they won't store well. Store the clean seeds in an airtight container like a glass jar with a tight-sealing lid. Label with the harvest date for future reference.
🪴 Step 4: Store Seeds for Long-Term Viability
Place the sealed container in a cool, dark location with consistent temperatures below 60°F. I keep mine in the back of a pantry or refrigerator crisper drawer. Millet seeds can remain viable for 2-5 years under these conditions, though germination rates decline over time.
Check stored seeds annually for signs of moisture or pests. If you notice any musty smells or condensation inside the container, transfer the seeds to a new, dry container immediately. Properly stored millet seeds should maintain their shape and color, ensuring you can replant them for seasons to come.
Tips & tricks for perfect millet seed head harvesting
Here's what I've learned after years of perfecting this process—small details make all the difference.
Harvesting Timing: The 2-3 hour turning schedule in Step 2 is crucial for even drying. I set a timer on my phone to remind me—this prevents uneven drying where some seeds stay damp while others over-dry. If you're harvesting a large batch, consider dividing them into smaller groups so you can rotate each group more frequently. This ensures every seed head gets equal exposure to air circulation.
Equipment Upgrade: While you can use cardboard boxes for drying, I've found that using a mesh screen with small holes (about 1/4-inch) works even better. The seeds don't fall through while still getting excellent airflow. For threshing, a clean pillowcase works surprisingly well—just toss in the dry seed heads and shake vigorously over a bucket. The fabric catches stray seeds while letting chaff escape.
Storage Wisdom: The 60°F temperature recommendation is perfect, but I've added an extra layer of protection by placing a small packet of silica gel with my seeds. This helps absorb any residual moisture that might develop over time, especially if your pantry occasionally gets humid. I also double-check the seal on my containers by pressing my finger around the lid—if it pops back, the seal is good and air can't get in.
Pro Tips for Millet Seed Head
- Here's what I've learned after years of perfecting this process—small details make all the difference.
- Harvesting Timing: The 2-3 hour turning schedule in Step 2 is crucial for even drying. I set a timer on my phone to r...
- Equipment Upgrade: While you can use cardboard boxes for drying, I've found that using a mesh screen with small holes...
Frequently asked questions
Got questions about harvesting and storing millet seed heads? You’re not alone—here are some of the most common concerns, answered clearly and simply!
When is the best time to harvest millet seed heads for saving?
The ideal time is when the seed heads turn golden-brown and the seeds rattle when shaken (about 70-80% dry). Harvest on a dry, sunny morning to prevent mold. Avoid harvesting if rain is forecasted within 24 hours—humidity is the enemy of seed viability!
How do I know if my millet seed heads are fully mature?
Check for these signs:
- Color shift: Seed heads go from green to golden or tan.
- Seed sound: Shake gently—if seeds rattle, they’re ready.
- Seed separation: A few seeds should pop off with light pressure.
Can I harvest millet seed heads from my lawn and still save them for planting?
Yes! If your millet is growing wild in the lawn (like proso or foxtail millet), you can harvest it—just avoid areas treated with herbicides or pesticides. For best results, grow millet in a dedicated patch next time to ensure purity and avoid contaminants.
What’s the best way to dry millet seed heads before storage?
Spread seed heads in a single layer on a mesh screen or paper towels in a well-ventilated area (like a garage or shed). Avoid direct sunlight—it can overheat and crack seeds. Stir occasionally for even drying (takes 1-2 weeks). A dehydrator (set to 95°F) speeds this up to 24 hours!
What if my millet seeds sprout mold or get bugs during storage?
Don’t panic! First, check for moisture—seeds should feel dry to the touch. If mold appears, discard the batch. For pests (like weevils), freeze seeds for 48 hours or store them in airtight containers with silica gel packets. Always store in a cool, dark place (50-60°F ideal).
Wrapping up and next steps
Harvesting millet seed heads is a rewarding way to stock up on nutritious, drought-resistant grains while reducing waste—no green thumb required! 🌾 Whether you're saving seeds for next season or exploring gluten-free baking, these resilient plants make sustainable gardening effortless.
Start small with just a few seed heads, and soon you’ll be enjoying homegrown millet in everything from salads to savory dishes.
Ready to dive in? Grab your scissors, pick a sunny spot, and let nature do the rest. Your future self (and your taste buds) will thank you! 🌱