
Propagation
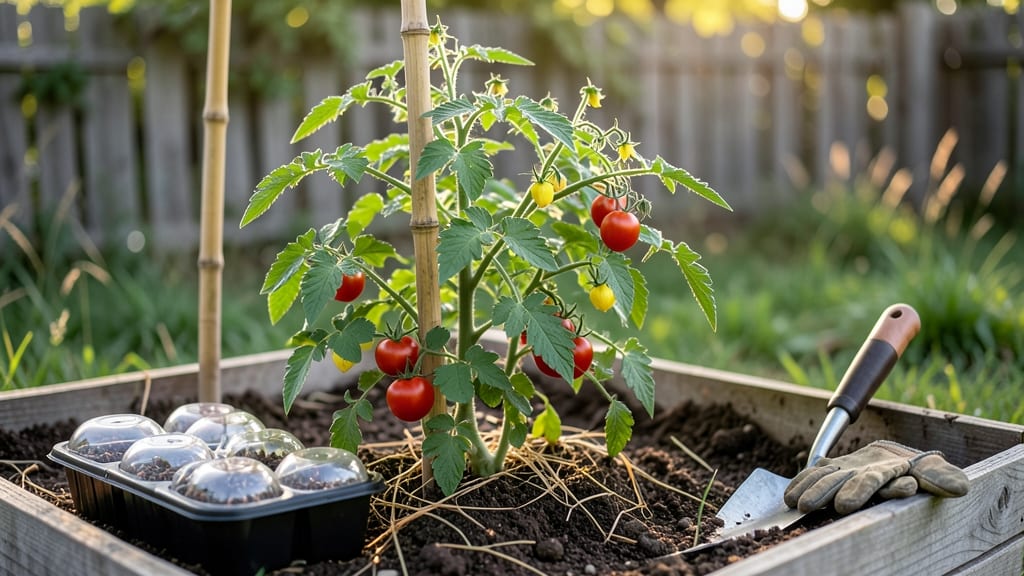
Growing tomatoes from seed outdoors gives you varieties store-bought plants can't match—like heirloom 'Black Krim' or cherry 'Sungold'. 🌱 I've started seeds in my backyard for five years, and the secret to success isn't just timing or soil—it's matching the tomato's natural rhythm with your growing season.
The payoff? Plants that outperform nursery starts by summer's end.
You'll need just five things: a sunny spot with at least 6 hours of direct light daily, a 3-inch-deep container (or direct-sow in warm soil), seed-starting mix, a spray bottle, and patience.
The real trick is starting seeds 4-6 weeks before your last frost—early enough for sturdy seedlings, but not so early they get leggy. I swear by a south-facing windowsill or a grow light for those first three weeks.
By day 60, you'll have 2-foot-tall seedlings ready for transplanting, their first true leaves unfurling like tiny umbrellas. The key is consistent moisture—never let the soil dry out completely—and a hardening-off period of 7-10 days before moving them outside.
Watch them grow from fragile sprouts to vibrant, productive plants that'll feed you all summer.
This method works for any tomato variety, from slicers to paste tomatoes, and adapts to containers or in-ground beds. Whether you're in Zone 5 or Zone 10, the principles stay the same—just adjust your timing. Let's get those seeds in the ground!
📚 In This Guide
- What you need
- Instructions
- Tips and common mistakes
- Wrapping up and next steps
What you need
- ● Tomato seeds: Choose heirloom or hybrid varieties suited to your climate (e.g., Cherry, Beefsteak, or Roma). Start with 5–10 seeds per variety.
- ● Seed-starting trays or pots: 2–4 inch deep with drainage holes (biodegradable pots are eco-friendly!). Aim for 12–24 cells total.
- ● Seed-starting mix: Lightweight, sterile mix (avoid garden soil—it’s too dense!). A 50/50 blend of peat moss/coir and perlite/vermiculite works well.
- ● Grow lights or sunny windowsill: 12–16 hours of light/day (LED or fluorescent grow lights are ideal for indoor starts).
- ○ Heat mat (optional but helpful): Keeps soil 70–85°F for faster germination (especially for slow starters like heirlooms).
- ● Misting bottle or spray nozzle: For gentle watering to avoid displacing seeds.
- ● Plant labels: Mark varieties to avoid mix-ups (use popsicle sticks or plant tags).
- ● Fertilizer: Balanced starter fertilizer (e.g., 5-5-5 or fish emulsion) or compost tea once true leaves appear.
- ● Hardening-off supplies: Shade cloth (30–50% coverage) and a fan or outdoor spot for acclimating seedlings.
- ● Outdoor planting space: Full sun (6–8+ hours/day) and well-draining soil (amend with compost if needed).
- ● Humidity dome or plastic wrap: Creates a mini greenhouse to retain moisture while seeds germinate.
- ● pH test kit: Ensures soil pH is 6.0–6.8 (tomatoes thrive in slightly acidic soil).
- ● Trellis or cages: Supports indeterminate varieties (e.g., Sungold) and improves airflow.
- ● Drip irrigation system: Keeps soil consistently moist without overwatering.
- ● Pruning shears: For pinching suckers and shaping plants as they grow.
Step-by-step instructions for growing tomatoes from seed outdoors
Here’s how to get strong, sun-loving tomato seedlings ready for transplant in just 60 days.
🌱 Step 1: Choose the Right Time and Location
Start seeds 60 days before your last frost date—this gives them enough time to grow sturdy before warm soil arrives. I like to mark the date on my calendar so I don’t forget. Tomatoes thrive in full sun (6-8 hours daily), so pick a sheltered spot like a raised bed or garden patch with afternoon shade if your summers are scorching.
If your spring nights are still chilly (below 50°F), use a garden cloche or row cover to protect young plants. I’ve found that even a simple plastic bottle cut in half works—just pop it over seedlings when frost threatens. The key is ensuring soil stays at least 60°F before transplanting, or roots won’t warm up properly.
🌱 Step 2: Prepare the Soil and Sow Seeds
Loosen the soil to a depth of 12 inches and mix in 2-3 inches of compost—this improves drainage and feeds roots. Tomatoes hate soggy soil, so if your garden holds water, amend with sand or perlite until the mix feels crumbly. I like to rake the area smooth and create shallow furrows ½ inch deep, spacing them 18 inches apart for 4 plants.
Drop 2-3 seeds per furrow, spacing them 1 inch apart. Cover lightly with soil and water gently—don’t drown them. I tap the soil with my fingers to settle it, then mist with a spray bottle until the surface looks damp. Label your rows so you remember where they are (tomato seedlings look identical to weeds at first!).
☀️ Step 3: Thin and Protect Seedlings
When seedlings reach 2 inches tall, thin to the strongest one per spot by snipping the others at soil level with clean scissors. This prevents overcrowding and gives remaining plants room to grow. I always thin on a cloudy day—less stress on the plants from direct sun.
Watch for true leaves (the second set after the initial seed leaves)—this means roots are established. If nights are still cool (below 55°F), cover seedlings with floating row covers or cloches to shield them from frost. You’ll see them push through the fabric as they grow, and the protection pays off when warm weather arrives.
💧 Step 4: Fertilize and Support Growth
When seedlings hit 4-6 inches tall, side-dress with balanced fertilizer (10-10-10) at half strength. Too much nitrogen now makes them leafy but weak-stemmed. I like to mix it into the soil around the base, then water deeply to help roots absorb it. This is also the time to set up cages or stakes—tomatoes grow fast, and supporting them early prevents broken stems.
Water deeply every 2-3 days—soak the soil until it’s 6 inches damp, then let it dry slightly before watering again. Shallow watering encourages shallow roots. You’ll know you’re doing it right when leaves stay crisp and stems feel sturdy. If they wilt in the afternoon, they need more water.
⏰ Step 5: Harden Off and Transplant
Two weeks before your last frost, start hardening off seedlings by placing them outside in partial shade for 2-3 hours daily, gradually increasing time. This toughens them up for real garden life. I move them to sunnier spots each day, watching for signs of stress like yellowing leaves—if that happens, they’re not ready yet.
Transplant when soil is at least 60°F and seedlings have 4-6 true leaves. Dig holes twice as wide as the root ball to encourage spreading roots, then water deeply after planting. Mulch with 2 inches of straw to retain moisture and keep soil cool. Your 60-day wait is over—now the real fun begins!
Tips & tricks for growing tomatoes from seed outdoors
These sun-loving secrets will help you raise vigorous tomato plants that thrive from seed to harvest.
Timing is Everything: That 60-day countdown is your golden window—mark it on your calendar and set reminders. I always double-check my last frost date using the USDA Plant Hardiness Zone Map; even a slight miscalculation can leave seedlings too weak for transplant. If you're in doubt, err on the side of starting earlier rather than later, as seedlings can handle cooler temperatures better than heat stress.
Soil Prep Matters: The 12-inch deep loosening and 2-3 inches of compost aren't just numbers—they create the perfect environment for root development. I've learned the hard way that compacted soil stunts growth, so take your time breaking up clods and mixing in organic matter. For heavy clay soils, add sand or perlite to improve drainage; tomatoes hate soggy feet just as much as they love sun. The furrow depth of ½ inch is perfect for seed placement—any deeper and they'll struggle to push through.
Seedling Protection Strategy: Those nighttime temperature thresholds (below 50°F for cloches and below 55°F for row covers) are critical. I've seen seedlings wilt overnight when temps dipped just 2°F below these thresholds. Float row covers work wonders—they let sunlight through while trapping warmth. For an even simpler solution, cut plastic bottles in half and pop them over seedlings; they create mini greenhouses that work just as effectively.
Watering Wisdom: The deep watering every 2-3 days (until soil is 6 inches damp) is non-negotiable for strong root systems. I always check moisture by sticking my finger in the soil—if it's dry at 2 inches, it's time to water. The key is consistency: shallow watering creates weak, surface roots that can't support heavy tomato fruits. And here's a pro move: water in the morning so foliage has all day to dry, preventing fungal diseases that thrive in damp leaves.
Pro Tips for Grow Tomatoes From Seed Outdoors
- These sun-loving secrets will help you raise vigorous tomato plants that thrive from seed to harvest.
- Timing is Everything: That 60-day countdown is your golden window—mark it on your calendar and set reminders. I alway...
- Soil Prep Matters: The 12-inch deep loosening and 2-3 inches of compost aren't just numbers—they create the perfect e...
Frequently asked questions
Got questions about growing tomatoes from seed outdoors? You’re not alone! Here are answers to the most common concerns—so you can grow confidently and troubleshoot like a pro.
When is the best time to start tomato seeds outdoors?
Plant seeds indoors 6–8 weeks before your last frost date (e.g., late March–April in most U.S. zones). Transplant seedlings outdoors after soil warms to 55°F+ and nighttime temps stay above 50°F. Use a frost calculator for your zone!
What if my seedlings get leggy or weak before transplanting?
Leggy seedlings happen from low light. Move them to a sunny window or use a grow light 12–16 hours/day. Bury stems deeper when transplanting—roots will sprout from the buried stem, creating a stronger plant!
How long does it take for tomato seeds to germinate?
Most tomato seeds sprout in 5–14 days at 70–85°F. Keep soil moist (not soggy) and warm with a heat mat if needed. If nothing sprouts after 2 weeks, try replanting—seeds may have expired or been buried too deep.
What should I do if my tomato plants get pests like aphids or hornworms?
Start with neem oil or insecticidal soap for aphids. Handpick hornworms (they’re camouflaged!) or use BT (Bacillus thuringiensis), a natural bacteria-based spray. Encourage ladybugs—they eat pests for free!
Can I grow tomatoes from grocery store seeds?
Nope! Store-bought tomatoes are hybridized for flavor and shelf life, not seed viability. Save seeds from heirloom or open-pollinated varieties instead. Let them dry on paper towels, then store in a cool, dark place for next year.
Wrapping up and next steps
Growing tomatoes from seed outdoors is a rewarding journey that connects you to nature and fresh, homegrown flavor! 🌱 With the right timing, soil, and care, you’ll enjoy vibrant plants and bountiful harvests in just 60 days.
Start small, stay patient, and let your green thumb shine—every seed you plant is a step toward a delicious, self-sufficient garden.
Ready to take the next step? Experiment with heirloom varieties, try container gardening, or even share your harvest with friends. Happy growing—your future tomato feasts await! 🍅✨