
Lawn
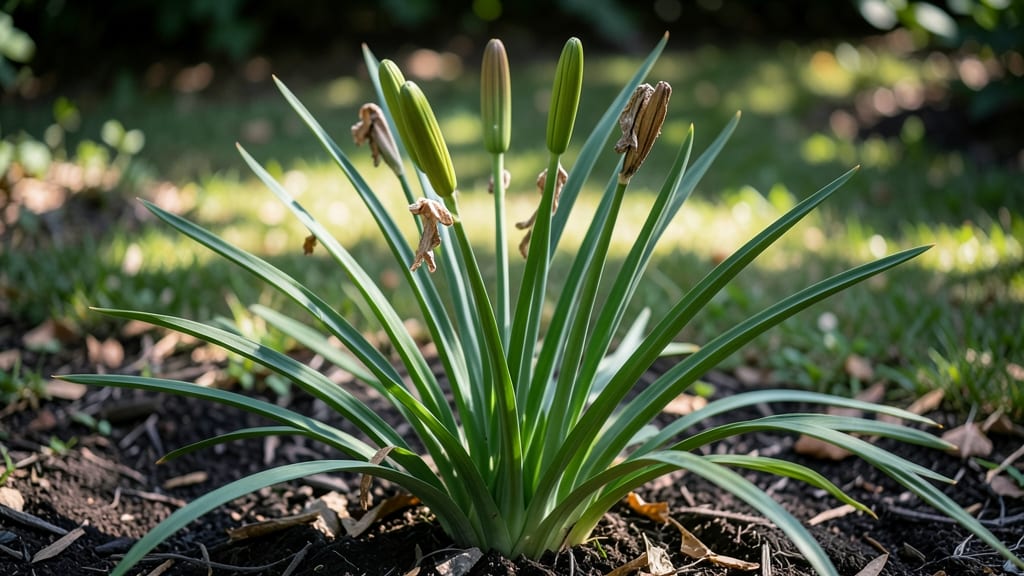
Harvesting daylily seed pods means multiplying your favorite varieties without spending a dime. 🌱 I’ve collected hundreds of these pods over the years, and the process is simpler than most gardeners realize—no fancy equipment or complicated steps required.
The key is knowing when to pick them and how to handle them once they’re in your hands.
These pods appear after your daylilies bloom, looking like elongated, green capsules that eventually turn brown and dry. The best time to harvest is when they’re fully mature but before they split open—usually late summer to early fall.
Once collected, you can store them in a cool, dry place until you’re ready to sow, though germination is often best when planted fresh.
What you’ll end up with are tough, hardy seedlings that thrive with minimal care. Unlike division, which only multiplies what you already have, seeds let you experiment with new colors and patterns.
Just be patient—germination can take 2-4 weeks, and the first blooms won’t arrive until the second or third year.
This method works for any daylily variety, whether you’re growing in full sun or partial shade. The only real mistake is harvesting too early—wait until the pods are fully dry and papery before opening them. Ready to turn those blooms into a seed-saving success?
📚 In This Guide
- What you need
- Instructions
- Tips and common mistakes
- Wrapping up and next steps
What you need
- ● Mature daylily plants: Healthy, established Hemerocallis varieties (at least 2–3 years old for reliable seed production).
- ● Seed pods: Fully developed, brownish-orange pods (harvest when they’re just starting to split open).
- ● Pruning shears or sharp scissors: Clean, sterilized tools to snip pods without damaging the plant.
- ● Paper bags or breathable mesh sacks: 3–5 medium-sized bags (1–2 gallons each) to store pods while drying.
- ● Labeling tags & permanent marker: To track varieties and harvest dates.
- ● Drying tray or screen: A flat, elevated surface (like a wire rack) for airflow.
- ○ Fine-mesh sieve or sifter: For separating seeds from chaff (optional but helpful).
- ○ Paper towels or silica gel packets: To absorb excess moisture during drying (optional).
- ● Desiccant (like rice or cat litter): Mix with pods to speed up drying in humid climates.
- ● Small fan: For gentle airflow if drying indoors.
- ● Seed storage containers: Airtight jars or envelopes with silica packets for long-term viability.
- ● Gloves: If handling prickly or dusty pods (though daylilies are usually gentle!).
- ● Notebook: To log pod maturity, harvest dates, and germination notes.
How to harvest daylily seed pods for reliable germination
Here's my foolproof method for collecting daylily seed pods that yield strong, true-to-type plants.
🌱 Step 1: Identify and Select Mature Seed Pods
Look for pods that have turned a deep brown color and feel firm to the touch—these are ready for harvest. I avoid green or partially open pods because they won't contain fully developed seeds. The best time to harvest is in late summer or early fall, when pods have fully matured but haven't split open yet.
Gently twist the pod from the stem—it should release cleanly without tearing. If it resists, wait another week. Avoid harvesting pods that are already splitting open, as the seeds inside will scatter or dry out too quickly. I like to collect pods from the healthiest plants in my garden, as their seeds tend to produce the most vigorous seedlings.
💧 Step 2: Dry and Store the Seed Pods
Place the harvested pods in a single layer on a paper towel or mesh screen in a warm, dry location with good airflow. I use a seed tray or even a cardboard box with holes punched in the sides. Keep them out of direct sunlight, as too much heat can cause the pods to dry too quickly and crack open prematurely.
Check the pods every few days. They're ready when they feel completely dry and papery to the touch. This usually takes about 2-3 weeks, depending on your climate. Once fully dry, store the pods in a sealed envelope or small paper bag in a cool, dark place until you're ready to extract the seeds.
✂️ Step 3: Extract and Clean the Seeds
When you're ready to use the seeds, gently squeeze each dried pod between your fingers or use a small knife to slit it open. Be careful—daylily seeds are tiny and can scatter easily. I place the pods on a clean white sheet of paper to catch any seeds that might fall during extraction.
Once all the pods are open, sift through the seeds to remove any debris or empty seed casings. The viable seeds will be small, dark, and firm. Discard any seeds that look shriveled, discolored, or hollow. Store the clean seeds in a small envelope or airtight container in the refrigerator for up to 6 months for best germination rates.
☀️ Step 4: Stratify Seeds for Better Germination
Daylily seeds benefit from a cold stratification period to break dormancy. Mix the seeds with a slightly damp potting mix in a small container, then place it in a sealed plastic bag. Store the bag in the refrigerator for 4-6 weeks. Check the mix every few days to ensure it stays moist but not soggy.
After stratification, sow the seeds in well-draining potting mix about ¼ inch deep in small pots or seed trays. Keep the soil consistently moist and place the containers in a warm, bright location. Germination can take 2-4 weeks, so be patient. Once seedlings emerge, provide bright, indirect light until they're strong enough to transplant outdoors in spring.
🌿 Step 5: Transplant Seedlings for Long-Term Growth
Wait until all danger of frost has passed and the soil has warmed to at least 60°F before transplanting your daylily seedlings. Choose a location with full sun to partial shade and well-draining soil. Dig a hole slightly larger than the root ball and place the seedling in, ensuring the top of the root ball is level with the soil surface.
Water the seedlings deeply after transplanting to help them establish roots. Mulch around the base with 2-3 inches of organic mulch to retain moisture and suppress weeds. Daylilies are hardy and low-maintenance, but they'll reward you with vibrant blooms in just 2-3 years if given proper care.
Tips & tricks for perfect daylily seed pod harvesting
These little-known tricks will help you maximize your yield and ensure germination success every time.
Pod Maturity Check: The deep brown color and firm texture are your best indicators, but there's one more trick: tap the pod gently with your fingernail. A mature pod will make a hollow sound, while an immature one will feel dull. I've learned this the hard way—harvesting too early means wasted effort on undeveloped seeds.
Storage Wisdom: Once your pods are fully dry and stored in a sealed envelope, label it with the date. This helps track their age, especially important since viability decreases after about 6 months. I keep mine in a small mason jar in the fridge's crisper drawer for extra humidity control.
Stratification Secret: During the 4-6 week cold stratification period, I like to add a small handful of perlite to the potting mix. This improves drainage and prevents the seeds from sitting in soggy conditions, which can lead to mold. Keep the mix just barely moist—you should be able to squeeze a few drops of water from it, but not have it dripping.
Transplant Timing: That 60°F soil temperature is crucial, but don't wait until the last possible moment. Daylilies establish roots slowly, and a head start means stronger plants. I test soil temperature with a cheap thermometer I keep buried in my garden bed—it's saved me from transplanting too early when nighttime temps still dip.
Pro Tips for Daylily Seed Pods
- These little-known tricks will help you maximize your yield and ensure germination success every time.
- Pod Maturity Check: The deep brown color and firm texture are your best indicators, but there's one more trick: tap t...
- Storage Wisdom: Once your pods are fully dry and stored in a sealed envelope, label it with the date. This helps trac...
Frequently asked questions
Got questions about daylily seed pods? You’re not alone! Here are the most common queries—and their straightforward answers—to help you harvest, store, and grow with confidence.
When do daylily seed pods ripen, and how do I know they’re ready?
Daylily seed pods typically ripen late summer to early fall (August–October in most climates). Look for pods that turn brown and papery—they’ll split open naturally or dry out completely. If you wait too long, seeds may scatter! Harvest when pods are dry but still intact for the best viability.
Can I save seeds from store-bought daylilies, or do I need heirloom varieties?
Nope! All daylilies produce seeds, even hybrids from nurseries. However, store-bought seeds may not true-to-type (i.e., they might not grow into the exact parent plant). For guaranteed results, save seeds from your own healthy daylilies or buy seeds labeled as "open-pollinated."
How do I store daylily seeds long-term without them losing viability?
Store seeds in a cool, dry place (like a sealed envelope or jar with silica gel) at 35–40°F (2–4°C) for up to 2 years. Avoid refrigerators with humidity fluctuations. For extra insurance, stratify seeds (mix with damp sand, refrigerate for 4–6 weeks) before planting to mimic winter conditions.
Why aren’t my daylily pods producing seeds, even though the flowers look fine?
Missing pods? Check these 3 common culprits:
- No pollinators: Daylilies rely on bees/butterflies. Hand-pollinate with a soft brush if your garden lacks visitors.
- Over-fertilizing: Too much nitrogen = leafy growth, no flowers. Use a balanced fertilizer (10-10-10) or compost instead.
- Stress or age: Young or stressed plants may skip reproduction. Wait until they’re 3+ years old and thriving.
Can I propagate daylilies from seed, or should I just divide the roots?
Both work! Seed-grown daylilies take 2–3 years to bloom but offer genetic diversity (great for experimenting). For faster, identical plants, divide mature clumps in early spring or fall. Seeds are ideal for collectors; divisions suit practical gardeners.
Wrapping up and next steps
Harvesting daylily seed pods is a rewarding way to save seeds year-round with minimal effort—perfect for gardeners who love low-maintenance propagation! 🌱 By following the right timing, techniques, and storage tips, you’ll ensure high viability and healthy blooms in future seasons.
Whether you’re a beginner or a seasoned gardener, this process opens doors to free, organic plant material and endless gardening possibilities.
Ready to put your new skills to work? Start by marking a few daylilies in your garden for next season’s harvest—then watch your green thumb grow even stronger! 🌟