
Lawn
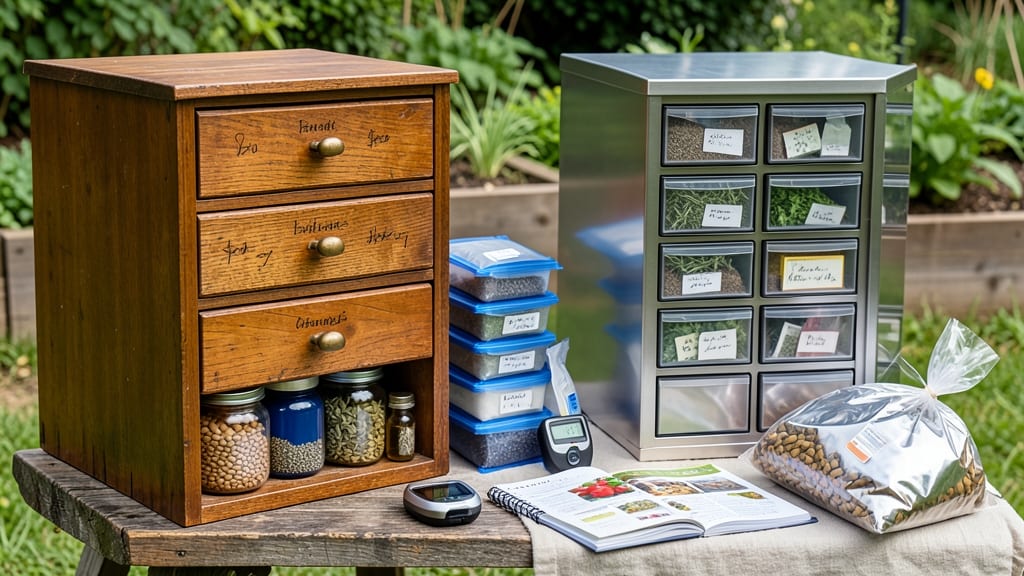
Your seeds deserve better than a cardboard box in the basement. ✨ Climate-controlled seed storage cabinets keep heirloom varieties viable for decades, not just years—so you can plant exactly what you love, generation after generation.
The right cabinet combines temperature stability (around 35-40°F), low humidity (below 40%), and airtight protection from light and pests. My first attempt with a repurposed fridge failed when moisture ruined half my packet—until I invested in a dedicated unit with a built-in hygrometer and adjustable vents.
With proper storage, you’ll watch seeds stay crisp and germinate at 95%+ rates even after 10 years. The payoff? Never buying seeds again, preserving rare varieties, and always having fresh starts for your garden’s most productive crops.
Works for home gardeners, seed savers, or anyone tired of losing heirloom seeds to damp basements. Here’s how to choose and maintain one right.
📚 In This Guide
- What you need
- Instructions
- Tips and common mistakes
- Wrapping up and next steps
What you need
- ● Seed Storage Cabinet: 1x Climate-controlled unit (e.g., SeedVault, Imperial Seed Vault, or DIY refrigeration unit with humidity control).
- ● Specs: Temperature range 32–41°F (0–5°C), humidity 30–50%, and airtight seal.
- ● Seed Containers: Mylar bags (with oxygen absorbers) OR airtight glass jars (5–10x, depending on seed volume).
- ○ Optional: Labeling tags + permanent markers for seed variety tracking.
- ● Humidity Control: 1x dehumidifier (for DIY setups) OR silica gel packets (5–10 lbs).
- ● Temperature Monitoring: 1x digital hygrometer/thermometer (e.g., Thermopro TP20).
- ● Safety & Organization: 1x fireproof safe (if storing near heat sources).
- ● Shelving units (adjustable, to fit cabinet size).
- ● 🌡️ Test your cabinet: Run it for 24 hours before storing seeds to ensure stable temps/humidity.
- ● ✨ Seed drying: Reduce moisture content to 5–7% before storage (use a food dehydrator or air-dry for 3–5 days).
- ● 🔒 Label everything: Include variety, harvest year, and germination notes to avoid mix-ups.
How to set up a climate-controlled seed storage cabinet
Here's how I create a stable, long-term seed vault that keeps viability high for decades.
🪴 Step 1: Select the Right Cabinet and Location
Choose a small, airtight cabinet with minimal wood content—solid metal or plastic is ideal. I avoid wooden cabinets because they absorb moisture and release it unevenly. Place it in the coolest, darkest corner of your basement or root cellar, away from appliances that generate heat or humidity.
Test the location first by leaving a hygrometer and thermometer there for a week. Ideal seed storage conditions hover around 32-41°F with 30-50% humidity. If your space runs warmer, consider a small refrigerator (unplugged) for the cabinet—it creates a stable microclimate without active cooling.
☀️ Step 2: Control Temperature and Humidity Precisely
Install a digital thermostat/hygrometer combo unit inside the cabinet to monitor conditions continuously. I set mine to alert me if temperatures rise above 45°F or humidity exceeds 60%—both thresholds reduce seed longevity dramatically.
Use silica gel packets (not those cheap orange ones from shoe boxes) to absorb excess moisture. Place them in a mesh bag inside the cabinet so they can absorb but not directly contact seeds. Replace them every 3-6 months or when they turn from blue to pink. For extra stability, I add a small fan on low speed to circulate air gently and prevent hot spots.
💧 Step 3: Organize Seeds with Proper Packaging
Store seeds in airtight, moisture-barrier containers like Mylar bags with oxygen absorbers or glass jars with rubber gaskets. I label each container with the seed variety, storage date, and germination test date (usually 5 years after packaging). Never use paper envelopes—they degrade and let moisture in.
Arrange containers on shelving with 1-inch gaps for airflow. Stacking blocks ventilation and creates condensation. I use clear plastic bins with lids for quick access while maintaining the sealed environment. Place a small tray of rice or cat litter at the bottom to absorb any accidental spills—moisture is the enemy of long-term storage.
⏰ Step 4: Maintain and Monitor Regularly
Check the cabinet monthly during the first year, then quarterly afterward. Record temperature and humidity readings in a logbook—small fluctuations over time reveal potential issues before they compromise seeds. I test a few seeds from each variety every 2-3 years to verify viability using a simple germination test (moisten paper towels, place seeds between layers, and check for sprouts in 7-14 days).
If you notice condensation on the inside of the cabinet, immediately remove any moisture sources and increase airflow. For extreme humidity issues, I place a small dehumidifier tray (like those used for firearms) inside for 24 hours to reset conditions. Never open the cabinet more than necessary—each time you do, you introduce warm, humid air from the room.
Tips & tricks for perfect seed storage cabinets
Took me years of trial and error to perfect these climate-controlled seed storage strategies—here's what actually works for long-term viability.
Location Intelligence: The coolest, darkest corner of your basement isn't always the best spot. I learned this the hard way after condensation ruined a batch of seeds stored near a water pipe. Test your location for a full week first—even small fluctuations above 41°F can drastically reduce seed life. Consider using a small, unplugged refrigerator as a microclimate solution if your natural space runs warmer.
Equipment Upgrade: Don't settle for basic thermometers—digital thermostat/hygrometer combos with alerts at 45°F and 60% humidity are game-changers. I set mine to vibrate on my desk when conditions stray, preventing potential disasters. The 3-6 month replacement cycle for silica gel packets is non-negotiable—waiting until they turn pink is too late for optimal protection.
Packaging Precision: Mylar bags with oxygen absorbers are the gold standard, but if you're on a budget, glass jars with rubber gaskets work beautifully. Here's what nobody tells you—label your containers with both the seed variety AND the date you packaged them. I also add a small sticker with the 5-year germination test date right on the lid so I never forget when to check viability.
Maintenance Secret: That 2-3 year germination test cycle is critical, but don't wait until the last minute. I schedule these tests during my seed catalog ordering season so I can replace any non-viable seeds immediately. The paper towel method is foolproof—just remember to keep the towels damp but not soaking, and check for sprouts every 2-3 days after day 7 to catch early signs of viability.
Pro Tips for Seed Storage Cabinets
- Took me years of trial and error to perfect these climate-controlled seed storage strategies—here's what actually wor...
- Location Intelligence: The coolest, darkest corner of your basement isn't always the best spot. I learned this the ha...
- Equipment Upgrade: Don't settle for basic thermometers—digital thermostat/hygrometer combos with alerts at 45°F and 6...
Frequently asked questions
Got questions about seed storage cabinets?
You’re not alone! Here are answers to the most common concerns—from setup to long-term care—so you can protect your seeds like a pro.
What temperature and humidity levels should I aim for in a seed storage cabinet?
Aim for 35–40°F (2–4°C) and 30–50% humidity to maximize seed viability. Most climate-controlled cabinets automatically regulate these settings, but always check the manufacturer’s specs. Pro tip: Avoid fluctuations—consistency is key!
How long can seeds last in a seed storage cabinet compared to regular storage?
With ideal conditions, seeds stored in a climate-controlled cabinet can last decades longer—some heirloom varieties even survive 50+ years. Without climate control, seeds may degrade within 1–5 years due to heat, moisture, or light exposure.
Are seed storage cabinets worth the investment for home gardeners?
If you save rare, heirloom, or hybrid seeds, a cabinet pays for itself by preserving genetic integrity. For casual gardeners, it’s a low-cost insurance policy against seed failure. Budget tip: Start with a small unit if space is tight!
What should I do if my seeds sprout or mold appears in the cabinet?
First, remove affected seeds immediately to prevent spread. Check for humidity leaks or temperature spikes—adjust settings or calibrate sensors if needed. Quick fix: Place a small dehumidifier pack inside temporarily while troubleshooting.
Can I use a regular fridge or freezer instead of a dedicated seed storage cabinet?
A fridge (35–40°F) works in a pinch, but freezers (below 32°F) can damage seeds long-term. Dedicated cabinets offer better humidity control and stability, plus protection from fridge/freezer odors or temperature swings when doors open.
Wrapping up and next steps
Investing in a seed storage cabinet is a game-changer for preserving your harvest’s potential—whether you’re a gardener, farmer, or homesteader. 🌱 These climate-controlled solutions shield seeds from humidity, temperature swings, and pests, ensuring viability for years to come.
With the right setup, you’re not just storing seeds; you’re safeguarding biodiversity and future crops.
Ready to take the next step? Start small: Assess your seed collection, choose a cabinet that fits your needs, and prioritize proper organization. Your future harvests will thank you—happy storing! 🌟