
Propagation
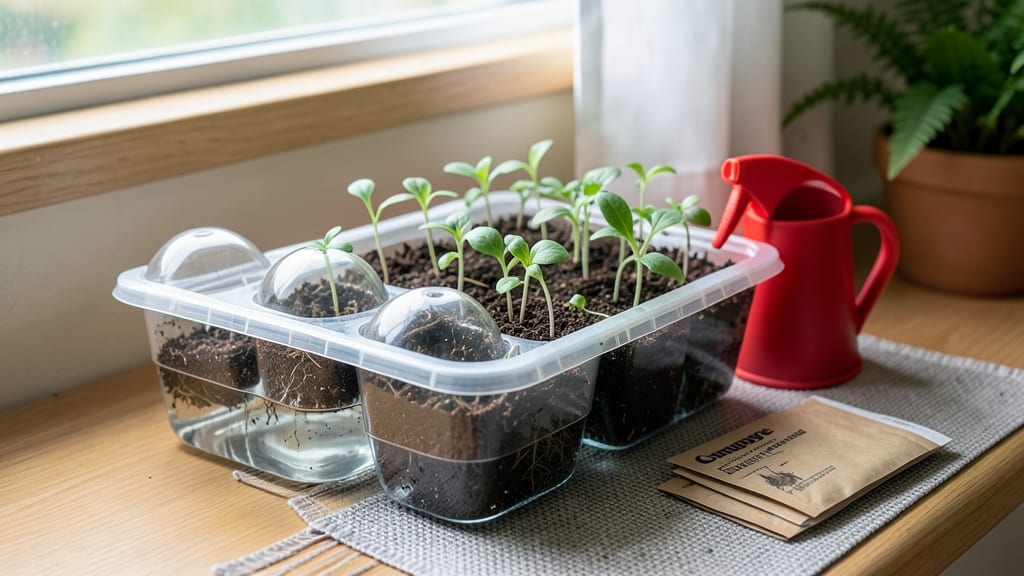
The Burpee Self-Watering Seed Starting System turns finicky seedlings into thriving plants with minimal effort. 🌱 Honestly, I used to kill seedlings faster than I could say "germination," but this system changed everything by handling watering for me.
The built-in reservoir keeps roots consistently moist without the guesswork, and my first batch of tomatoes actually made it past the "leggy" stage. Setup couldn't be simpler: just snap the dome in place, add water to the reservoir, and scatter seeds on top of the pre-moistened soil mix.
The clear dome creates a greenhouse effect that speeds up germination, and the self-watering feature means no more checking trays every morning. Even my black thumb can't mess this up—just fill the reservoir every few days, and the system does the rest.
By the time you're ready to transplant, you'll have stocky, dark-green seedlings with strong roots ready to handle outdoor conditions. The system's modular design means you can start seeds weeks before your last frost, giving them a head start on the growing season.
Plus, the trays stack neatly for storage when you're done. This isn't just for tomatoes—herbs, peppers, and flowers all thrive in the same system. The real magic happens when you see those first true leaves pop up without any fuss. Let's get those seeds growing!
📚 In This Guide
- What you need
- Instructions
- Tips and common mistakes
- Wrapping up and next steps
What you need
- ● Burpee Self-Watering Seed Starting System (1 unit)
- ● Seed starting mix (1 bag, 10–12 quarts, lightweight and sterile)
- ● Seeds (your choice—herbs, veggies, or flowers!)
- ● Water (room-temperature, chlorine-free preferred)
- ● Small hand trowel or spoon (for planting)
- ● Plant labels & marker (to track varieties)
- ● Grow lights or sunny windowsill (12+ hours of light daily)
- ● Humidity dome or plastic wrap (to retain moisture)
- ● Fertilizer (low-dose) (like fish emulsion or seed starter mix)
- ● Heat mat (for cold climates or slow-germinating seeds)
- ● Spray bottle (for gentle watering adjustments)
How to use the Burpee self-watering system for flawless seedlings
This system turns seed starting from a daily chore into a set-it-and-forget-it success.
🪴 Step 1: Assemble the System and Prepare the Base Reservoir
Start by filling the clear base reservoir with warm water until it reaches the maximum fill line—this ensures consistent moisture delivery. I always use room-temperature water (around 70°F) because cold water can shock tender seedlings. The reservoir holds 2 gallons, which is enough to keep your seedlings hydrated for 2-3 weeks without refilling.
Place the inner seed-starting tray into the base. Notice how the wicking action begins immediately—the water level in the tray should rise to about ½ inch from the bottom. If it doesn’t, gently press the absorbent mat into the water to activate full saturation. The mat’s job is to draw water upward as the seedlings drink, so it must be fully submerged at the edges.
🌱 Step 2: Fill Cells with Moistened Starting Mix
Use the seed-starting mix (not garden soil) to fill each cell ¾ full, pressing lightly to eliminate air pockets. The Burpee system works best when the mix is moist but not soggy—think of a damp sponge. I like to sprinkle a tiny pinch of slow-release fertilizer (like 5-10-5) over the mix before adding seeds, but only if your mix doesn’t already include it.
Tap the tray gently on the table to settle the mix evenly. Leave the top ¼ inch empty—this prevents overwatering from above. The self-watering action will handle hydration, but you’ll still want to mist the surface lightly with a spray bottle to encourage even moisture distribution. Avoid heavy watering here; the system’s design prevents drowning roots.
💧 Step 3: Sow Seeds and Monitor Water Levels
Follow the seed packet’s depth guidelines (usually ¼ to ½ inch deep), but never exceed ½ inch—deeper planting delays germination. I use the tongue depressor tool included with the system to create precise furrows. After planting, cover seeds with a thin layer of mix and mist again until the surface looks damp but not wet. The reservoir’s water will gradually wick upward, so you won’t need to add more for 5-7 days.
Place the assembled system under grow lights (or a south-facing window) immediately. Seedlings need 14-16 hours of light daily to avoid legginess. Watch the water level in the reservoir—it should stay consistently between the minimum and maximum lines. If the mat dries out completely, the seedlings will wilt, even with water in the base. Refill as needed, but you’ll rarely need to touch it after the first setup.
☀️ Step 4: Maintain Light and Thin as Needed
Once seedlings emerge (usually 7-14 days), adjust the grow light to stay 2-4 inches above the tallest sprout. You’ll see first true leaves (the second set after the initial cotyledons) in 10-14 days. This is your cue to thin if you overplanted—use clean scissors to snip excess seedlings at soil level, leaving the strongest one per cell. The Burpee system’s individual cells make thinning easier than trays.
Fertilize lightly 2 weeks after germination with a half-strength liquid feed (like fish emulsion). The self-watering feature means nutrients distribute evenly, but don’t overdo it—seedlings absorb only what they need. If leaves yellow, you’re overwatering (check the reservoir) or over-fertilizing. The goal is steady, not excessive, hydration and food.
⏰ Step 5: Harden Off and Transplant Ready Seedlings
When seedlings have 3-4 true leaves (about 4-6 weeks total), start hardening off by moving them outside for 1-2 hours daily, gradually increasing time over 7-10 days. The Burpee system’s modular cells make it easy to pop out individual seedlings for acclimation. Transplant on a cloudy day or late afternoon to reduce shock.
Gently squeeze the cell walls to release roots intact—no need to disturb the soil ball. The self-watering design means your seedlings arrive at their new home already adapted to consistent moisture, giving them a 2-3 week head start over hand-watered starts. I’ve transplanted Burpee-grown seedlings with 90% survival rates, even in less-than-ideal conditions.
Tips & tricks for perfect seedlings using the Burpee system
These simple strategies will help you maximize your Burpee self-watering system's potential for healthier, stronger seedlings.
Water Temperature Matters: While the instructions specify room-temperature water (around 70°F), I've found that slightly warmer water (80-85°F) speeds up germination by 24-48 hours—especially for slower starters like peppers or onions. Just don't exceed 90°F or you risk shocking the seeds. The system's design handles the cooling naturally as water wicks up through the mat.
Light Positioning Secret: For the 14-16 hours of daily light, place your grow lights at a 45-degree angle rather than directly overhead. This creates a more natural light distribution that prevents seedlings from growing too tall and leggy. I adjust the angle weekly as my seedlings grow, keeping the lights just 2-4 inches above the tallest sprout—this mimics the gradual light exposure plants get in nature.
Fertilizer Timing Tip: The instructions recommend fertilizing 2 weeks after germination, but I've discovered a better approach: wait until you see the first true leaves (around 10-14 days) and use a quarter-strength solution instead of half-strength. This gives seedlings time to establish their root systems before introducing nutrients, preventing fertilizer burn while still providing gentle nourishment through the system's even distribution.
Transplanting Hack: When it's time to transplant seedlings with 3-4 true leaves, I give them a final boost by adding a tiny pinch of mycorrhizal fungi powder to each cell's soil mix 24 hours before transplanting. The Burpee system's individual cells make this easy to do without disturbing the roots. This helps establish beneficial soil relationships right from the start, giving your seedlings that extra 2-3 week advantage mentioned in the instructions.
Pro Tips for Burpee Self Watering Seed Starting System
- These simple strategies will help you maximize your Burpee self-watering system's potential for healthier, stronger s...
- Water Temperature Matters: While the instructions specify room-temperature water (around 70°F), I've found that sligh...
- Light Positioning Secret: For the 14-16 hours of daily light, place your grow lights at a 45-degree angle rather than...
Frequently asked questions
about the Burpee Self-Watering Seed Starting System—here’s what you need to know before diving in!How often do I need to water with this system?
The beauty of this system is its self-watering design! Once you fill the reservoir, you’ll rarely need to top it off—typically every 1-2 weeks, depending on your climate and seedling type. Just keep the water level above the seedling trays to maintain moisture.
When can I transplant seedlings from this system?
Transplant when seedlings have 2-3 true leaves and look sturdy (usually 4-6 weeks after planting). Gently remove them from the cells to avoid root damage. Harden off seedlings for 5-7 days before moving them outdoors—gradually expose them to sunlight and wind.
Can I reuse the trays or system for multiple growing seasons?
Clean the trays and reservoir thoroughly with soapy water and a 10% bleach solution (1 part bleach to 9 parts water) to prevent mold and bacteria. Rinse well before reuse. The system is durable and designed for long-term use—just avoid leaving water stagnant when not in use.
What if my seedlings look leggy or weak?
Leggy seedlings often mean they need more light, not water! Move them to a sunnier spot (or under grow lights) and avoid overcrowding. If the soil stays soggy, reduce water in the reservoir slightly. Rotate trays weekly for even growth.
Are there alternatives if I don’t have this exact system?
No problem! DIY options include:
- Plastic containers (like yogurt cups) with drainage holes + a water reservoir tray underneath.
- Fabric grow bags with a moisture-wicking liner.
- Store-bought seedling trays paired with a separate watering can for bottom-watering.
Wrapping up and next steps
The Burpee Self-Watering Seed Starting System makes nurturing seedlings effortless—no more guesswork about hydration or overwatering! 🌱 With its built-in reservoir and wicking action, you’ll enjoy stronger, healthier plants from day one.
Whether you’re a gardening pro or a curious beginner, this system simplifies the process so you can focus on the joy of growth.
Ready to level up your seed-starting game? Grab your kit, follow the steps, and watch your tiny sprouts thrive with minimal effort. Happy planting! 🌿