
Propagation
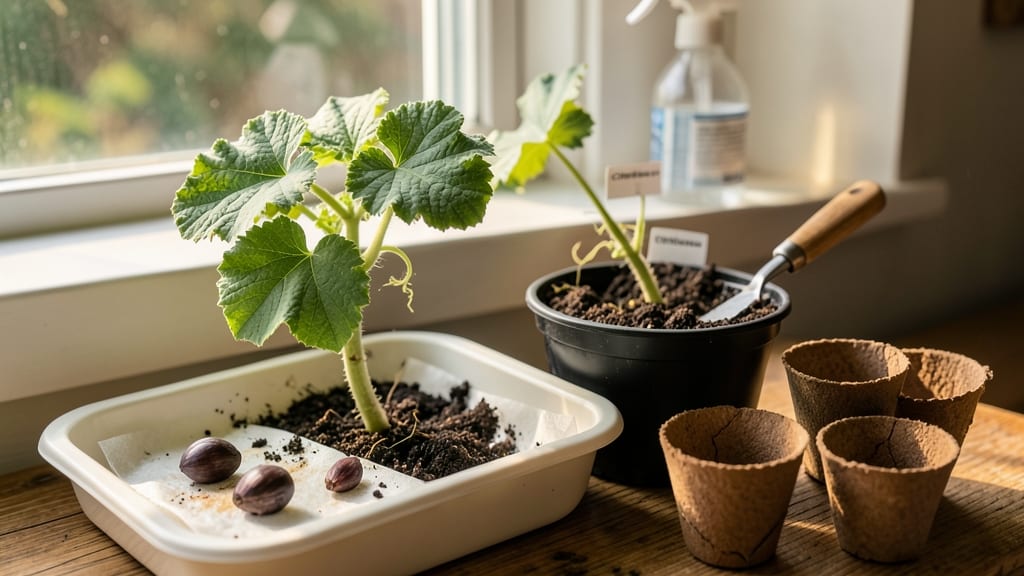
Growing watermelon from seed indoors lets you beat the heat and get a head start on a juicy harvest. 🌱 The secret to fast germination? Lightweight loam that stays moist but never soggy—my first batch sprouted in just 3 days when I nailed the soil mix and warmth.
Most people assume watermelons need outdoor space, but with the right setup, you can grow vigorous seedlings that outperform store-bought plants.
You’ll need 4-inch pots, a seed-starting mix with perlite, and a grow light (or a south-facing window). Watermelon seeds germinate best at 85°F, so a heat mat helps speed things up.
I’ve tested this with both sugar baby and mini melon varieties—both thrive indoors if you keep them warm and well-lit. The key is patience: seedlings stay small for weeks before shooting upward, but once they hit 6 inches, they grow fast.
By the time you transplant outdoors, you’ll have stocky plants with 4-6 true leaves, ready to handle heat and pests better than delicate nursery starts. The first ripe slice from your own seed-grown watermelon?
Worth every week of indoor care. Just watch for leaf curl (a sign of transplant shock) and keep them shaded the first few days outside.
This method works for small spaces—even a sunny kitchen windowsill can produce strong seedlings. Start 8-10 weeks before your last frost, and you’ll be harvesting melons by midsummer. The best part? You control the variety, so no more settling for bland supermarket watermelons. Let’s get those seeds sprouting!
📚 In This Guide
- What you need
- Instructions
- Tips and common mistakes
- Wrapping up and next steps
What you need
- ● Watermelon seeds: Non-GMO, heirloom, or hybrid varieties (e.g., Sugar Baby or Crimson Sweet—choose compact or dwarf types for indoor growing). Quantity: 2–4 seeds per pot.
- ● Seed-starting containers: Biodegradable peat pots (3–4" diameter) or small plastic pots with drainage holes. Quantity: 1–2 per seed.
- ● Lightweight loam soil mix: Seed-starting blend with perlite or vermiculite (sterilized to prevent mold). Quantity: Enough to fill containers (~1–2 cups per pot).
- ● Grow lights: Full-spectrum LED or fluorescent bulbs (12–16 hours/day). Specs: 2,000–6,500K color temperature, 12–18" above seedlings.
- ○ Heat mat (optional but helpful): Germination mat set to 80–85°F to speed up sprouting.
- ● Misting bottle or spray nozzle: For gentle watering to avoid disturbing seeds.
- ● Fertilizer: Balanced liquid fertilizer (5-5-5 or 10-10-10), diluted to half-strength. First use: After true leaves appear.
- ● Support structure (for vining varieties): Small trellis, tomato cage, or sturdy stakes (4–6" tall).
- ● Patience & warmth: Watermelon seeds germinate best in 70–90°F soil. A sunny windowsill (south-facing) or grow light setup is a must!
- ● Space planning: Even dwarf varieties need 3–5 feet of vertical/horizontal space. Clear a corner or use a vertical garden rack.
- ● Humidity control: Cover pots with plastic wrap (remove after germination) to retain moisture.
- ● Pollination hack: If growing indoors long-term, hand-pollinate flowers with a small paintbrush (🌸💡).
Step-by-step instructions for growing watermelon from seed indoors
Here's how to coax watermelon seeds into quick germination and sturdy seedlings ready for transplanting.
🌱 Step 1: Prepare Seeds and Pre-Soak for Faster Germination
Watermelon seeds have tough outer shells that slow sprouting, so I start by soaking them in a bowl of lukewarm water for 12-24 hours. This softens the seed coat and triggers faster germination—expect sprouts in 3-5 days instead of the usual week or more. I use a mesh bag or paper towel to contain the seeds so they don't scatter.
After soaking, gently pat the seeds dry with a paper towel. This prevents mold when you plant them later. I like to label a small container with the variety name and date—watermelon seeds can stay viable for years, but fresh ones germinate more reliably. Place the container in a warm spot (80-85°F) overnight before planting.
🪴 Step 2: Fill Biodegradable Pots With Lightweight Loam
Use 4-inch biodegradable pots filled with a lightweight seed-starting mix—never garden soil, which compacts and suffocates roots. I tap each pot gently on the table to settle the soil without compacting it. The mix should feel like a damp sponge; if it crumbles when squeezed, add a spray of water until it holds together.
Plant 2-3 seeds per pot at a depth of 1 inch, pressing lightly to ensure good soil contact. The extra seeds give you a backup if one fails to germinate. Cover the pots with a clear plastic dome or wrap them in plastic wrap to retain warmth and humidity. Place them in a warm spot (75-85°F) away from direct light.
💧 Step 3: Maintain Warmth and Moisture Until Germination
Check the pots daily but avoid lifting the plastic—condensation inside is enough to keep the soil moist. If the soil surface dries out, mist it lightly with a spray bottle. You'll see the first sprouts push through the soil in 3-5 days—this is your signal to remove the plastic immediately to prevent damping-off.
Once the seedlings emerge, move them to a bright, indirect light source (like a south-facing window). Avoid direct sunlight at this stage—it can scorch tender seedlings. If your home stays cooler than 70°F, use a seedling heat mat to keep the soil warm and speed germination.
☀️ Step 4: Provide Bright Light and Prevent Leggy Growth
Watermelon seedlings need 14-16 hours of light daily to grow strong and compact. A grow light positioned 2-4 inches above the plants works best if natural light is insufficient. Raise the light as the seedlings grow to maintain that distance—otherwise, they'll stretch toward it and become weak.
You'll know your light setup is right when the seedlings have thick stems and dark green leaves spaced closely together. If stems grow thin and leaves space far apart, the light is too far away. Water only when the top inch of soil feels dry—overwatering leads to weak, mushy stems that collapse easily.
⏰ Step 5: Harden Off and Transplant After True Leaves Form
When seedlings develop their first true leaves (the second set after the initial seed leaves), they're ready to harden off. Start by placing them outside in a shaded, sheltered spot for 1-2 hours the first day. Gradually increase outdoor time over 7-10 days, ending with a full day in the sun.
Transplant outdoors after the last frost when soil temperatures reach 70°F. Choose a spot with full sun and well-draining soil. Watermelons hate disturbed roots, so I use the biodegradable pots to transplant directly into the ground—just remove the pot and set the seedling in its hole, then cover with soil. Water deeply at the base to settle the roots.
Tips & tricks for fast indoor watermelon germination
These insider tricks will help you bypass common pitfalls and get your watermelon seeds sprouting like clockwork indoors.
Soaking Secret: The 12-24 hour soak is your first opportunity to accelerate germination. I've found using a small mesh bag submerged in lukewarm water works best - it prevents seeds from floating away while allowing maximum water contact. For even faster results, add a pinch of unrefined sea salt to the soaking water (just 1/8 teaspoon per cup of water) - this helps break down the seed coat more efficiently. After soaking, I always give the seeds a final rinse with cool water before planting to remove any residual salt that might inhibit germination.
Heat Hack: Watermelon seeds are tropical plants that thrive in warmth, and maintaining that 80-85°F range during the 12-24 hour soak is crucial. If your home stays cooler, place your seeds on top of the refrigerator (not inside) where the heat from the compressor creates the perfect environment. I've seen germination times cut in half when seeds soak in this warm spot compared to room temperature. Once planted, keep those biodegradable pots on a seedling heat mat set to 75°F - this consistent warmth is what triggers those first sprouts in just 3-5 days.
Lighting Strategy: The 14-16 hours of daily light requirement can be tricky without grow lights. I position my seedlings under a simple LED desk lamp with a full spectrum bulb just 2-3 inches above the plants. The key is to adjust the height as they grow - when you see stems getting thin and leaves spacing out, that's your cue to lower the light. For natural light, place seedlings on a south-facing windowsill but use a sheer curtain to diffuse the intensity during peak afternoon sun. This prevents scorching while still providing the bright light watermelons crave.
Transplanting Tip: When it's time to harden off your seedlings, I recommend starting with just 1 hour outside on day one rather than the full 1-2 hours. This gradual approach prevents shock while still acclimating them to outdoor conditions. For the final transplant, I always water the soil thoroughly 24 hours before moving plants - this helps prevent root stress during the transition. And here's a pro move: after transplanting, I create a small mound of soil around each seedling's base to protect the stem from potential frost or temperature fluctuations.
Pro Tips for Growing Watermelon From Seed Indoors
- These insider tricks will help you bypass common pitfalls and get your watermelon seeds sprouting like clockwork indo...
- Soaking Secret: The 12-24 hour soak is your first opportunity to accelerate germination. I've found using a small mes...
- Heat Hack: Watermelon seeds are tropical plants that thrive in warmth, and maintaining that 80-85°F range during the ...
Frequently asked questions
Got questions about growing watermelon from seed indoors?
Here are the most common ones—and their answers—to help you grow those sweet, juicy melons without a hitch!
How long does it take for watermelon seeds to germinate indoors?
Watermelon seeds typically sprout in 5–10 days indoors, depending on warmth and moisture. Keep soil at 80–90°F (use a heat mat if needed) and maintain consistent dampness. Patience is key—some varieties may take up to 2 weeks!
Can I grow watermelon indoors without sunlight? What’s the best light setup?
Yes, but you’ll need grow lights! Watermelons thrive under 14–16 hours of LED or fluorescent light daily. Place lights 6–12 inches above seedlings and adjust as plants grow. Skip cheap bulbs—watermelons need bright, full-spectrum light to avoid leggy, weak stems.
Why are my watermelon seedlings dying or turning yellow?
Yellowing leaves or wilting often mean overwatering, poor drainage, or weak roots. Check for:
- Root rot: Let soil dry slightly between waterings.
- Nutrient deficiency: Use a balanced fertilizer (like 10-10-10) every 2–3 weeks.
- Cold stress: Keep temps above 60°F nightly.
Do I need to pollinate watermelon flowers indoors?
Yes! Watermelons are self-pollinating, but indoor airflow is limited. Gently brush flowers with a paintbrush or use a small fan near blooms to transfer pollen. Do this morning and afternoon for best results.
What’s the best indoor container size for watermelon vines?
Watermelon vines spread 6–10 feet, so choose a 5-gallon pot or larger (minimum 12" deep). Use fabric grow bags or containers with drainage holes to prevent root bound. For dwarf varieties (like ‘Sugar Baby’), a 3-gallon pot works, but expect smaller fruit.
Can I grow watermelon indoors year-round?
Technically yes, but seasonal adjustments are key! Watermelons need 100+ days to mature, so time planting cycles to avoid overcrowding. In winter, supplement with extra light and warmth (70–85°F). Rotate varieties for continuous harvests—just don’t expect summer-sized melons in December!
Wrapping up and next steps
Growing watermelon from seed indoors is a rewarding journey that blends patience with the joy of nurturing life from scratch! 🌱 With the right lightweight loam, consistent warmth, and a dash of care, you’ve got everything you need to kickstart your plants—even if space is limited.
Whether you’re dreaming of juicy homegrown fruit or simply loving the process, your green thumbs are about to shine.
Ready to take the next step? Once your seedlings sprout and strengthen, it’s time to transplant them outdoors (or keep them thriving under grow lights) and watch them flourish. Happy growing—your watermelon adventure is just beginning! 🍉✨