
Size
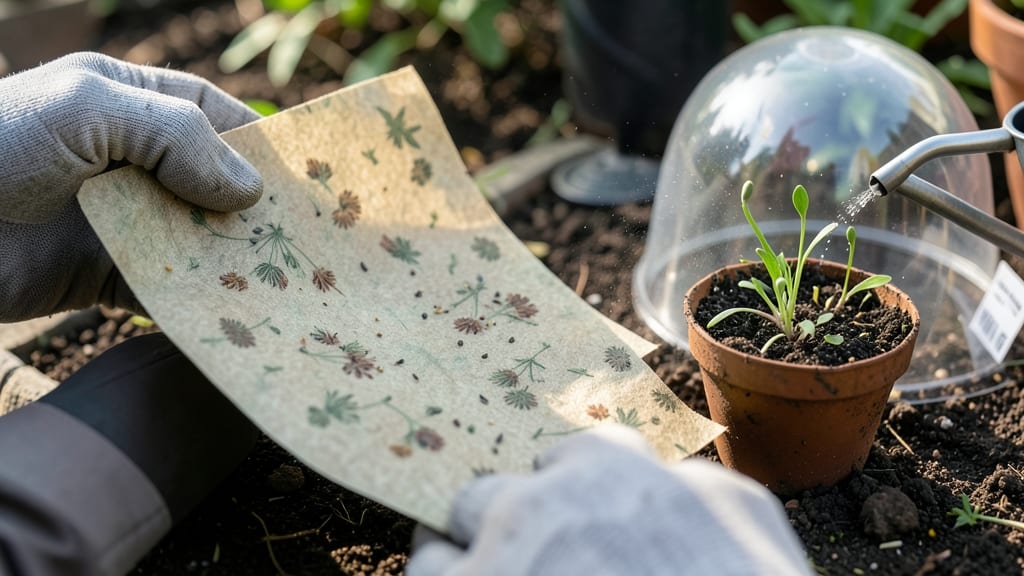
Growing flowers from seed paper feels like magic—just water, wait, and suddenly you have blooms. 🌸 I've turned these plantable cards into everything from wedding favors to wildflower meadows, and the process is simpler than you'd think. No soil prep, no transplanting, just scatter and watch nature take over.
The secret lies in the paper itself, which blends wildflower seeds with a soil-like pulp. You'll need a sunny spot, regular watering, and patience—sprouts appear in 7-14 days if conditions are right. The best part? These cards break down naturally, leaving zero waste behind.
By summer, you'll have vibrant blooms that attract pollinators and brighten any space. Perfect for beginners, eco-conscious gardeners, or anyone who wants instant flowers without the fuss. Here's how to make it work every time.
Works year-round in mild climates, or use them as spring/summer projects. The possibilities are endless—think giftable plantable cards, meadow starters, or even temporary ground cover for events. Let's get growing!
📚 In This Guide
- What you need
- Instructions
- Tips and common mistakes
- Wrapping up and next steps
What you need
- ● Seeds: Choose fast-growing wildflowers (e.g., cosmos, sunflowers, or marigolds). Aim for 1–2 teaspoons per sheet (about 10–20 seeds).
- ● Unbleached paper: Use 100% recycled, unbleached paper (e.g., printer paper, cardstock, or watercolor paper). Cut into 5x7-inch sheets (standard card size).
- ● Water: 1 cup (for mixing). Use filtered or rainwater if possible.
- ● Blender or food processor: To turn paper into pulp.
- ● Large mixing bowl: For combining pulp and seeds.
- ● Rolling pin or smooth surface: To flatten the seed paper.
- ● Plastic wrap or parchment paper: For drying.
- ● Scissors or paper cutter: To trim edges after drying.
- ● Essential oils (e.g., lavender or citrus): Add a few drops to the pulp for a pleasant scent.
- ● Natural dyes (e.g., beet juice, turmeric): For colored seed paper.
- ● Seed paper mold or silicone mat: For uniform thickness.
- ● Drying rack or wire mesh: Speeds up drying time.
- ○ Glue (optional): A tiny bit of flour paste can help bind stubborn pulp.
- ● Access to a sunny outdoor space (for planting later).
- ● Patience! Seed paper takes 24–48 hours to dry.
Step-by-step instructions for crafting seed paper
Here's how to transform ordinary paper into living, blooming art—no green thumb required.
🌱 Step 1: Gather Materials and Prepare the Base
Start with unbleached paper pulp (available at craft stores) and mix it with water in a bowl until you achieve a thick, paste-like consistency. I like to use a blender for this—it saves time and ensures even distribution. Add wildflower seeds (about 1 teaspoon per sheet) to the pulp mixture and stir thoroughly. The seeds should be fully coated but not buried.
If you're using pre-made seed paper kits, skip blending and follow the package instructions for mixing. The goal is a smooth, workable paste that holds its shape when pressed. Too much water makes the paper flimsy; too little makes it impossible to spread evenly. Aim for a texture like wet sand that clings together when pressed between your fingers.
💧 Step 2: Spread and Shape the Seed Mixture
Lay a silicone mat or parchment paper on a flat surface—this prevents sticking. Using a plastic spreader or your hands (cleaned thoroughly), spread the seed-pulp mixture evenly across the mat to create a thin, uniform layer. I press gently with a second silicone mat to squeeze out excess moisture and create a smooth surface. The final sheet should be about 1/16 inch thick—thicker sheets take longer to dry and may crack.
For decorative designs, use cookie cutters or stencils before the mixture dries. Press shapes firmly into the wet pulp, then lift to create intricate patterns. Once shaped, let the sheets dry completely—this takes 24-48 hours depending on humidity. You'll know they're ready when edges feel crisp and no moisture remains when touched.
☀️ Step 3: Plant and Maintain for Germination
Once dry, your seed paper is ready to plant. Place each sheet directly on prepared soil in a garden bed or container, pressing lightly to ensure contact with the earth. Water gently but thoroughly—aim for 1/2 inch of moisture in the top layer of soil. Avoid soaking the paper, as excess water can cause it to disintegrate before seeds germinate.
Keep the soil consistently moist (not soggy) for 7-14 days until you see the first signs of sprouting. Place the paper in a location with 4-6 hours of sunlight daily—partial shade works for delicate flowers, but full sun encourages robust growth. You'll notice tiny green shoots pushing through the paper within a week, signaling successful germination. At this stage, the paper will begin to decompose naturally, enriching the soil as roots establish.
✂️ Step 4: Care for Emerging Flowers
Once seedlings reach 2-3 inches tall, thin them if overcrowded—this prevents competition for nutrients. Gently remove weaker sprouts with your fingers, leaving the healthiest plants spaced 3-4 inches apart. Water at the base rather than overhead to avoid damaging delicate stems or washing away soil.
Fertilize lightly with a balanced, water-soluble fertilizer (diluted to half-strength) when flowers first appear. Most wildflower seed paper blooms within 6-8 weeks, though some varieties may take longer. Deadhead spent blooms to encourage continuous flowering. The paper will fully decompose within 3-6 months, leaving only vibrant flowers and enriched soil behind.
Tips & tricks for perfect seed paper growth
Between us, crafting seed paper is where creativity meets eco-conscious gardening. Here are the game-changers that'll ensure your blooming masterpiece thrives from start to finish.
Seed Distribution Secret: When mixing your wildflower seeds into the pulp, aim for an even spread where every pinch of the mixture contains a few seeds. I learned this the hard way—clumping seeds creates patchy germination. Stir thoroughly after adding the 1 teaspoon per sheet, then give the bowl a quick shake to break up any hidden clusters. The goal is a consistent distribution so every section of your paper has equal potential to sprout.
Drying Strategy: The 24-48 hour drying window is your best friend, but humidity can turn it into a nightmare. If your kitchen feels damp, prop open a window or use a small fan on low to circulate air around your drying sheets. Too much moisture during drying causes warping or cracking—both ruin the delicate structure. For extra insurance, place a shallow tray of rice near your drying rack; the rice absorbs excess moisture from the air without affecting your paper.
Planting Precision: Pressing your seed paper into soil requires just enough contact to trigger germination without smothering the seeds. Think of it like tucking a blanket around a baby—firm but gentle. Use the flat side of a spoon to press the paper into prepared soil, then give it a light pat. This ensures seeds make contact with earth while leaving room for roots to push through naturally. Over-pressing can create a barrier that prevents sprouting.
Sunlight Savvy: The 4-6 hours of daily sunlight recommendation is non-negotiable for most wildflower varieties, but there's a trick to maximize this window. Position your seed paper to capture morning sun and late afternoon light—these are the gentlest on delicate seedlings. If you're working with shade-loving varieties, supplement with a grow light for 2-3 hours daily until they establish. Too much harsh midday sun can scorch tender new growth before it even gets a chance to thrive.
Pro Tips for Grow Seed Paper
- Between us, crafting seed paper is where creativity meets eco-conscious gardening. Here are the game-changers that'll...
- Seed Distribution Secret: When mixing your wildflower seeds into the pulp, aim for an even spread where every pinch o...
- Drying Strategy: The 24-48 hour drying window is your best friend, but humidity can turn it into a nightmare. If your...
Frequently asked questions
Got questions about growing your own seed paper? You’re not alone—this eco-friendly project is full of curiosity! Here are answers to the most common queries to help you bloom with confidence.
Can I plant seed paper anywhere, or does it need special soil?
Seed paper thrives in well-draining, nutrient-rich soil with plenty of sunlight (6+ hours daily). Avoid compacted or waterlogged areas—it needs room to root! For best results, plant in garden beds, pots, or even hanging baskets. If your soil is poor, mix in compost for a nutrient boost.
How long does it take for seed paper to sprout and bloom?
Sprouting usually takes 7–14 days after planting, depending on moisture and warmth. Blooms vary by flower type: wildflowers may take 6–8 weeks, while herbs like basil can sprout in 1–2 weeks. Keep the soil moist but not soggy—patience is key!
Do I need to water seed paper differently than regular seeds?
Yes! Seed paper stays moist longer, so light misting 1–2 times daily is ideal until sprouts appear. Once established, water deeply 2–3 times a week. Overwatering can drown seeds, while underwatering may slow growth. A spray bottle works great for gentle hydration.
What if my seed paper doesn’t sprout? Troubleshooting tips?
Don’t worry—try these fixes:
- Check moisture: Press the soil; it should feel damp like a wrung-out sponge.
- Verify sunlight: Move to a sunnier spot if growth stalls.
- Test seed viability: Some seeds (like basil) may need warmth (70°F+) to germinate.
- Replant: If no sprouts after 3 weeks, try planting fresh seed paper.
Can I use seed paper for indoor gardening or just outdoors?
Seed paper works indoors with grow lights (12–16 hours/day) or near sunny windows. For herbs like thyme or basil, a sunny kitchen windowsill is perfect. Just ensure good airflow to prevent mold. Outdoor planting is easier, but indoor success is totally doable with the right setup!
Wrapping up and next steps
Growing seed paper is a rewarding way to combine creativity with eco-friendly gardening—perfect for small spaces, gifts, or even classroom projects! 🌱 With just a few supplies and a little patience, you’ll soon have vibrant blooms sprouting from your handmade paper.
Ready to take the next step? Try experimenting with different seeds or paper textures to personalize your creations, or share your blooming masterpiece with friends!
💡 Pro Tip:
Once your flowers bloom, harvest seeds to make even more seed paper—sustainability at its finest!