
Lawn
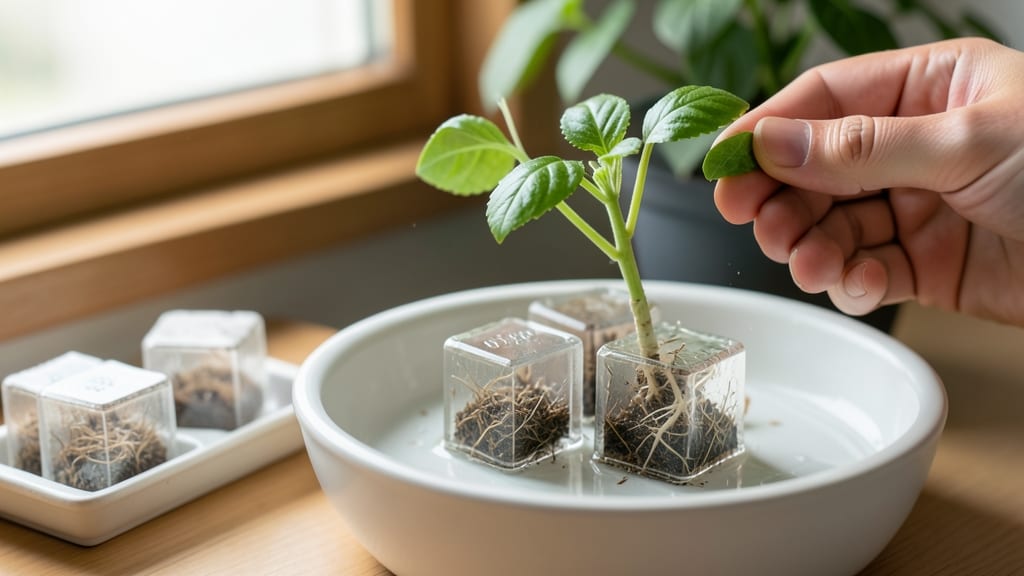
Seed starter cubes let you grow seedlings in half the time without messy soil. 🌱 I used to struggle with damping-off and weak seedlings until I discovered how these little cubes create the perfect environment for fast germination.
No soil prep, no transplant shock—just pop in a seed, add water, and watch roots grow in days. The cubes work like tiny sponges, holding moisture while providing just enough air to roots.
You’ll see sprouts in 3-5 days for fast growers like lettuce or basil, and they handle delicate seedlings like tomatoes and peppers better than traditional trays. The best part? No need to wait for soil to warm up—these work indoors all winter long.
By the time you’re ready to transplant, your seedlings will be stocky and strong, with roots already established in the cube. That means less shock and better survival rates when moving them to soil. Perfect for beginners and busy gardeners who want reliable results without the fuss.
Works for flowers, herbs, and vegetables alike. Here’s how to get started with your first batch!
📚 In This Guide
- What you need
- Instructions
- Tips and common mistakes
- Wrapping up and next steps
What you need
- ● Seed starter cubes – 10-50 cubes (quantity depends on your planting goals; 10-20 is great for beginners). Look for biodegradable options made from peat, coconut coir, or recycled materials.
- ● Seeds – Choose fast-growing varieties like lettuce, herbs (basil, parsley), or flowers (marigolds, sunflowers) for best results.
- ● Water – Room-temperature, preferably filtered or rainwater to avoid chlorine.
- ● Spray bottle – A 16-ounce misting bottle for gentle hydration (avoid overwatering!).
- ○ Clear plastic dome or ziplock bag – Optional but helpful for creating a mini greenhouse effect (use a quart-sized bag for small batches).
- ● Tray or shallow container – A 10x20-inch plastic seed tray or even a repurposed egg carton to hold cubes in place.
- ● Plant labels – Toothpicks or biodegradable labels to track seed types.
- ● Grow light or sunny windowsill – A LED grow light (6-12 inches above cubes) or a south-facing window for 6+ hours of light daily.
- ● Fertilizer – A balanced, water-soluble fertilizer (5-5-5 or 10-10-10) diluted to half-strength for feeding seedlings after 2-3 weeks.
- ● Tweezers or popsicle stick – For gently placing seeds into cubes without crushing them.
Step-by-Step instructions for using seed starter cubes
Here's how to get those seedlings popping in record time—no soil mess, no fuss.
🌱 Step 1: Soak the Cubes for Optimal Moisture
Place your seed starter cubes in a shallow tray or bowl and add enough water to completely submerge them. Let them soak for 10-15 minutes until they expand to about double their original size and feel spongy to the touch. You'll know they're ready when water stops beading on the surface.
Drain any excess water—soggy cubes won't work. I like to lay them flat on a paper towel to absorb the extra moisture while keeping them damp. This step is critical because dry cubes will slow germination or even prevent it entirely.
💧 Step 2: Load the Cubes into Your Tray
Arrange the soaked cubes into your seed-starting tray, pressing them snugly together so they stay upright. The cubes will hold their shape without needing soil, which is why this method works so well for beginners. I use a 48-cell tray to get 4 servings of strong seedlings.
Gently press each cube into the tray until it stands firm. If any cubes feel unstable, add a tiny bit of water to help them settle. The goal is to create a stable base where roots can anchor and grow without toppling over.
✂️ Step 3: Plant Your Seeds with Precision
Follow the seed packet instructions for depth—usually twice the seed diameter. I use a toothpick to make a small hole in the center of each cube, then drop in 1-2 seeds per cube. Cover lightly with a pinch of the cube material itself (no extra soil needed).
Label each cube with the plant variety and date using a toothpick and a permanent marker. This is the moment that matters: planting too deep delays germination, while planting too shallow risks drying out the seed. A gentle press with your finger ensures good seed-to-cube contact.
☀️ Step 4: Provide Warmth and Light for Germination
Cover the tray with a clear plastic dome or plastic wrap to create a mini greenhouse. Place it in a warm spot—70-75°F is ideal—like on top of your fridge or near a sunny window. You'll see sprouts in as little as 3-7 days, depending on the plant type.
Check daily for condensation on the dome. If it's foggy inside, the humidity is perfect. Once 50% of seeds have sprouted, remove the dome immediately to prevent damping-off. Strong seedlings will have thick stems and vibrant green leaves within 10-14 days.
🌿 Step 5: Transition to Light and Care for Growth
Move the tray to a bright spot with 12-16 hours of light daily. A south-facing window or grow light works best. You'll notice leggy growth if the light is too weak—this means the seedlings are stretching toward any available light source.
Water from the bottom by adding ¼ inch of water to the tray. The cubes will absorb moisture as needed, preventing overwatering. Fertilize lightly with a diluted liquid fertilizer after the first true leaves appear—this is your signal that the seedlings are ready for a little extra nutrition.
Tips & tricks for perfect seed starter cubes
These little tricks will help your seedlings sprout faster and stronger than ever before!
Soaking Secret: When soaking your cubes for those critical 10-15 minutes, use lukewarm water instead of cold. The warmer temperature helps kickstart the germination process immediately, giving you faster results. I like to add a tiny pinch of sea salt to the water—it helps prevent any potential mold growth while the cubes soak.
Tray Stability Tip: For Step 2, if you're using a 48-cell tray and notice some cubes wobbling after pressing, try this: lightly mist the bottom of each unstable cube with water, then press again. The extra moisture creates temporary adhesion while the cubes settle. This simple trick prevents toppling during the germination phase, especially important for delicate seedlings.
Lighting Hack: To maximize that 12-16 hours of light in Step 5, place your tray on a rotating turntable or turn it 180 degrees every 24 hours. This ensures all seedlings get equal light exposure, preventing lopsided growth. If you don't have a turntable, just rotate the tray by hand—your seedlings will thank you with uniform, strong stems!
Germination Timing: The 3-7 days window for sprouting can feel like forever, but there's a trick to speed things up: place your covered tray on top of your fridge (where it's naturally 75°F) during the day, then move it to a sunny windowsill at night. This temperature fluctuation mimics natural conditions and often brings those first sprouts within 3 days instead of 7!
Pro Tips for Seed Starter Cubes
- These little tricks will help your seedlings sprout faster and stronger than ever before!
- Soaking Secret: When soaking your cubes for those critical 10-15 minutes, use lukewarm water instead of cold. The war...
- Tray Stability Tip: For Step 2, if you're using a 48-cell tray and notice some cubes wobbling after pressing, try thi...
Frequently asked questions
Got questions about seed starter cubes?
You’re not alone! Here are answers to the most common ones to help you grow confidently.
How do I know if my seed starter cubes are ready to transplant?
Your seedlings are ready when they’ve developed 2-3 true leaves (not just the initial seed leaves) and the cubes are fully rooted through the bottom. Gently squeeze the cube—if roots cling together, they’re transplant-ready! Avoid letting them dry out or get waterlogged before moving them to soil.
Can I use seed starter cubes with all types of seeds?
Most small seeds (like herbs, lettuce, and flowers) thrive in cubes, but larger seeds (e.g., beans, peas, or corn) may need more space. For these, use a deeper tray or pre-sprout them in a damp paper towel before transferring. Always check the seed packet for specific recommendations!
Why are my seed starter cubes moldy or mushy?
Mold or mushiness usually means overwatering or poor airflow. Let cubes dry slightly between waterings (top layer should feel damp, not soggy), and avoid stacking trays. If mold appears, discard the affected cubes and use a 1:10 hydrogen peroxide solution (1 part peroxide to 10 parts water) to sanitize your setup next time.
Are seed starter cubes reusable?
No—they’re designed for one-time use because they break down as roots grow. However, you can compost them after use! For a sustainable hack, repurpose the trays for soil blocks or seedling pots with coconut coir or peat pellets instead.
What’s a good alternative if I can’t find seed starter cubes?
No problem! Try these DIY options:
- Coconut coir bricks: Soak and use like cubes.
- Peat pellets: Expand with water for a similar texture.
- Paper towels: Fold into a "pouch," dampen, and place seeds inside (great for sprouting!).
- Egg cartons: Poke drainage holes and fill with soil.
Wrapping up and next steps
Seed starter cubes are a game-changer for gardeners looking to skip the soil stress and nurture fast, robust seedlings with ease! 🌱 Whether you're a beginner or a seasoned pro, these cubes offer a low-mess, high-reward way to jumpstart your plants—no greenhouse or fancy equipment needed.
The key? Patience, consistency, and a little love as you watch your seeds transform into thriving starters.
Ready to take the next step? Grab your cubes, pick your favorite seeds, and start experimenting—your future garden (and your lawn!) will thank you. Happy growing! 🌿