
Lawn
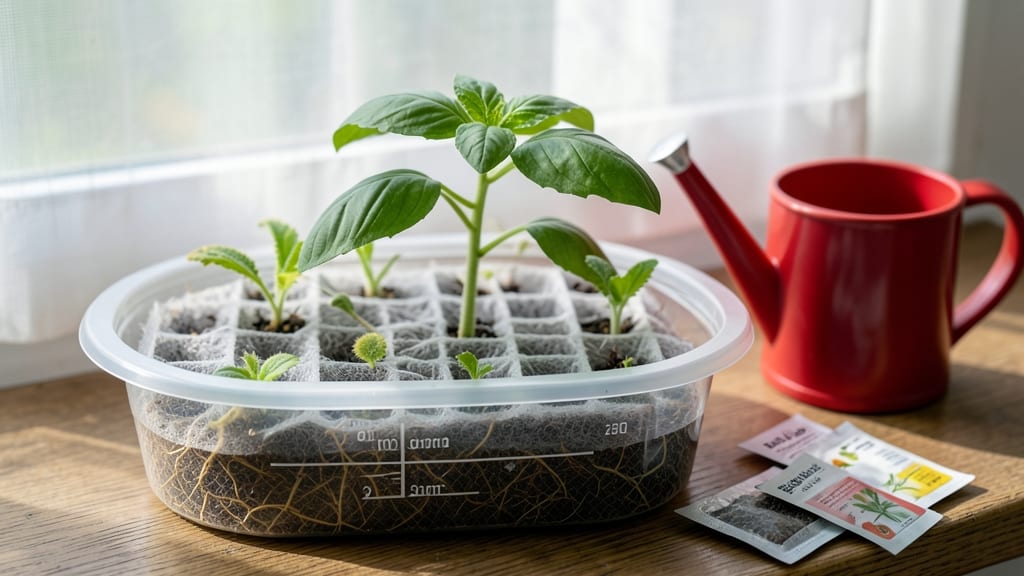
Self-watering seed starters cut the guesswork out of germination, so you never have to worry about drying out your precious seeds again. 🌱 I've tested everything from store-bought trays to repurposed plastic containers, and the right setup makes all the difference—especially when you're dealing with fussy seeds like lettuce or delicate herbs.
No more checking moisture levels every hour or watching seedlings shrivel from inconsistent watering. The magic happens with a simple wicking system: a reservoir at the bottom feeds water upward through a wick or absorbent material, keeping soil consistently moist without drowning roots.
My favorite DIY version uses a clear plastic clamshell with a wick made from a folded paper towel—it's cheap, reusable, and works like a charm for 20+ seedlings at once. Commercial options are pricier but often more durable, with built-in trays and removable inserts for easy transplanting.
You'll see those first green shoots break through the soil in 5-10 days, depending on the seed, and they'll stay sturdy through the critical first two weeks. The biggest advantage?
No more black thumb moments—even if you travel or forget to water, these starters keep seeds happy until they're ready for their next home. Whether you're growing on a sunny windowsill or under grow lights, this method works for any space. Here's how to set yours up without the stress!
📚 In This Guide
- What you need
- Instructions
- Tips and common mistakes
- Wrapping up and next steps
What you need
- ● Clear plastic bottle (16–20 oz): Any clean, empty bottle with a cap (soda or water bottles work great). Remove the label and cut the top portion (see instructions for specifics).
- ● Scissors or box cutter: For precise cutting—safety first, folks! Wear gloves if needed.
- ● Potting soil: A lightweight, seed-starting mix (avoid garden soil—it’s too dense!). Quantity: ~1 cup per starter.
- ● Seeds: Your favorite flowers, herbs, or veggies (check seed packets for planting depth!).
- ● Water: Room-temperature or slightly warm water (never cold).
- ○ Optional but helpful: Hole punch or nail (to create drainage holes in the bottle).
- ● Ruler or measuring tape (for even cuts).
- ● Spray bottle (for gentle watering).
- ● Twine or rubber band (to secure the bottle if needed).
Step-by-step instructions for building a DIY self-watering seed starter
Here's how to create a simple, foolproof system that keeps seedlings happy with minimal effort.
🪴 Step 1: Gather and Prepare Your Materials
You'll need a 4-inch deep plastic container (like a takeout tray), 4-6 small pots (2-3 inches deep), a wick material (cotton string or felt strips), potting mix, and your seeds. Cut the wick material into 6-inch lengths—each pot will get one. Poke a small hole in the bottom of each pot, then place them inside the larger container.
Arrange the pots so they're 1-2 inches apart inside the container. This gives roots room to grow without crowding. The larger container will hold water that feeds all seedlings through the wicks. Here's the thing—this setup works best with 4-6 pots because too many can compete for moisture.
💧 Step 2: Set Up the Wick System
Thread each wick through the drainage hole in a pot, then down into the bottom container. The wick should reach almost to the bottom of the larger container—this ensures steady moisture flow. Fill the bottom container with 1 inch of water (just enough to saturate the wicks).
Now fill each small pot with potting mix, leaving ½ inch of space at the top. Press the soil down lightly so it's firm but not compacted. Moisten the soil in each pot until it's damp to the touch—this helps the wicks draw water immediately. Watch for the wicks to darken as they absorb moisture; that's your confirmation the system works.
🌱 Step 3: Plant and Maintain Moisture
Follow seed packet instructions for depth, but keep it shallow—¼ inch deep is plenty. Plant 1-2 seeds per pot (you can thin later). Cover the seeds lightly with more potting mix, then mist the surface with water. Place the container in bright, indirect light (a south-facing window works well).
Here's where it gets easy: refill the bottom container only when the water level drops below ½ inch. The wicks will pull moisture up as needed, so you won't need to water from above. In 5-10 days, you'll see sprouts—no guesswork about overwatering or underwatering. Real talk: this system prevents damping-off (that sad, moldy seedling death) by keeping moisture consistent.
☀️ Step 4: Transition to Direct Light
Once seedlings have 2-3 true leaves (those are the second set after the initial cotyledons), move them to full sun for 4-6 hours daily. If using a grow light, position it 2-3 inches above the seedlings. You'll notice leggy growth if light is insufficient—stems stretch and leaves space far apart. That's your cue to adjust.
Continue refilling the bottom container as needed. The wicks will keep roots hydrated without soggy soil. After 3-4 weeks, when seedlings are sturdy, transplant them into larger pots or the garden. The wick system ensures they're never stressed by dry roots during the move.
Tips & tricks for perfect self-watering seed starters
These simple adjustments will help you avoid common pitfalls and maximize your seedling success.
Material Selection: For the 4-inch deep plastic container, opt for something with slightly textured sides—like a reusable takeout tray with ridges. This gives the wicks better grip and prevents them from sliding out when you fill the bottom container with 1 inch of water. I've used smooth plastic before, and the wicks would always shift, causing uneven moisture distribution. Also, make sure your small pots have drainage holes that are just large enough for the 6-inch wicks to thread through snugly—too big, and moisture will escape too quickly.
Wick Confirmation: After threading each wick through the drainage hole and into the bottom container, give it a gentle tug to ensure it's securely in place. The wick should reach almost to the bottom of the container, but not quite—this prevents it from sitting in standing water, which can cause rot. Once you fill the bottom container with 1 inch of water, the wicks should darken within minutes as they absorb moisture. If they don't, check for kinks or blockages in the wick material. This simple test confirms your system is ready to go before you even plant your seeds.
Light Transition Strategy: When moving seedlings from bright indirect light to full sun (after they've developed 2-3 true leaves), do it gradually over 3-4 days. Start with just 1-2 hours of direct sun on the first day, then increase by 1-2 hours each subsequent day. This gradual transition prevents sunburn, which can scorch delicate seedlings. I've seen seedlings go from healthy to crispy overnight when moved too quickly—trust me, this step saves you heartache. Also, position your grow light 2-3 inches above seedlings if using artificial light, and adjust the height as they grow to maintain consistent distance.
Pro Tips for Self Watering Seed Starter
- These simple adjustments will help you avoid common pitfalls and maximize your seedling success.
- Material Selection: For the 4-inch deep plastic container, opt for something with slightly textured sides—like a reus...
- Wick Confirmation: After threading each wick through the drainage hole and into the bottom container, give it a gentl...
Frequently asked questions
Got questions about self-watering seed starters? You’re not alone! Here’s a quick breakdown of the most common concerns—plus easy solutions to keep your seeds thriving with minimal effort.
How often do I need to water a self-watering seed starter?
A self-watering starter handles the heavy lifting, but check the water reservoir every 3–5 days to ensure it’s not empty. Most designs provide moisture for 1–2 weeks without refills, but humidity and seed type (like thirsty lettuce vs. drought-tolerant marigolds) can tweak timing. Pro tip: Fill the reservoir before planting—don’t wait until seeds sprout!
When should I transplant seedlings from a self-watering starter?
Transplant once seedlings have 2–3 true leaves (not the initial seed leaves) and fill out the starter cells. For most veggies, this takes 2–4 weeks; herbs and flowers may need just 1–2 weeks. Hardening off (acclimating to outdoor conditions) for 5–7 days before planting boosts survival rates. Watch for: Crowded roots circling the bottom—time to move them up!
What if my seeds aren’t germinating in the self-waterer?
First, verify seed viability (test a few in warm water—if they sink, they’re good!). Next, check:
- Temperature: Most seeds need 65–75°F (use a heat mat if your home runs cool).
- Moisture: Soil should stay consistently damp (not soggy). Press a finger in—it should feel like a wrung-out sponge.
- Light: Place under grow lights or a sunny window (6+ hours/day).
Can I reuse a self-watering seed starter?
Clean and sanitize between uses to prevent mold or disease. Soak in a 1:10 bleach-water mix for 10 minutes, rinse thoroughly, and let dry. For plastic trays, a dishwasher cycle works too. Pro tip: Sterilize before planting new seeds—even if it looks clean!
Are self-watering starters worth the investment over regular trays?
If you’re new to gardening or struggle with inconsistent watering, they’re a game-changer—especially for fussy seeds like basil or peppers. For budget-friendly options, try DIY versions (e.g., repurposed plastic containers with a wick system). Break-even point: If you save time and seeds, the cost pays off in 1–2 growing seasons.
Wrapping up and next steps
Ready to transform your gardening game with zero stress? 🌱 A self-watering seed starter is your secret weapon—no more guesswork, no more drowned seedlings, just consistent, effortless growth from day one.
Whether you’re a green thumb or a curious beginner, these starters make nurturing seeds simple, fun, and foolproof.
Now that you’re armed with the how-tos, tips, and answers, it’s time to roll up your sleeves! Start with a few easy-to-grow seeds like basil or marigolds, then expand your collection. Watch your garden thrive—and enjoy the pride of a job well done! 🌿✨