
Propagation
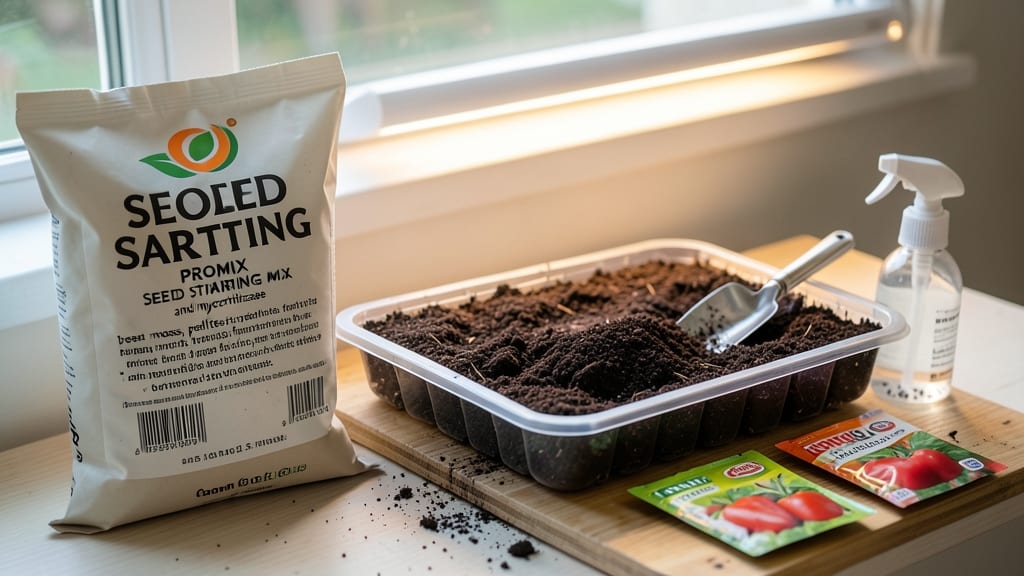
My seed starting mix game changed the moment I switched to Promix—those fussy seedlings finally thrived without the guesswork. 🌱 The secret lies in its perfect balance of moisture retention and airflow, which prevents the two biggest seedling killers: soggy roots and compacted soil.
No more black mold or leggy sprouts staring back at me from the windowsill. Start by filling your seed trays or pots, then gently firm the mix—just enough to hold seeds in place without crushing them. Most seeds need ¼-inch deep coverage, but check individual plant tags for exceptions.
The mix stays moist but never soggy, so water lightly after planting and keep it in a warm spot (around 70°F) until sprouts appear. Once seedlings emerge, move them to bright, indirect light and reduce watering to just enough to keep the surface damp.
Overwatering is the #1 mistake—Promix drains well, but it doesn’t mean you should let it dry out completely. Watch for yellowing leaves or mold, which means you’re either overwatering or the air isn’t circulating enough.
This mix works for everything from tomatoes to herbs, and it’s especially great for beginners who’ve struggled with inconsistent germination. The key is patience—healthy seedlings take time, but Promix gives you the best possible foundation to grow strong plants that’ll outperform anything from the nursery.
📚 In This Guide
- What you need
- Instructions
- Tips and common mistakes
- Wrapping up and next steps
What you need
- ● Promix Seed Starting Mix: 10-20 lbs (or enough to fill your seed-starting containers). Opt for the Promix BX or Promix BX Mycorrhizae for extra benefits!
- ● Seed-starting containers: 4-6" deep trays, cell packs, or biodegradable pots (one per seedling). Ensure they have drainage holes!
- ● Seeds: Choose high-quality seeds suited to your climate and growing season.
- ● Watering can or spray bottle: With a fine mist nozzle for gentle hydration.
- ● Grow lights or sunny windowsill: Provide 12-16 hours of light daily for optimal growth.
- ● Labels and markers: To track seed varieties and planting dates.
- ● Seedling heat mat: For faster germination in cooler climates.
- ● Fertilizer (low-dose): A balanced, water-soluble option (e.g., 5-10-5) to nourish seedlings after sprouting.
- ● Humidity dome or plastic wrap: To retain moisture during germination.
- ● Fine-gauge screen or mesh: For covering trays to deter pests.
How to use Promix seed starting mix for strong, disease-resistant seedlings
This light, airy mix eliminates the guesswork of balancing moisture and aeration—here’s how to get the most from it.
🌱 Step 1: Prepare Containers for Optimal Drainage
Promix works best in containers with drainage holes to prevent waterlogging, which can suffocate young roots. I use 4-inch deep plastic cell packs or biodegradable pots because they’re lightweight and let me handle seedlings without disturbing roots. If repurposing containers, drill ¼-inch holes in the bottom if none exist—Promix’s moisture-retention can turn stagnant pots into breeding grounds for damping-off.
Line the bottom of each container with a ¼-inch layer of perlite or coarse sand if your pots lack drainage. This creates a capillary break that keeps roots from sitting in soggy conditions. Tap the container gently on the table to settle the layer evenly—you’ll see the perlite form a stable base that won’t compact over time.
💧 Step 2: Moisten the Mix Before Planting
Promix’s unique blend of peat, perlite, and vermiculite holds moisture without becoming waterlogged, but it still needs pre-moistening. Fill your containers ¾ full with the mix, then water until the surface feels slightly damp to touch—like a wrung-out sponge. Overwatering now will displace the mix when you plant seeds, so aim for even saturation rather than puddles.
I use a spray bottle for this step to avoid disturbing the soil structure. You’ll know it’s right when water runs through the bottom holes but the surface doesn’t form a crust. Let the mix sit for 5 minutes to absorb evenly—this prevents dry pockets where seeds might fail to germinate.
🌿 Step 3: Sow Seeds at Correct Depth
Promix’s light texture means seeds won’t sink as they might in heavier mixes, so follow seed packet depth guidelines closely. For most seeds, this means ¼ to ½ inch deep—about twice the seed’s diameter. Use a toothpick or pencil to make small holes; pressing seeds in by hand can bury them too deeply, delaying germination.
After planting, cover seeds with a light dusting of additional mix—just enough to obscure them. Mist the surface with water until the top layer feels damp but not wet. Promix’s airiness means seeds need consistent moisture to germinate, but standing water will smother them. Place containers in a warm spot (70–75°F) until sprouts appear.
☀️ Step 4: Maintain Even Moisture Without Overwatering
Promix’s moisture balance means you’ll water less frequently than with standard mixes, but consistency is key. Check the top ½ inch of soil daily—it should feel damp but not soggy. Water from the bottom by placing containers in a tray of ¼-inch standing water for 10–15 minutes, or use a gentle spray to avoid displacing seedlings.
Once seedlings emerge, reduce humidity by removing any domes or plastic wraps—Promix’s structure prevents moisture buildup that causes damping-off. You’ll see strong, stocky stems within 7–10 days if moisture and light are right. If leaves yellow or stems weaken, you’re overwatering; if they wilt quickly, the mix is too dry.
✂️ Step 5: Transplant When Seedlings Are Ready
Promix’s lightweight nature makes it ideal for transplanting without disturbing roots. Wait until seedlings have 2–4 true leaves and are at least 2 inches tall—this usually takes 4–6 weeks. Gently squeeze the biodegradable pot or slide plastic cells out; Promix’s structure holds together enough to minimize root damage.
Plant at the same depth as the original container, and water deeply to help roots establish. Promix’s low nutrient content means you’ll want to fertilize lightly (½-strength solution) 2 weeks after transplanting. The mix’s airy texture encourages root growth, so you’ll see vigorous new leaves within 10–14 days of moving outdoors.
Tips & tricks for perfect seed starting with Promix mix
Mastering Promix means balancing its unique properties—here’s how to avoid common pitfalls and maximize results.
Container Depth Matters: The 4-inch depth specified in Step 1 isn't arbitrary—it gives roots enough room to establish without overcrowding. If using deeper containers, fill only ¾ full with mix to prevent compaction. For shallow trays, reduce mix volume by half to maintain proper aeration. This balance prevents waterlogging while supporting root development.
Pre-Moistening Precision: The 5-minute absorption time in Step 2 is critical—it ensures even moisture without creating dry pockets. I’ve learned the hard way that rushing this step leads to uneven germination. Use a spray bottle to distribute water evenly, and check moisture by squeezing a handful: it should feel like a wrung-out sponge, not a dripping cloth.
Seed Depth Visual Cue: For the ¼ to ½ inch depth in Step 3, think of your seed size: most seeds need about twice their diameter of coverage. A good trick is to use a toothpick to mark the hole depth—this prevents over-burying, which can delay or prevent germination entirely. The light texture of Promix means seeds won’t sink further than planted, so accuracy matters.
Transplant Timing Secret: The 4-6 week window in Step 5 might seem wide, but it’s actually precise for Promix’s nutrient balance. Wait until seedlings have 2-4 true leaves and are 2 inches tall—this ensures they’ve developed strong enough roots to handle transplant shock. The mix’s lightweight nature means you can remove seedlings easily, but don’t rush: waiting for these specific growth markers gives you the best survival rate.
Pro Tips for Promix Seed Starting Mix
- Mastering Promix means balancing its unique properties—here’s how to avoid common pitfalls and maximize results.
- Container Depth Matters: The 4-inch depth specified in Step 1 isn't arbitrary—it gives roots enough room to establish...
- Pre-Moistening Precision: The 5-minute absorption time in Step 2 is critical—it ensures even moisture without creatin...
Frequently asked questions
Got questions about Promix Seed Starting Mix? You're not alone! Here are some of the most common queries—plus straightforward answers to help you grow confident seedlings.
What makes Promix Seed Starting Mix different from regular potting soil?
Promix Seed Starting Mix is specially formulated to balance moisture retention and air circulation, preventing compaction and root rot. Unlike regular potting soil, it contains perlite or vermiculite for aeration and peat moss or coconut coir for moisture control—ideal for delicate seedlings.
When is the best time to use Promix Seed Starting Mix?
Use it anytime you’re starting seeds indoors—spring, summer, or even winter under grow lights! Since it’s sterile and lightweight, it’s perfect for early starts (6–8 weeks before last frost) or year-round propagation in controlled environments.
Can I reuse Promix Seed Starting Mix after transplanting seedlings?
Not recommended! Promix is designed for short-term seedling growth (4–8 weeks). After transplanting, the mix breaks down and loses its ideal texture. Instead, repurpose it for seedling trays or compost it—don’t waste its nutrients!
Is Promix Seed Starting Mix worth the cost compared to DIY mixes?
For beginners, it’s a time-saver—sterile, pre-balanced, and consistent. DIY mixes (e.g., peat + perlite + compost) can work but require precise ratios. If you’re serious about seed starting, Promix’s reliability often justifies the price for higher germination rates.
What should I do if my seedlings look leggy or weak in Promix?
Leggy seedlings often mean too little light or overcrowding. Move trays to a sunnier spot (or under grow lights) and thin seedlings if needed. Avoid overwatering—Promix drains well, but soggy roots can stunt growth. A light dusting of compost can also boost nutrients.
Wrapping up and next steps
Starting seeds with Promix Seed Starting Mix sets you up for success—its perfect balance of moisture retention and aeration ensures strong, healthy seedlings from day one. Whether you're a seasoned gardener or just beginning, this mix simplifies the process while maximizing growth potential. 🌱
Now that you’re armed with the right knowledge, grab your trays, seeds, and Promix mix—it’s time to get growing! Try your first batch this weekend and watch your seedlings thrive. Happy planting! 🌿