
Propagation
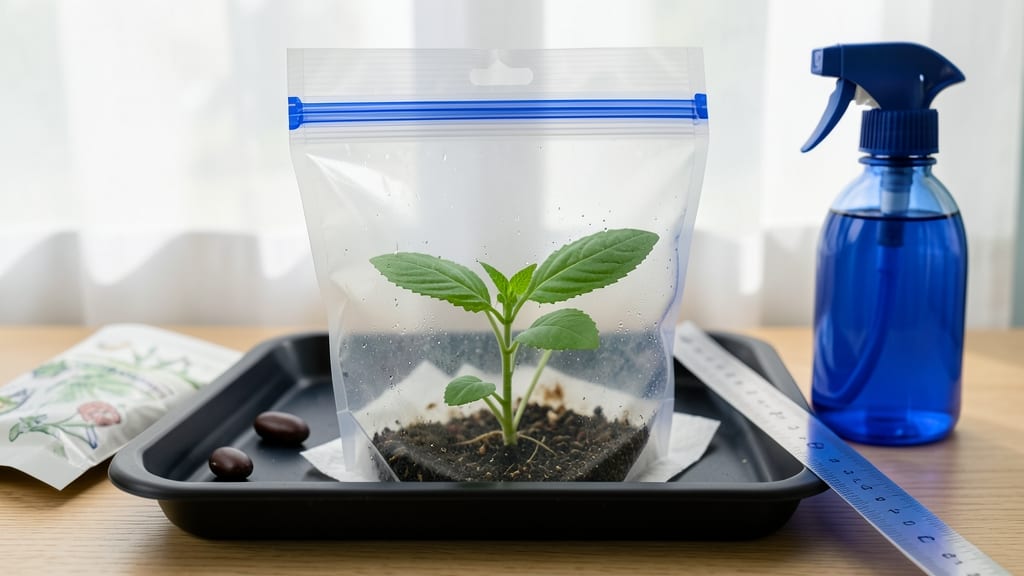
Ziploc bag seed germination cuts weeks off your growing season. 🌱 This simple method creates the perfect humid environment for seeds to sprout faster than traditional soil planting—ideal for impatient gardeners or slow-to-germinate varieties like okra or chili peppers.
The process starts with damp paper towels or a seed-starting mat inside the bag, creating a greenhouse effect. You’ll monitor temperature closely—most seeds need warmth between 70-80°F—and avoid direct sunlight until sprouts appear. Transplanting becomes effortless once roots reach 1-2 inches, ensuring minimal shock.
You’ll see tiny green hooks breaking through in as little as 3-5 days (compared to weeks in soil), and the method works for everything from herbs to flowers. The key is balance: too much moisture breeds mold, while too little stunts growth—check daily and adjust as needed.
Perfect for beginners or anyone tired of waiting for seeds to germinate. Once mastered, this technique becomes your go-to for fast, reliable starts—no fancy equipment required. Let’s get those seeds sprouting!
📚 In This Guide
- What you need
- Instructions
- Tips and common mistakes
- Wrapping up and next steps
What you need
- ● Ziploc bags (quart-sized): 1–2 bags per seed type (quart size holds moisture well and allows visibility).
- ● Seeds: Choose fast-sprouting varieties like radishes, beans, or lettuce (10–20 seeds per bag, depending on size).
- ● Paper towels or coffee filters: 2–3 sheets per bag (cut to fit snugly).
- ● Water: Room-temperature, filtered if possible (just enough to dampen, not soak).
- ○ Spray bottle (optional but helpful): For gentle misting if towels dry out.
- ● Ruler or measuring tape: To mark seed depth (¼–½ inch for most seeds).
- ● Permanent marker: To label bags with seed type and date.
- ● Heat mat or warm location (e.g., near a sunny window or on top of a fridge): Speeds germination (70–85°F ideal).
- ● Plastic wrap or additional bags: For extra humidity if needed.
- ● Small tray or container: To catch condensation if bags leak.
Step-by-step instructions for germinating seeds in Ziploc bags
This method cuts germination time in half while keeping everything contained and mess-free.
🌱 Step 1: Select and Prepare Your Seeds
Start with fresh seeds—older seeds germinate poorly no matter the method. I always check the packet date and choose varieties known for fast germination, like beans or peas. Soak seeds overnight in lukewarm water if the packet suggests it (this softens the seed coat and speeds things up). Drain them well before proceeding.
For seeds that don’t need soaking, simply place them directly in the bag. I like to lay a damp paper towel flat in the bottom of the bag—this creates the perfect moisture-rich environment without drowning the seeds. The towel should be damp but not dripping; squeeze it gently to test.
💧 Step 2: Create the Ideal Germination Environment
Seal the bag after adding seeds, leaving just enough air to prevent crushing when you close it. The goal is to trap warmth and humidity while still allowing oxygen to reach the seeds. Place the bag in a warm spot—70-80°F is ideal. A seedling heat mat works wonders, but even a sunny windowsill or the top of your fridge will do in a pinch.
Check the bag daily for condensation on the inside. If it’s foggy, that’s perfect—you’ve got the right humidity. If it’s dry, mist the paper towel lightly and reseal. Watch for the first signs of sprouting, which usually appear in 3-7 days depending on the seed type. Beans and peas often sprout in just 3-4 days this way.
⏰ Step 3: Monitor and Transplant at the Right Time
Once you see the first true leaves (not the initial seed leaves, called cotyledons), it’s time to move the seedlings to soil. True leaves are smaller but more defined and look like the mature plant’s foliage. Gently open the bag and carefully lift each seedling by its leaves—never grab the delicate stem. Place them in prepared pots filled with moist seed-starting mix.
Cover the roots lightly with soil and press down gently to secure. Water lightly to settle the soil around the roots, but don’t soak it. Within a day or two, the seedlings will adjust to their new home. This method gives them a strong, healthy start—no leggy or weak plants here.
☀️ Step 4: Transition to Light and Care for New Growth
Move the pots to a spot with bright, indirect light for the first few days. Direct sunlight can scorch tender new leaves, so a north-facing window or under a grow light is best. After a week, gradually introduce them to more light—12-14 hours daily is ideal. You’ll notice the seedlings perking up, growing straighter, and developing vibrant color.
Water when the top inch of soil feels dry to the touch, but avoid overwatering. The Ziploc method gives them a head start, but now they need consistent care. If you see any yellowing leaves, it’s usually a sign of overwatering or too little light—adjust accordingly. Within 2-3 weeks, you’ll have sturdy seedlings ready for transplanting outdoors or into larger containers.
Tips & tricks for perfect Ziploc bag germination
Here's what nobody tells you about getting every seed to sprout reliably—these are the little details that make all the difference.
Seed Selection Matters: Not all seeds are created equal for this method. Fast-germinating varieties like beans, peas, and radishes thrive in the contained environment, while slower seeds like tomatoes or peppers may need extra time. I always check the packet for "fast germination" labels—those are your best bet. For stubborn seeds, try a quick 24-hour soak in lukewarm water before bagging, which softens the seed coat and speeds up the process.
The Humidity Balance: That damp paper towel should feel like a wrung-out sponge—not dripping, not bone-dry. Too much moisture creates mold; too little stunts growth. I test by gently squeezing the towel—if water beads up on my fingers, it's perfect. Pro tip: If your kitchen feels dry, place the sealed bag in a shallow dish with a tiny bit of water underneath (just enough to create a humid microclimate). The condensation check in Step 2 is your best indicator—foggy inside means you're golden.
Warmth Hack: Your 70-80°F target is non-negotiable, but here's how to hit it without fancy equipment. Place the bag on top of your fridge (not inside—too cold!) or nestle it between two lightbulbs in a lamp shade. I've even used a heated car seat cover in winter—anything to maintain that cozy range. Avoid direct sunlight here; you want warmth, not heat stress. The goal is consistent temperature, not a sauna.
Transplant Timing: True leaves are your cue, but don't rush—wait until they're fully unfurled and slightly stiff to the touch. I find it helps to photograph the seedlings at the 3-4 day mark so I can compare progress. When transplanting, handle those delicate stems like they're made of glass. A pair of tweezers makes this easier if you're nervous about breaking them. The first few days after transplant are critical; keep them in that bright, indirect light and resist the urge to overwater.
Pro Tips for Ziploc Bag Seed Germination
- Here's what nobody tells you about getting every seed to sprout reliably—these are the little details that make all t...
- Seed Selection Matters: Not all seeds are created equal for this method. Fast-germinating varieties like beans, peas,...
- The Humidity Balance: That damp paper towel should feel like a wrung-out sponge—not dripping, not bone-dry. Too much ...
Frequently asked questions
Got questions about germinating seeds in Ziploc bags? You’re not alone! Here are answers to the most common queries to help you grow like a pro.
Why use a Ziploc bag for seed germination instead of soil?
A Ziploc bag creates a humid, warm, and controlled environment that mimics ideal germination conditions. This speeds up sprouting (often by days!) and reduces the risk of mold or damping-off compared to planting directly in soil.
How long does it take for seeds to germinate in a Ziploc bag?
Germination time varies by seed type, but most fast-sprouting seeds (like beans, peas, or lettuce) appear in 3–7 days. Slow germinators (tomatoes, peppers) may take 10–20 days. Monitor daily—once sprouts emerge, transplant them to soil ASAP!
Do I need to add water every day?
Nope! Just mist the paper towel or seed mix once every 2–3 days to keep it damp (not soggy). Overwatering can suffocate seeds or encourage mold. A lightly sealed bag with a tiny air pocket prevents excess moisture buildup.
Can I reuse Ziploc bags for germination?
Yes, but sterilize them first! Wash bags with hot, soapy water and rinse thoroughly to kill bacteria or fungi. Avoid reusing bags with mold or foul odors—start fresh for best results.
What if mold grows in my Ziploc bag?
Mold is a red flag! If you spot fuzzy spots, open the bag immediately to improve airflow. Discard contaminated seeds and towels, then sanitize the bag. To prevent mold, avoid overcrowding seeds and use a paper towel (not plastic) for better breathability.
Can I germinate all seeds this way?
Most small seeds (herbs, lettuce, carrots) thrive in bags, but avoid large seeds (like beans or corn) or those needing stratification (e.g., apples). For tricky seeds, check their specific needs—some prefer light exposure or cooler temps!
Wrapping up and next steps
Using a Ziploc bag seed germination method is a game-changer for gardeners—it’s simple, cost-effective, and boosts your sprouting success rate! 🌱 With just a few supplies and a little patience, you’ll watch tiny seeds transform into thriving seedlings in no time.
Now that you’re armed with the know-how, why not try it with your next batch of seeds?
Ready to take the next step? Experiment with different seeds, track your progress, and share your results with fellow plant lovers. Happy growing—your future garden will thank you! 🌿