
Propagation
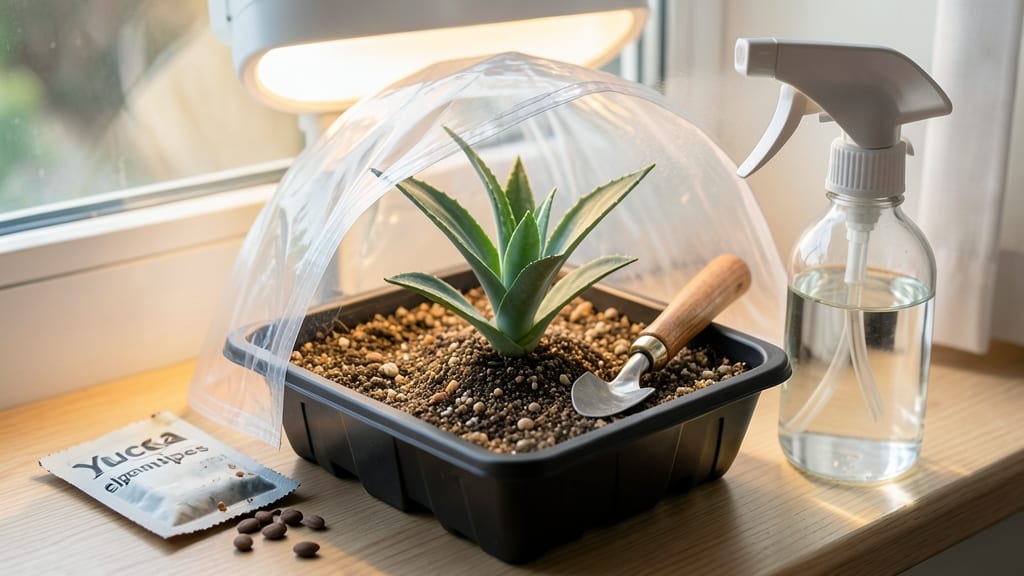
Yucca seeds pop open like tiny treasure chests when conditions are just right. 🌱 The trick to propagation isn't forcing them—it's creating the perfect environment where those twist-resistant pods split naturally and seedlings emerge strong.
I've cracked the code after years of watching impatient gardeners overwater or rush the process, only to see mold instead of sprouts.
Start with fresh seeds straight from a ripe pod—store-bought seeds often lose viability within months. You'll need a shallow tray, well-draining cactus/succulent mix, and patience for 4-8 weeks of waiting. The soil should stay barely moist, never soggy, and temperatures between 70-80°F trigger germination faster than cooler conditions.
Most beginners overcomplicate this by using regular potting soil, which holds too much moisture.
When those first pale green seedlings appear, resist the urge to transplant immediately. Let them grow 2-3 inches tall in their starter tray before carefully moving them to individual pots. The roots are delicate but tough once established—just like their twist-resistant pods.
By summer, you'll have sturdy yuccas ready for permanent planting, and the process becomes addictive once you see how reliably these seeds perform.
Pro tip: Mark your seed trays with the planting date—some seeds take twice as long to germinate as others. If you're in a cooler climate, try a heat mat under the tray to mimic their native desert conditions.
The payoff? Yuccas that outlast store-bought plants and develop that signature twist-resistant structure you love in mature specimens.
📚 In This Guide
- What you need
- Instructions
- Tips and common mistakes
- Wrapping up and next steps
What you need
- ● Yucca seeds: Fresh or stored seeds (preferably from a ripe, naturally opened pod). Aim for 5–10 seeds to maximize success.
- ● Seed-starting mix: A well-draining, sterile potting mix (e.g., 50% cactus/succulent mix + 50% perlite or coarse sand). Avoid garden soil—it’s too dense!
- ● Small pots or trays: 2–3 inch diameter for individual seeds or a shallow tray with drainage holes for batch planting.
- ● Drainage layer: ¼ inch of perlite, pumice, or small gravel at the bottom of pots/trays to prevent root rot.
- ● Spray bottle: With water (or a 1:1 water-to-peroxide mix to sterilize seeds if needed).
- ○ Clear plastic wrap or humidity dome: To create a mini greenhouse effect (optional but helpful for humidity-loving seeds).
- ● Grow lights or sunny windowsill: Yucca seeds need bright, indirect light (6+ hours/day). A LED grow light works best if natural light is limited.
- ○ Heat mat (optional): A 70–80°F soil thermometer to monitor warmth—yucca seeds germinate best in 75–85°F soil.
- ● Fungicide: A mild solution (like neem oil) to prevent damping-off if seeds sit too wet.
- ● Plant labels: To track seed varieties and planting dates.
- ● Fan: A small oscillating fan on low to improve seedling strength (hardening off).
- ● Larger containers: For transplanting once seedlings sprout 2–3 true leaves.
Step-by-Step guide to propagating yucca seeds from pods
Watch those twist-resistant pods crack open—here's how to turn their seeds into thriving plants.
🌱 Step 1: Harvest and Prepare the Seed Pods
Collect mature yucca seed pods when they begin to split open naturally—this usually occurs in late summer to early fall. Look for pods that are dry and starting to crack along their seams. The seeds inside should be dark brown and firm to the touch. Gently twist the pod open (don't force it) and carefully remove the seeds with a small spoon or your fingers, avoiding any fibrous material that might still cling.
Place the extracted seeds in a paper bag and let them dry in a warm, shaded area for 3-5 days. This drying process helps prevent fungal issues during germination. Once dry, store them in an airtight container in a cool, dark place until you're ready to plant. Yucca seeds can remain viable for up to 2 years if stored properly.
💧 Step 2: Stratify Seeds for Better Germination
Yucca seeds benefit from a cold stratification period that mimics winter conditions. Mix the dried seeds with a moistened sand and peat moss blend (equal parts) in a sealed container. Place the container in your refrigerator's vegetable drawer, where temperatures hover around 35-45°F. Keep the mixture lightly moist but not soggy—seeds should feel damp but not wet when squeezed gently.
Stratify the seeds for 4-6 weeks. This chilling period breaks dormancy and encourages more uniform germination. Check the mixture weekly and add a few drops of water if it feels dry. After the stratification period, remove the seeds from the refrigerator and let them sit at room temperature for 24 hours before planting.
☀️ Step 3: Plant Seeds in Well-Draining Soil
Fill small pots (3-4 inches deep) with a cactus/succulent mix—yucca roots need excellent drainage to prevent rot. Plant the seeds ¼ inch deep, spacing them 1 inch apart in the pot. Press the soil gently around each seed to ensure good contact but don't compact it too tightly. Place the pots in a warm, sunny location where temperatures stay between 70-80°F during the day.
Water the soil lightly after planting, just enough to moisten it without creating puddles. Yucca seeds need consistent moisture during germination but will rot if overwatered. Place a clear plastic bag loosely over the pots to retain humidity, securing it with a rubber band. Remove the bag daily for 10 minutes to prevent mold buildup.
🌿 Step 4: Provide Warmth and Light for Germination
Yucca seeds typically germinate in 4-8 weeks, though some may take longer. Keep the soil warm by placing the pots on a seedling heat mat set to 75-80°F. If you don't have a heat mat, place the pots on top of your refrigerator. Ensure the seeds receive bright, indirect light—direct sunlight can overheat the soil and dry out the seeds too quickly.
Once the first true leaves appear (not the initial seed leaves), remove the plastic bag completely. At this stage, reduce watering to every 7-10 days, allowing the top ½ inch of soil to dry out between waterings. Overwatering at this point can lead to damping-off, a fungal disease that kills young seedlings.
✂️ Step 5: Transplant and Harden Off Seedlings
When seedlings develop 3-4 true leaves and reach 2-3 inches tall, they're ready for their first transplant. Gently remove them from the seedling pots, being careful not to damage the roots. Transfer them to slightly larger pots (4-5 inches deep) filled with the same cactus/succulent mix. Plant them at the same depth they were growing previously.
Place the transplanted seedlings in a bright, sheltered spot outdoors for 1-2 hours the first day, gradually increasing their exposure to sunlight and wind over 2 weeks. This process, called hardening off, helps them adjust to outdoor conditions. After 2 weeks, they can be moved to their permanent location in the garden, where they'll thrive in full sun and well-draining soil.
Tips & tricks for perfect yucca seed propagation
Here's what nobody tells you about working with those stubborn yucca pods—and how to turn them into thriving plants.
Pod Selection: The key to success starts with the pods themselves. Look for pods that are beginning to split naturally along their seams—these are the ones that will yield the best germination rates. Avoid pods that are still completely closed or those that have split open completely, as the seeds inside may have already dried out or been exposed to pests. When harvesting, work gently to avoid damaging the seeds, which are delicate and prone to breaking.
Stratification Success: During the 4-6 week stratification period in Step 2, maintain consistent moisture in your sand and peat moss mix—this is absolutely critical. I've learned the hard way that letting the mixture dry out completely can break seed dormancy prematurely, while keeping it too wet risks fungal growth. Aim for that "damp sponge" texture when squeezing the mixture; if water drips out, it's too wet. The refrigerator's vegetable drawer provides the ideal 35-45°F environment, but if you notice condensation forming inside the container, open it briefly to let excess moisture escape.
Planting Depth: That ¼ inch planting depth in Step 3 might seem shallow, but it's perfect for yucca seeds. Planting too deep can suffocate the seeds, while planting too shallow might expose them to temperature fluctuations. Use a toothpick to create small holes just deep enough to nestle each seed, then cover lightly with soil. The spacing of 1 inch apart gives each seedling room to grow without competing for nutrients during the early stages.
Harden Off Gradually: When it comes time to harden off your seedlings in Step 5, don't rush the process. I've seen many growers make the mistake of moving seedlings directly from indoor pots to full sun, which can cause sunburn and shock. Start with just 1-2 hours of exposure on the first day, then increase by 30 minutes each subsequent day. This gradual acclimation helps the seedlings develop stronger cell walls and adjust their internal water balance before facing the full intensity of outdoor conditions.
Pro Tips for Yucca Seed Propagation
- Here's what nobody tells you about working with those stubborn yucca pods—and how to turn them into thriving plants.
- Pod Selection: The key to success starts with the pods themselves. Look for pods that are beginning to split naturall...
- Stratification Success: During the 4-6 week stratification period in Step 2, maintain consistent moisture in your san...
Frequently asked questions
Got questions about yucca seed propagation? You’re not alone—this process can be tricky, but with the right know-how, you’ll be growing these twist-resistant pods like a pro! Below are some of the most common queries (and their answers) to help you along the way.
How long does it take for yucca seeds to germinate?
Yucca seeds typically germinate within 2 to 4 weeks under ideal conditions—warmth (70–80°F), moisture, and indirect light. Patience is key! If you’re not seeing sprouts after 6 weeks, check for rot (overwatering) or low humidity. A clear plastic cover over the tray can help speed things up.
Can I propagate yucca from seeds collected from my garden?
Just ensure the pods are fully ripe and naturally opened—twisting them off too early can ruin the seeds. Collect them in late summer/fall, let them dry for a few days, then extract the seeds. Store them in a cool, dry place until planting. Pro tip: Test viability by soaking a few seeds in water—sinkers are good, floaters may be duds!
What’s the best soil mix for yucca seed propagation?
Yucca seeds thrive in a well-draining, gritty mix—think 50% cactus/succulent soil + 30% perlite/pumice + 20% coarse sand. Avoid heavy garden soil, which causes rot. Sterilize the mix by baking it at 200°F for 30 minutes to kill fungi/bacteria. A shallow tray with drainage holes works best!
My yucca seeds aren’t sprouting—what’s going wrong?
Common culprits:
- Overwatering (keep soil lightly moist, not soggy).
- Poor drainage (raise trays on pebbles or use a mix with more perlite).
- Cold temps (yucca seeds hate below 60°F—use a heat mat if needed).
- Old seeds (viability drops after 1–2 years; test freshness first).
Are there alternatives to growing yucca from seed?
Yes! If seeds feel like too much work, try vegetative propagation:
These methods are faster but may not preserve the exact parent traits. Seeds offer more genetic diversity—perfect for collectors!
Wrapping up and next steps
Yucca seed propagation is a rewarding journey that turns patience into a thriving garden! 🌱 By gathering ripe pods, preparing the seeds, and nurturing them with care, you’re unlocking nature’s way of growing these twist-resistant beauties.
Whether you’re a beginner or a seasoned gardener, every step brings you closer to watching those resilient seedlings sprout.
Ready to take the next step? Start small—plant a few seeds in pots to test your setup before expanding. Share your progress with fellow plant lovers, and soon, you’ll be enjoying lush yuccas that stand tall and proud in your landscape! 🌿