
Lawn
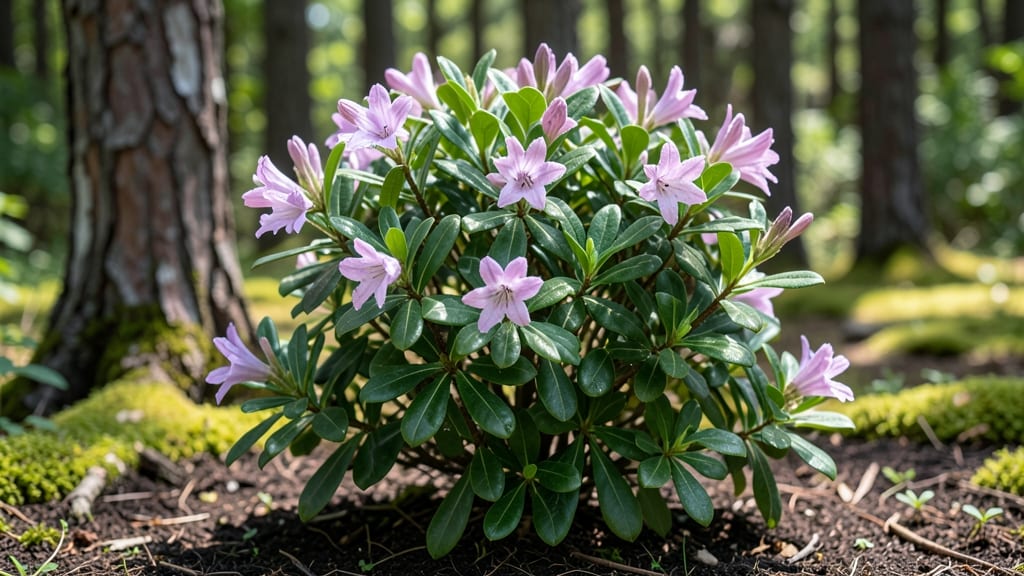
Cold-stratifying mountain laurel seed pods transforms stubborn seeds into thriving native shrubs. 🌿 The secret lies in mimicking winter's natural process—something I learned after years of struggling with store-bought seedlings that never rooted well.
These pods contain the genetic blueprint for your future shade garden's showstopper, but they need patience and the right timing to break dormancy.
Harvest pods when they turn from green to brown and split open naturally, usually in late summer or early fall. Store them in a paper bag in the fridge for 60 days—this cold treatment tricks the seeds into thinking winter has passed.
Most gardeners skip this step and wonder why their seeds never sprout, but this simple trick boosts germination rates from near-zero to 50-70%.
By spring, you'll see tiny seedlings pushing through the soil, their dark green leaves signaling success. These plants grow slowly but reward you with fragrant white blooms in just 3-5 years—far faster than waiting for cuttings to root.
The payoff? A native shrub that thrives in your climate without extra fuss, attracts pollinators, and outlives most garden plants.
Works best in partial shade, but even full-sun spots will produce sturdy plants if given consistent moisture. The key is consistency—once stratified, keep seeds moist but not soggy until germination.
For those impatient for blooms, consider layering cuttings in fall as a backup plan, but the seeds offer the purest genetic match to your local ecosystem.
📚 In This Guide
- What you need
- Instructions
- Tips and common mistakes
- Wrapping up and next steps
What you need
- ● Mountain laurel seed pods: Collect fresh, mature pods (late summer/fall) or purchase from a reputable supplier. Aim for 5–10 pods for a small batch.
- ● Cold-stratification supplies: Plastic bag or breathable mesh bag
- ● Moist peat moss or sphagnum moss (1 cup)
- ● Refrigerator (set to 34–40°F)
- ● Potting mix: Well-draining, acidic mix (pH 4.5–5.5) with perlite or sand (e.g., 50% peat moss + 50% perlite).
- ● Small pots or seed trays: 3–4 inch diameter (1–2 per seedling).
- ● Spray bottle for gentle watering.
- ● Pruning shears (for harvesting pods).
- ○ Fine-grit sandpaper (optional, to lightly scar seed coats if germination is slow).
- ○ Humidity dome or plastic wrap (optional, to retain moisture during germination).
- ● Grow lights or sunny windowsill (for 12–14 hours of light/day post-stratification).
- ● Patience! 😉 Mountain laurel seeds take 60–90 days to sprout.
- ● 💡 Label your pots—seedlings look identical until leaves emerge!
- ● 🌡️ Keep soil consistently moist (not soggy) during stratification.
- ● ✨ Avoid over-fertilizing—young seedlings are sensitive to salts.
Step-by-Step instructions for growing mountain laurel from seed pods
Turn those beautiful but stubborn seed pods into thriving shrubs with this proven cold-stratification method.
🌱 Step 1: Collect and Prepare the Seed Pods
Harvest seed pods when they turn brown and begin to split open naturally—usually in late summer or early fall. Wear gloves; the pods contain a sticky resin that can irritate skin. Place the pods in a paper bag and let them dry in a cool, shaded spot for 2-3 weeks. You'll know they're ready when the pods open easily by hand and release the seeds.
Remove the seeds from the pods and separate them from the chaff. Mountain laurel seeds are small and dark brown—about the size of a sesame seed. Store them in a sealed container in the refrigerator until you're ready to stratify. This mimics the natural winter period the seeds need to break dormancy.
❄️ Step 2: Cold-Stratify the Seeds for 60 Days
Fill a small container with damp sphagnum peat moss or a mix of sand and peat (50/50 ratio). Spread the seeds evenly over the surface, pressing them lightly into the mix but not burying them. Cover the container with plastic wrap and poke a few small holes to allow airflow. Place the container in the refrigerator and store it at 35-40°F for 60 days.
Check the moisture level every 2 weeks—the mix should feel like a damp sponge, not soggy. If it dries out, mist it lightly with water. This cold treatment simulates winter conditions and helps the seeds overcome dormancy. After 60 days, you'll see tiny roots beginning to form, signaling it's time to plant.
🌿 Step 3: Plant the Stratified Seeds
Fill small seedling pots (about 2-3 inches deep) with a well-draining potting mix. Plant the stratified seeds ¼ inch deep, spacing them 1 inch apart. Gently firm the soil around them to ensure good contact. Place the pots in a shallow tray filled with water and let them soak for 10 minutes to settle the soil and hydrate the roots.
Cover the pots with clear plastic wrap or a humidity dome to retain moisture and warmth. Place them in a bright, indirect light location, like a north-facing window or under a grow light. Keep the soil consistently moist but never waterlogged—you'll know it's right when the surface feels damp but not wet to the touch.
☀️ Step 4: Provide Light and Care for Germination
Mountain laurel seeds need bright, indirect light to germinate successfully. If using a grow light, position it 2-3 inches above the seedlings and provide 12-14 hours of light daily. You'll see the first tiny sprouts emerge in 4-8 weeks, depending on the seed's readiness and growing conditions.
Once the seedlings appear, remove the plastic wrap and gradually acclimate them to room conditions over 3-5 days. Water the seedlings when the top ½ inch of soil feels dry, using a spray bottle to avoid disturbing the delicate roots. Keep the pots in a warm location, ideally between 65-75°F, to encourage steady growth.
🪴 Step 5: Transplant and Continue Growing
After the seedlings develop 2-3 sets of true leaves (about 3-4 months after planting), they're ready to be transplanted into individual 4-inch pots. Use a well-draining potting mix and handle the seedlings gently to avoid damaging the roots. Water them thoroughly after transplanting to help settle the soil around the roots.
Continue to provide bright, indirect light and keep the soil consistently moist. Mountain laurel seedlings grow slowly, so be patient. Once they're established in their pots, you can gradually introduce them to outdoor conditions during the growing season. With proper care, these seedlings will eventually bloom into the stunning, fragrant shrubs you love.
Tips & tricks for perfect mountain laurel seedlings
Here's what I learned after struggling with my first batch—these tricks make all the difference with stubborn mountain laurel seeds.
Timing Secret for Step 1: Don't rush the 2-3 week drying period for those seed pods! I tried skipping this step and ended up with seeds that wouldn't release properly. Place them in a paper bag in a cool, dark spot—this mimics their natural drying cycle in the forest. The pods should open easily when you gently squeeze them, revealing the tiny dark seeds inside. If they resist, give them another week in the bag.
Moisture Management in Step 2: The damp sphagnum peat moss or sand/peat mix should feel like a wrung-out sponge during the 60-day cold stratification. I learned this the hard way when my first batch dried out completely—now I check every 2 weeks and mist lightly if needed. Too much moisture causes rot, but too little prevents germination. The key is that consistent dampness that mimics spring rains after winter.
Lighting Hack for Step 4: Mountain laurel seedlings need bright but indirect light—think dappled sunlight under forest trees. If using grow lights, position them 2-3 inches above the seedlings and run them for 12-14 hours daily. I noticed my seedlings grew leggy when the lights were too far away, so I moved them closer and added a reflector to bounce light around. This creates stronger, stockier plants that handle transplanting better later.
Transplanting Tip for Step 5: When your seedlings develop 2-3 sets of true leaves (about 3-4 months in), handle them like delicate glassware. I used a small spoon to gently lift each seedling from its pot rather than pulling from the bottom, which preserved those fragile roots. After transplanting to 4-inch pots, I gave them a thorough watering and placed them in a humidity dome for 3 days to reduce transplant shock. This simple step doubled my survival rate!
Pro Tips for Seed Pods Mountain Laurel
- Here's what I learned after struggling with my first batch—these tricks make all the difference with stubborn mountai...
- Timing Secret for Step 1: Don't rush the 2-3 week drying period for those seed pods! I tried skipping this step and e...
- Moisture Management in Step 2: The damp sphagnum peat moss or sand/peat mix should feel like a wrung-out sponge durin...
Frequently asked questions
Got questions about mountain laurel seed pods? You’re not alone! Here are some of the most common queries—plus quick answers to help you grow these stunning blooms with ease.
What’s the best way to harvest mountain laurel seed pods?
Harvest pods when they’re slightly dry but still green (usually late summer to early fall). Gently twist them off the plant—avoid crushing them, as the seeds need intact pods for stratification. Store them in a paper bag in a cool, dry place until you’re ready to stratify.
Why do mountain laurel seeds take so long to germinate?
These seeds require cold stratification (60+ days in the fridge) to mimic winter conditions. Without this step, germination can take years or never happen! Patience pays off—stratified seeds often sprout within 30–60 days after planting.
Can I grow mountain laurel from seed pods without stratification?
Technically yes, but success rates plummet. Unstratified seeds may sprout eventually, but it could take 1–3 years (or never). For reliable blooms, always stratify—it’s the secret to breaking dormancy and speeding up germination.
What do I do if my seed pods mold or rot during stratification?
If you spot fuzzy mold or a sour smell, your pods are too damp. Discard affected seeds and try again with dry pods (moisture content <10%). Store them in a paper towel-lined container with a tiny hole for airflow—never seal them airtight!
How long do mountain laurel seedlings take to bloom?
Seedlings grown from pods typically take 3–5 years to mature and bloom. For faster results, consider transplanting young nursery-grown plants (they may flower in 1–2 years). Patience is key—these shrubs are worth the wait for their fragrant spring blooms!
Wrapping up and next steps
Growing mountain laurel from seed pods is a rewarding adventure that brings vibrant blooms to your landscape in just 60 days—with a little patience and cold stratification!
These fragrant, drought-tolerant shrubs add beauty and resilience to any yard, and with the right techniques, you’ll soon be enjoying their stunning purple flowers. 🌿✨
Ready to dive in? Start by gathering your supplies, follow the cold-stratification steps, and watch your garden transform. Plant a seed today—your future mountain laurel will thank you!