
Lawn
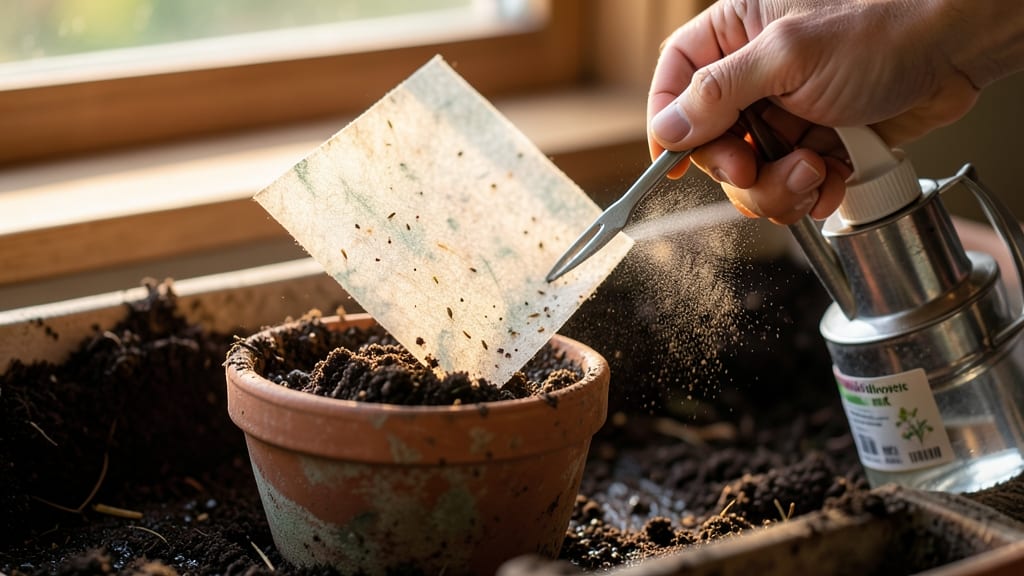
Seed paper instructions are like making edible art that grows into wildflower blooms. 🌸 The process is simpler than you'd think—just mix seeds with a natural fiber pulp, press into sheets, and let them dry. I've made hundreds of these over the years, and they're perfect for gifting, scattering in gardens, or even planting in dry areas where traditional seeds struggle.
You only need a handful of supplies: wildflower seeds, paper pulp (or even old paper blended with water), a tray, and a little patience. The paper breaks down naturally, releasing seeds into the soil as it decomposes.
No soil prep needed—just scatter and wait. It’s a great way to introduce kids to gardening or add unexpected color to a landscape.
Once dry, the seed paper stays viable for months, making it ideal for spring or fall planting. Simply press it into moist soil, keep it damp for a few weeks, and watch as delicate sprouts push through.
The first blooms appear in about 6-8 weeks, depending on the flower mix. It’s satisfying to see something so delicate grow from something you made yourself.
If you’re new to this, start with a small batch and experiment with different seed blends. Try adding lavender or poppies for extra fragrance or color. The key is keeping the paper moist until germination—after that, they’re as tough as any other wildflower. Ready to grow your own blooms?
📚 In This Guide
- What you need
- Instructions
- Tips and common mistakes
- Wrapping up and next steps
What you need
- ● Wildflower seeds: 1–2 tablespoons (adjust based on paper size). Choose native or heirloom varieties for best results.
- ● Unbleached paper pulp: 1 cup (homemade or store-bought, like recycled paper towels or printer paper torn into small pieces). Avoid glossy or colored paper.
- ● Water: 2–3 cups (enough to soak the pulp and create a slurry). Use room-temperature water for consistency.
- ● Blender or food processor: To break down the paper into pulp. A manual potato masher works in a pinch!
- ● Mold & deckle (or DIY alternative): A simple frame (like a wooden box or even a microwave-safe container with a window screen) to shape your paper.
- ● Sponge or towel: For pressing out excess water after forming the paper.
- ● Flat surface: A tray, baking sheet, or cardboard to dry the paper (avoid direct sunlight for even drying).
- ○ Optional adhesive: A tiny bit of flour paste (1 tbsp flour + 2 tbsp water) to help seeds stick if needed.
- ● Fine-mesh strainer: To drain excess water from the pulp.
- ● Rolling pin or heavy book: For smoothing out the paper while drying.
- ● Hair dryer (low heat): To speed up drying time (keep it moving to avoid warping!).
- ● Decorative elements: Dried flowers, glitter, or pressed leaves (for a personalized touch!).
Step-by-Step instructions for crafting wildflower seed paper
Here’s my foolproof method for making seed paper—no fancy tools, just patience and a little creativity.
🌱 Step 1: Prepare Your Materials and Mix the Base
Start by blending 2 cups of wildflower seeds with 4 cups of water in a blender until you get a smooth, seed-rich liquid. I like to add a splash of 1 tablespoon of flaxseed gel (made by simmering flaxseeds in water) to help bind everything together. This creates a thick, paint-like consistency that’s perfect for spreading evenly.
If the mixture feels too thin, stir in 1 cup of unbleached paper pulp (or finely shredded recycled paper) until it thickens to the texture of pancake batter. You want it thick enough to hold its shape when spread but still spreadable with a brush. Test it by dipping a spoon in—it should leave a smooth, even layer behind.
💧 Step 2: Spread the Seed Mixture on a Screen
Lay your fine mesh screen (like an embroidery hoop or window screen) over a flat surface, then pour the seed mixture onto it. Use a smooth paintbrush to spread it evenly into a thin, even layer—about 1/8 inch thick. Tap the screen gently to release any air bubbles, and smooth out any uneven spots with the back of the brush.
Here’s the thing—don’t overdo it. If the layer is too thick, the paper will take forever to dry and might crack. Aim for consistency, like a thin pancake. You’ll know you’ve got it right when the surface looks smooth and uniform, with no clumps or dry spots.
☀️ Step 3: Dry the Paper Slowly and Evenly
Let the screen dry in a shady, well-ventilated spot for 24-48 hours. Avoid direct sunlight or heat sources—this can cause the paper to dry too quickly and crack. I prop mine up against a wall in my garage where it gets indirect light. Check it after 12 hours; if the edges feel crispy but the center is still damp, give it another few hours.
Once fully dry, carefully peel the seed paper off the screen. If it resists, gently run a butter knife along the edges to loosen it. Handle it like you would a delicate piece of parchment—don’t bend or fold it too much, or it might crumble. Store it in a cool, dry place until you’re ready to plant.
🌿 Step 4: Plant Your Seed Paper
When you’re ready to plant, simply place the seed paper in a moist, well-drained soil area and press it lightly into the ground. Water it gently to help the seeds make contact with the soil. You’ll see tiny sprouts emerging in 7-14 days, depending on the wildflower mix and weather conditions.
Here’s where it gets fun—watch the paper dissolve naturally as the seeds sprout. You won’t need to remove it; it’ll break down into the soil, leaving your wildflowers to thrive. Keep the area evenly moist but not soggy until the plants are established.
⏰ Step 5: Maintain and Enjoy Your Blooms
Once the wildflowers are up, water them regularly during dry spells, but avoid overwatering—most wildflowers prefer moderate moisture and can handle some drought once established. Deadhead spent blooms to encourage more flowers and prevent self-seeding if you don’t want volunteers popping up everywhere.
In just a few weeks, you’ll have a vibrant patch of wildflowers that attract pollinators and add color to your garden. The best part? No weeding, no fuss—just beautiful blooms that grow right from the paper you made with your own hands.
Tips & tricks for perfect wildflower seed paper
These simple strategies will help you avoid common pitfalls and create seed paper that's sturdy, beautiful, and ready to grow.
Consistency is Key: For Step 1, when blending your wildflower seeds with water, aim for a texture that's like thick paint—not too runny, not too stiff. I learned this the hard way after making seed paper that crumbled apart during drying. If your mixture feels too thin after adding the 4 cups of water, gradually stir in the 1 cup of unbleached paper pulp until it holds its shape when you lift the spoon. The flaxseed gel acts as a natural glue, so don't skip it—it makes all the difference in holding everything together.
Screen Selection Matters: In Step 2, the type of screen you use can make or break your seed paper. I recommend using a fine mesh screen with holes no larger than 1/16 inch. Larger holes can cause seeds to fall through, while finer meshes create a smoother surface. If you don't have an embroidery hoop, a window screen works well—just make sure it's clean and free of debris before using. The goal is to create an even layer that's about 1/8 inch thick, so take your time spreading it out evenly.
Drying Strategy: The 24-48 hour drying time in Step 3 is crucial for creating sturdy seed paper. I've found that placing the screen in a shady spot with good airflow prevents cracking. If you're in a humid environment, you might need the full 48 hours. Check after 12 hours—if the edges are crispy but the center still feels damp, give it more time. Propping it up at an angle helps air circulate underneath, which speeds up drying without causing cracks. Once dry, handle it gently to avoid tearing.
Planting Timing: For Step 4, don't rush planting your seed paper. The seeds need to be in contact with moist soil to begin germination. I recommend planting during spring or early fall when temperatures are moderate. Water gently after planting to help the seeds make contact with the soil. You'll see sprouts in 7-14 days, but be patient—some seeds may take longer to germinate depending on the mix and weather conditions.
Pro Tips for Seed Paper Instructions
- These simple strategies will help you avoid common pitfalls and create seed paper that's sturdy, beautiful, and ready...
- Consistency is Key: For Step 1, when blending your wildflower seeds with water, aim for a texture that's like thick p...
- Screen Selection Matters: In Step 2, the type of screen you use can make or break your seed paper. I recommend using ...
Frequently asked questions
Got questions about seed paper? We’ve got answers! Whether you’re a first-time gardener or a seasoned green thumb, these FAQs will help you plant with confidence—no stress, just blooms.
What’s the best time of year to plant seed paper?
Plant seed paper in early spring (after the last frost) or late summer/fall for best results. Avoid extreme heat or cold—ideal soil temps are between 50–75°F (10–24°C). If you’re in a mild climate, spring or fall are your sweet spots!
How long does it take for seeds to sprout?
Most seed paper sprouts in 7–21 days, depending on species and conditions. Keep the soil moist but not soggy (water lightly daily) and place in partial sun until seedlings emerge. Patience pays off—blooms may take 6–12 weeks!
Do I need to water seed paper differently than regular seeds?
Yes! Seed paper is pre-moistened, so avoid overwatering right after planting. Water gently every 1–2 days (or when the top inch of soil feels dry). Once sprouted, reduce to 1–2 times per week—think “damp, not drenched.”
Can I plant seed paper indoors or in containers?
Seed paper works in pots, hanging baskets, or even windowsill planters. Just ensure containers have drainage holes and use well-draining soil. For indoor gardens, place near a sunny window (or under grow lights) until seedlings are sturdy enough to transplant outdoors.
What if my seed paper doesn’t sprout? Troubleshooting tips!
No sprouts? Check these fixes:
Soil too dry? Water lightly and cover with plastic wrap (remove once sprouts appear).
Too much shade? Move to 4–6 hours of sunlight daily.
Old seed paper? Some seeds lose viability after 1–2 years—check the packaging date!
Poor soil? Mix in compost or use seed-starting mix for better nutrients.
Still stuck? Try replanting a fresh sheet—sometimes it’s just timing!
Wrapping up and next steps
Creating your own seed paper is a rewarding way to grow wildflowers while reducing waste—and you’ve just learned how easy it is! 🌱 Whether you’re crafting it for gifts, eco-friendly stationery, or simply to brighten up your garden, every sheet holds the potential for vibrant blooms.
Now that you’re equipped with the right materials and step-by-step instructions, there’s no better time to get planting.
Ready to take the next step? Try experimenting with different flower blends, colors, or even adding herbs for a sensory twist. Share your creations with friends or plant them in your yard—your green thumb (or budding one!) will thank you. Happy growing! 🌸