
Lawn
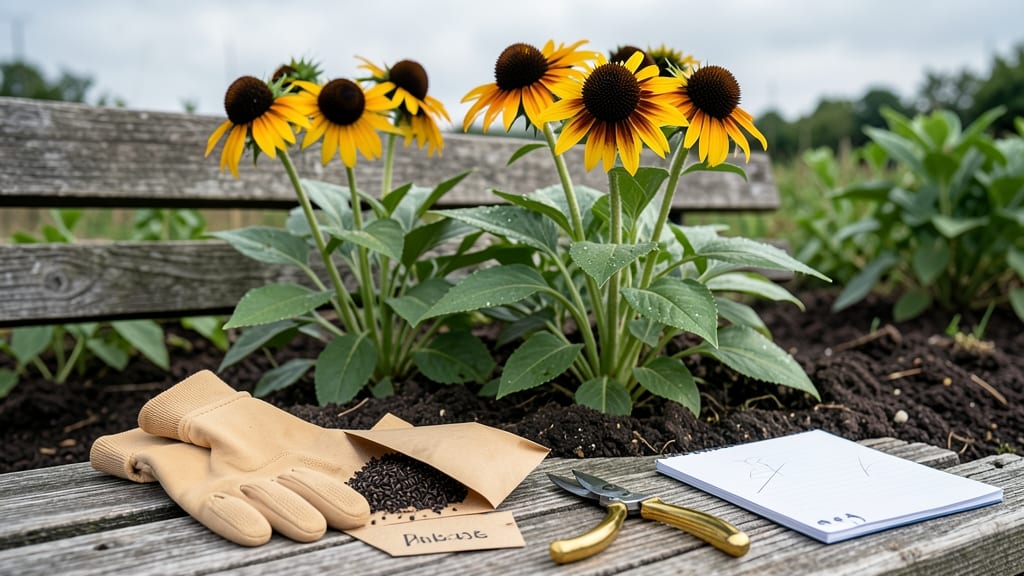
Rudbeckia seed collection unlocks free, homegrown blooms for years to come—no store-bought plants needed. 🌻 The key lies in timing: wait until seed heads turn papery brown and split open naturally, usually late summer to early fall in most climates. I’ve saved seeds from my own garden for five seasons now, and the trick is simple—let nature do most of the work while you handle just a few critical steps.
You’ll need only three things: a paper bag for collecting, a pair of clean scissors, and a cool, dry spot for storage. Harvest on a dry morning when dew has evaporated, then gently snip the seed heads before they scatter.
The seeds inside are tiny but tough, designed to survive winter—just like their parent plants. This method works for both Black Beauty and Goldsturm varieties, my personal favorites.
After collection, cold-stratify the seeds for 60 days in the fridge to break dormancy—this mimics winter’s natural process. Plant them in early spring, and you’ll see sprouts within 2-3 weeks.
The first year’s blooms might be smaller, but by year two, your rudbeckias will thrive just like the ones you grew from seed.
This approach saves money, preserves heirloom varieties, and ensures you’ll always have fresh flowers. Plus, it’s a great project for kids or anyone who loves watching seeds transform into plants. Ready to try it? Grab a bag and let’s get started!
📚 In This Guide
- What you need
- Instructions
- Tips and common mistakes
- Wrapping up and next steps
What you need
- ● Mature rudbeckia seed heads: Collect fully dried, brown seed heads (late summer to early fall). Aim for at least 10-15 healthy heads for a reliable yield.
- ● Paper bags or breathable fabric sacks: 2–3 medium-sized bags (12"x15") to store seeds and prevent moisture buildup.
- ● Pruning shears or sharp scissors: For cleanly harvesting seed heads without damaging stems.
- ○ Small cardboard boxes or trays: Optional but helpful for drying seeds indoors (line with paper towels).
- ● Fine-mesh sieve or sifter: To separate seeds from chaff (a #10–12 mesh works best).
- ● Paper towels or newspaper: For drying seeds thoroughly before stratification.
- ● Ziploc bags or airtight containers: For cold stratification (quart-sized bags with a breathable seal).
- ● Refrigerator or cold stratification setup: A consistent 35–40°F (2–4°C) environment for 60 days.
- ● Seed catalog or notebook: To label varieties and harvest dates.
- ● Desiccant packets: Place 1–2 in storage bags to absorb excess moisture.
- ● Humidity monitor: Ensures optimal drying conditions (aim for 30–50% humidity).
- ● Plant labels: For organizing seeds by variety post-stratification.
Step-by-Step instructions for collecting and cold-stratifying rudbeckia seeds
Here’s how I guarantee strong, viable rudbeckia seeds ready for planting in just 60 days.
🌱 Step 1: Harvest Mature Seed Heads at the Right Time
Wait until the rudbeckia flower heads turn completely brown and the back of the seed head feels dry to the touch—usually late fall after the first frost. Cut the entire stem with 4-6 inches of stalk attached and hang them upside down in a dry, well-ventilated spot. I use a paper bag over the heads to catch falling seeds while allowing airflow.
Don’t rush—green seed heads won’t dry properly, and seeds won’t germinate. You’ll know they’re ready when the seed heads crumble easily in your hand and the seeds inside look plump and dark brown.
🌿 Step 2: Extract and Clean the Seeds
Once fully dry, gently rub the seed heads between your fingers or use a small brush to release the seeds. Remove any chaff or debris by placing them in a bowl of water—the viable seeds will sink while lighter debris floats. Drain and spread them on a paper towel to dry completely for 24-48 hours.
I like to store them in a labeled envelope with the variety name and collection date. Keep them in a cool, dark place until stratification begins—this prevents premature sprouting and maintains viability.
💧 Step 3: Cold-Stratify for 60 Days
Place the dried seeds in a sealed plastic bag with a small amount of damp (not wet) sphagnum moss or paper towels. Store them in your refrigerator’s crispier drawer at 35-40°F for 60 days. Check them weekly—they should feel slightly damp but not soggy.
Cold stratification mimics winter conditions, breaking dormancy so seeds germinate reliably in spring. If you forget to check, just open the bag and adjust moisture as needed—seeds can’t spoil from a little extra dampness.
☀️ Step 4: Test Germination Before Planting
After 60 days, remove a few seeds and plant them in a small pot with seed-starting mix to test viability. Keep the soil moist and place the pot in a warm, sunny spot. Germination should begin in 7-14 days—if seeds sprout, the rest are ready for outdoor planting.
If germination is slow or weak, repeat the stratification for another 2-4 weeks. Rudbeckia seeds are tough, so don’t worry if a few don’t make it—even 50% viability gives you plenty of strong seedlings.
⏰ Step 5: Plant Stratified Seeds in Spring
Sow the seeds directly in the garden after the last frost when soil temperatures reach 50°F. Plant them ¼ inch deep and 12 inches apart—rudbeckia thrives in full sun and well-draining soil. Water lightly after planting to settle the soil around the seeds.
Mulch with 1-2 inches of straw to retain moisture and suppress weeds. You’ll see seedlings emerge in 2-3 weeks, and they’ll bloom their first year if planted early enough.
Tips & tricks for perfect rudbeckia seed viability
These simple strategies ensure your rudbeckia seeds stay strong through stratification and beyond.
The Harvest Factor: Don't skip the frost requirement—rudbeckia seeds need that first freeze to fully mature. I've seen green seed heads produce seeds that either didn't germinate or grew into weak plants. Wait until the entire flower head turns completely brown and feels dry to the touch, even if it's still attached to the stem.
Cleaning Secret: The water float test in Step 2 works brilliantly, but don't rush the drying time. Spread seeds on a paper towel for the full 24-48 hours—this prevents mold growth during stratification. I like to place them near a fan on a low setting to speed up drying without damaging the seeds.
Stratification Wisdom: Your refrigerator's crispier drawer is perfect for maintaining that 35-40°F range, but don't use the freezer section. The seeds need consistent cold without freezing. I mark my calendar 60 days out to check them weekly—this reminds me to adjust moisture if needed, especially if I forget to check.
Germination Test Tip: When testing viability in Step 4, use a small pot with just 3-4 seeds—this gives you clear results without overcrowding. If you're impatient, place the pot in a warm spot (like on top of your fridge) to speed up germination to the lower end of that 7-14 day window.
Pro Tips for Rudbeckia Seed Collection
- These simple strategies ensure your rudbeckia seeds stay strong through stratification and beyond.
- The Harvest Factor: Don't skip the frost requirement—rudbeckia seeds need that first freeze to fully mature. I've see...
- Cleaning Secret: The water float test in Step 2 works brilliantly, but don't rush the drying time. Spread seeds on a ...
Frequently asked questions
Got questions about collecting and storing rudbeckia seeds? You’re not alone! Here are some of the most common inquiries—plus quick, practical answers to keep your seed-saving game strong.
When is the best time to harvest rudbeckia seeds?
Collect seeds when the brown, papery seed heads have fully dried but before they shatter—usually late summer to early fall (August–October, depending on your climate). Check daily for readiness: gently squeeze a seed head—if seeds rattle inside, they’re ready!
Do rudbeckia seeds need cold stratification?
Yes! While rudbeckia seeds can sometimes germinate without it, cold stratification for 60 days (like in your fridge) mimics winter and boosts viability. Place seeds in a damp paper towel, seal in a bag, and refrigerate before planting in spring.
What if my rudbeckia seeds won’t germinate?
Try these fixes:
- Check freshness: Seeds lose viability after 1–2 years. Test a few in warm water—if they sink, they’re likely still good.
- Scarify the seed coat: Lightly nick the hard outer shell with sandpaper or a knife to help water penetrate.
- Use a heat mat: Place trays on a warm mat (70–75°F) to speed up germination.
How should I store rudbeckia seeds long-term?
Store seeds in a cool, dry place (like a sealed jar in the fridge or freezer) with a desiccant packet to prevent mold. Label with the collection date—most stay viable for 1–2 years, though germination rates drop over time.
Can I collect seeds from hybrid rudbeckias?
Probably not! Hybrid varieties (like ‘Goldsturm’) may not reproduce true to type. For reliable results, stick to heirloom or open-pollinated rudbeckias (e.g., Rudbeckia hirta). If you love hybrids, save photos or buy fresh seeds annually.
Wrapping up and next steps
Collecting and cold-stratifying rudbeckia seeds is a rewarding way to grow vibrant blooms year after year! With just a few simple steps—like drying seeds, storing them in moist medium, and a 60-day cold treatment—you’ll unlock higher germination rates and healthier plants. 🌱
Now that you’re armed with the know-how, give it a try this season! Start small, experiment with different varieties, and soon you’ll be sharing your thriving rudbeckia patches with fellow gardeners. Happy growing! 🌸