
Size
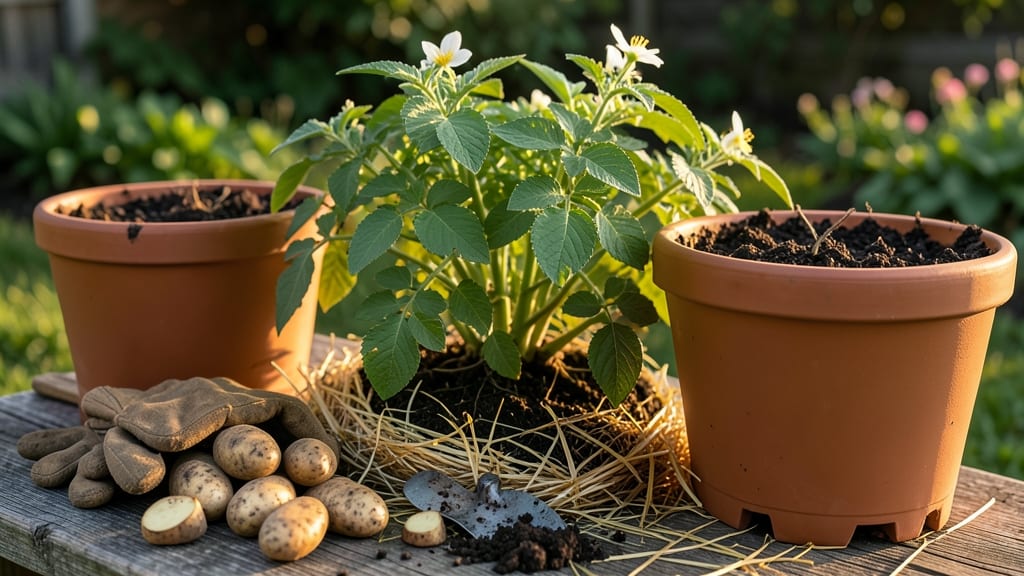
Growing seed potatoes in pots turns your balcony or patio into a potato patch with zero yard needed. 🌱 I’ve grown enough spuds in 5-gallon buckets to feed my family for a month—no digging, no fuss, just a steady harvest of crisp, homegrown potatoes in just 12 weeks.
The secret? Chunky containers, the right soil, and a little patience to let those tubers swell underground.
You’ll need a few basics: seed potatoes (not grocery store spuds), pots at least 10 inches deep, well-draining soil mix, and a sunny spot that gets 6-8 hours of light daily. No fancy equipment—just a fork, some compost, and a watering can.
The key move? Planting your seed potatoes 4 inches deep and covering them with extra soil as they sprout (a technique called "earthing up").
By harvest time, you’ll be pulling out pound after pound of potatoes from those same pots, and the best part? You can reuse the containers year after year.
The plants stay compact, the tubers grow plump, and you skip the backbreaking work of tilling soil. Even if your space is tiny, this method delivers.
Here’s the plot twist: if you’re worried about rot or stunted growth, I’ll show you how to spot those problems early and fix them—so you end up with a full harvest, not a sad little pile of shrivels. Let’s get those potatoes growing!
📚 In This Guide
- What you need
- Instructions
- Tips and common mistakes
- Wrapping up and next steps
What you need
- ● Seed potatoes: 2–4 certified disease-free seed potatoes (e.g., Yukon Gold, Red Pontiac, or Fingerlings). Look for "seed" potatoes (not grocery-store spuds) at garden centers.
- ● Containers: 1–2 large pots (10–12 inches deep, 12–18 inches wide) per seed potato. Use fabric grow bags, plastic pots with drainage holes, or even buckets with holes drilled in the bottom.
- ● Potting mix: 3–5 gallons of high-quality, well-draining potato-specific mix or a blend of 60% potting soil + 40% perlite/vermiculite. Avoid garden soil—it compacts and retains too much moisture.
- ● Drainage: Small rocks, gravel, or broken pottery pieces (1–2 inches thick) for the pot’s bottom layer.
- ● Watering can or hose: With a gentle spray nozzle to avoid disturbing soil.
- ● Fertilizer: Balanced, slow-release granular fertilizer (10-10-10 or 5-5-5) or organic options like worm castings or compost tea.
- ○ Chitting tray (optional but helpful): A tray with egg cartons or small pots to pre-sprout potatoes indoors (if starting early).
- ● Potato growing bags with built-in drainage (saves space and hassle!).
- ● Plant supports: Twine or stakes to secure stems as they grow (especially for tall varieties).
- ● Mulch: Straw or grass clippings to retain moisture and regulate soil temp.
- ● Soil moisture meter: To check moisture levels without overwatering.
- ● Liquid seaweed or fish emulsion: For a mid-season nutrient boost.
Step-by-step instructions for growing seed potatoes in pots
Here's the method I've used for years to grow crisp, homegrown potatoes in small spaces—no garden required.
🌱 Step 1: Choose and Prepare Your Containers
Pick pots that are at least 12 inches deep and have drainage holes—potatoes hate soggy roots. I like using 5-gallon buckets with holes drilled in the bottom because they're sturdy and hold enough soil. If you're using multiple pots, group them together so they share similar growing conditions.
Fill each pot with 6-8 inches of well-draining potting mix. Avoid garden soil—it compacts in containers and causes rot. I like to add a handful of compost to the bottom for extra nutrients. Leave about 2 inches of space between the soil surface and the pot rim for later additions.
🌱 Step 2: Plant Your Seed Potatoes
Seed potatoes are actually whole potatoes with "eyes" (buds) that will sprout into plants. Place them in your pots with the eyes facing up—this is where the stems will grow. I like to plant 2-3 seed potatoes per 5-gallon bucket to ensure a good harvest. Space them evenly so they have room to grow.
Cover the potatoes with 2-3 inches of soil, leaving the top third exposed to light. This encourages multiple stems to grow from each potato. Keep the soil moist but not soggy—water gently after planting. Place the pots in a warm, bright spot (like a sunny windowsill) until sprouts appear, which usually takes 2-3 weeks.
💧 Step 3: Add Soil as Plants Grow
Here's the trick to growing big potatoes in pots: as the stems grow, you'll need to add more soil. When the green stems reach about 6 inches tall, add another 2-3 inches of soil around the base of the plant, burying the lower stems. This process, called "hilling," encourages the plant to grow more tubers underground.
Continue hilling every 2-3 weeks until the pot is full or the stems reach the rim. Stop hilling when the plants start flowering—this means the tubers are growing rapidly. Water deeply after each hilling to help the soil settle and keep the roots moist. You'll know you're doing it right when the soil level reaches the top of the pot.
☀️ Step 4: Provide Light and Care Until Harvest
Potatoes need 6-8 hours of sunlight daily, so place your pots in the sunniest spot you have. If you're growing indoors, supplement with a grow light. Keep the soil consistently moist—about 1 inch deep—but never waterlogged. Overwatering can cause rot, while underwatering stunts growth.
When the plants flower and the leaves start to yellow, it's time to stop watering. This signals the potatoes to mature. After about 2 weeks of yellowing leaves, carefully empty the pot and look for potatoes. Brush off excess soil to check for size—small ones can go back in the pot for another 2 weeks to grow larger.
⏰ Step 5: Cure and Store Your Harvest
Leave your potatoes in a dark, dry place for 1-2 weeks to cure their skins. This helps them store longer. I like to place them in a cardboard box with some newspaper to keep them from touching. Once cured, store them in a cool, dark spot (like a basement) where the temperature stays between 40-50°F.
Check your potatoes occasionally for any that start to sprout or rot—remove those immediately. With this method, you'll have a fresh harvest of potatoes ready in just 12 weeks, even in the smallest of spaces. Enjoy your homegrown spuds!
Tips & tricks for growing potatoes in containers
These are the lessons I learned after growing potatoes in pots for five seasons—tricks that'll help you avoid my early mistakes and get the best harvest possible.
Container Selection: The depth of your pot matters more than you might think. While 12 inches is the minimum, I've found that 15-inch deep containers give you noticeably larger potatoes because they allow more tuber development. If you're using fabric grow bags, make sure they're sturdy enough to hold moist soil—they can collapse under weight. And always check those drainage holes! I once ruined a batch because I missed a tiny hole in the bottom of my bucket.
Hilling Technique: When you're hilling every 2-3 weeks, don't just pile soil on top—create a gentle slope around the stems. This encourages tubers to form all along the stem rather than just at the base. I like to use a small shovel to create little trenches around the plant before adding soil. Also, watch for when the stems reach the rim—this is your cue to stop hilling, even if it feels like you haven't filled the pot completely. The plant knows when it's time to focus on tubers!
Light Requirements: Those 6-8 hours of sunlight are non-negotiable, but here's what I've learned about maximizing light: If you're growing indoors near a south-facing window, rotate your pots every few days so all sides get equal light. For indoor growers, LED grow lights are worth the investment—they can provide the full spectrum your potatoes need. And if you notice the leaves turning yellow between the veins, that's a classic sign of too little light. Move your pots closer to the window or turn on those grow lights immediately.
Watering Wisdom: The "1 inch deep" moisture guideline is perfect, but how you water matters just as much. I've found that watering in the morning gives the soil time to dry out slightly during the day, which prevents rot. Use a moisture meter if you're unsure—potatoes like their soil consistently damp but not soggy. And here's a pro move: after hilling, give the soil a good soak to help it settle and eliminate air pockets around the developing tubers.
Pro Tips for Grow Seed Potatoes In Pots
- These are the lessons I learned after growing potatoes in pots for five seasons—tricks that'll help you avoid my earl...
- Container Selection: The depth of your pot matters more than you might think. While 12 inches is the minimum, I've fo...
- Hilling Technique: When you're hilling every 2-3 weeks, don't just pile soil on top—create a gentle slope around the ...
Frequently asked questions
Got questions about growing seed potatoes in pots? You’re not alone—this method is packed with potential, but it’s smart to know the ins and outs before you start. Here are some of the most common queries, answered in a pinch!
Can I use any pot for seed potatoes?
Not all containers work! Opt for pots with drainage holes (at least 12 inches deep) and a diameter of 12–18 inches for 1–2 potato plants. Avoid plastic if possible—terracotta or fabric grow bags breathe better and prevent overheating. Pro tip: If your pot lacks drainage, add a layer of pebbles at the bottom to mimic it!
How long does it take to grow potatoes in pots?
With the right setup, you’ll harvest new potatoes (small, tender ones) in about 8–10 weeks after planting. For fully mature potatoes, plan for 10–12 weeks. Speed depends on variety (early vs. late), sunlight (6+ hours daily), and warmth—aim for 50–70°F (10–21°C) for best growth.
What if my potatoes sprout but stay tiny?
Tiny tubers often mean one of three things: not enough light (move to a sunnier spot), overcrowding (thin to 1–2 plants per pot), or nutrient deficiency (feed with compost tea or a balanced fertilizer every 3–4 weeks). Quick fix: Gently hill soil around stems every 2–3 weeks to encourage more tuber growth!
Can I reuse soil from last year’s potato harvest?
Reusing soil isn’t ideal—potatoes deplete nutrients and can harbor pests/diseases like blight. Refresh with 50% new potting mix and 50% compost, or swap out the top 6 inches of soil. Sterilize with baking soda (1 tbsp per gallon of water) if you suspect disease. Bonus: Rotate crops yearly to keep your pots healthy!
What’s the best potato variety for pots?
Stick to compact, early-maturing varieties like ‘Yukon Gold,’ ‘Red Pontiac,’ or ‘Fingerling’—they thrive in small spaces and produce well. Avoid large, sprawling types (e.g., Russets) unless your pot is extra deep (18+ inches). Pro move: Check seed packet labels for “container-friendly” or “early harvest” tags!
Can I grow potatoes in pots indoors?
Indoor growing is possible but tricky—you’ll need a grow light (12–16 hours/day) and a sunny windowsill (south-facing). Pots must stay in 60–70°F (15–21°C) temps; a heat mat helps in winter. Expect slower growth and smaller yields. Alternative: Try a sunroom or greenhouse for better results!
Wrapping up and next steps
Growing seed potatoes in pots is a rewarding way to enjoy a fresh, homegrown harvest—even with limited space! With just a few simple steps, you’ll have delicious, organic potatoes ready in as little as 12 weeks.
Whether you’re a beginner or a seasoned gardener, this method proves that big yields don’t require big gardens.
Now that you’re equipped with the know-how, why not take the next step? Try experimenting with different varieties, like fingerlings or red potatoes, or even grow them indoors under grow lights for year-round harvests. Happy planting—your future meals (and taste buds) will thank you! 🌱✨