
Propagation
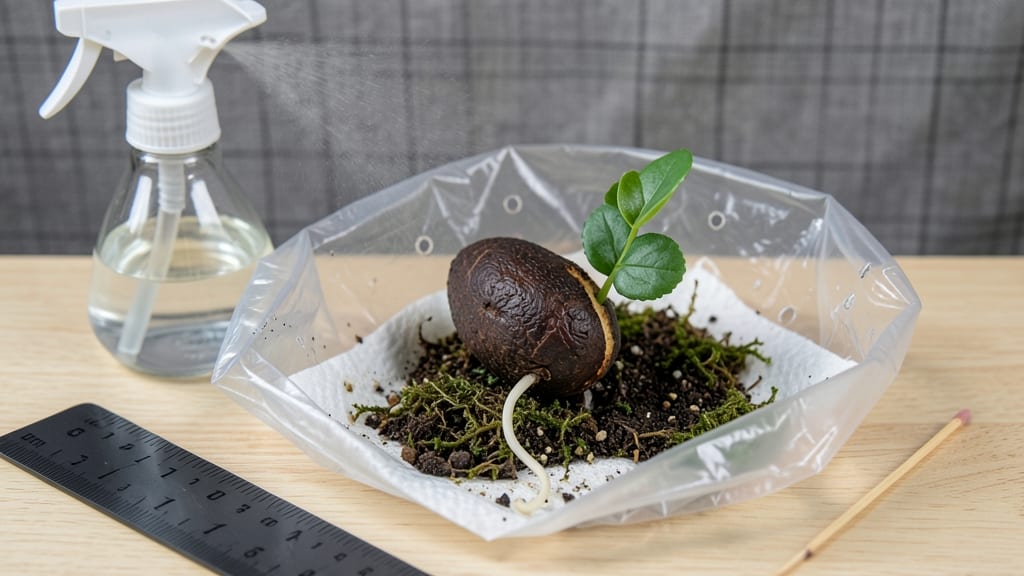
Germinating an avocado seed in a bag turns kitchen scraps into a living plant—foolproof roots in 2-3 weeks without fancy equipment. 🌱 I’ve turned more than a dozen seeds into thriving houseplants using this method, and the best part?
You’re not just growing a plant; you’re teaching yourself how roots really work. All you need is a seed, toothpicks, a glass jar, and a plastic bag. The toothpicks prop up the seed, the jar holds moisture, and the bag creates the humidity roots crave.
No soil, no mess—just wait for those first white tendrils to appear, usually within 10-14 days. The magic happens when the seed splits open, and a tiny green sprout pokes through. Once roots hit 2-3 inches, you’ll know it’s time to transplant into soil.
The plant will keep growing, and with patience, it might even produce fruit someday. The real reward? Watching something so simple transform into life right in your kitchen. This method works year-round, whether you’re a beginner or a seasoned propagator.
Just avoid overwatering—the bag traps moisture, but too much can rot the seed. Let’s get those roots growing!
📚 In This Guide
- What you need
- Instructions
- Tips and common mistakes
- Wrapping up and next steps
What you need
- ● 1 fresh avocado pit – Use a seed from a ripe, organic avocado (the fresher, the better!).
- ● 1 plastic bag (ziplock or reclosable) – A medium-sized bag (8x10 inches or larger) works best.
- ● Toothpicks (2-3) – For suspending the seed.
- ● Water – Filtered or room-temperature tap water (avoid chlorinated water if possible).
- ● Paper towels (1-2 sheets) – To keep the seed moist.
- ○ Scissors or knife – For trimming the seed (optional but helpful).
- ● Measuring cup or funnel – For precise water levels (if you’re detail-oriented!).
- ● Small container (like a cup) – To hold water while you work.
- ● Ruler or marker – To track seed growth over time.
- ● Planting pot (4-6 inches) – For transplanting once roots sprout!
Step-by-Step instructions for germinating avocado seeds in a bag
Here's the method I've used successfully with four different seeds—watch those roots grow in just weeks.
🌱 Step 1: Prepare the Avocado Seed
Start with a fresh avocado pit—one that still has some moisture in the center. I like to use the seed right after eating the fruit, while it's still slightly damp. Rinse it gently under running water to remove any remaining fruit residue, then pat it dry with a paper towel.
This ensures no mold or bacteria slows down germination. Look for a seed that feels heavy for its size—this indicates it's fully developed and ready to sprout. If the seed is light or hollow-sounding when tapped, it won't germinate successfully.
🪴 Step 2: Insert Toothpicks and Suspend the Seed
Place three toothpicks evenly around the seed, spacing them about ½ inch apart from each other. The toothpicks should pierce the seed about ¼ inch deep—just enough to hold it securely without damaging the core. I like to position them so the wider, flatter side of the seed faces downward.
Suspend the seed over a glass or jar filled with about 1 inch of water. The bottom ⅓ of the seed should be submerged in the water while the top remains dry. This keeps the seed hydrated without rotting. Change the water every 2-3 days to prevent bacterial growth.
💧 Step 3: Create a Humid Environment
Place a plastic bag over the suspended seed to create a warm, humid microclimate. Secure the bag loosely with a rubber band, leaving enough room for the seed to breathe but trapping moisture inside. I like to use a clear plastic bag so I can monitor progress without disturbing the setup.
Find a spot with warmth (70-75°F)—a sunny windowsill or near a heat source works well. You'll see condensation form inside the bag within a few days, which is a good sign. Check the seed daily to ensure the water level hasn't dropped too low.
⏰ Step 4: Monitor and Wait for Sprouting
After about 2-4 weeks, you'll notice a small crack forming at the bottom of the seed. This is the root emerging! Once the root reaches about 2-3 inches long, it's time to transition the seedling to soil. I wait until the root is this long because shorter roots are more fragile and harder to handle.
Keep the seed in the bag until the root reaches the desired length, but remove the bag for a few hours each day to prevent mold growth. If you see any dark spots or fuzzy growth on the seed, increase airflow immediately—this is a sign of mold, which can kill the seed.
🌿 Step 5: Transition to Soil
Once the root is long enough, fill a small pot with well-draining potting mix and make a hole about 1 inch deep. Gently lower the seed into the hole so that the root is covered but the top half remains exposed. Press the soil lightly around the seed to secure it without compacting it too much.
Water the soil gently until it's moist but not soggy. Place the pot in a warm, bright spot with indirect sunlight for the first week. You'll see the first true leaves emerge within 2-4 weeks after planting. This is your signal that the seedling is thriving!
Tips & tricks for germinating avocado seeds in a bag
Watch those roots grow in just weeks—here's how to avoid the most common pitfalls and give your seed the best chance to thrive.
Seed Selection Matters: The freshness of your avocado pit is everything. I've found that seeds from Hass avocados (the most common variety) work best when they still have some moisture in the center. Tap the seed—if it sounds hollow, it won't sprout. For best results, use seeds from avocados that were recently purchased (within the last 2 weeks) and still have that slightly damp feel.
Toothpick Placement Technique: When inserting the three toothpicks in Step 2, aim for equal spacing—about ½ inch apart—and pierce just ¼ inch deep. I learned this the hard way: going too deep can damage the seed's core, while too shallow means the seed won't stay suspended properly. Position them so the wider, flatter side faces downward—this natural orientation helps the root grow straight down toward the water.
Water Maintenance Secret: The 1-inch water level in Step 2 is critical, but don't let it become stagnant. Change the water every 2-3 days to prevent bacterial growth, but be careful not to disturb the seed. I've seen seeds rot when left in the same water too long—just pour out the old water and refill carefully. Keep only the bottom ⅓ submerged to maintain the right balance of hydration without drowning the seed.
Mold Prevention: In Step 4, when you notice condensation forming inside the bag, that's actually a good sign—but it's also when mold risks appear. Remove the bag for a few hours each day to allow airflow, especially if you see dark spots or fuzzy growth. I've had seeds saved by this simple daily airing routine when others in my group gave up and lost theirs to mold. Keep the bag loosely secured so air can circulate while still maintaining humidity.
Pro Tips for Germinate Avocado Seed In Bag
- Watch those roots grow in just weeks—here's how to avoid the most common pitfalls and give your seed the best chance ...
- Seed Selection Matters: The freshness of your avocado pit is everything. I've found that seeds from Hass avocados (th...
- Toothpick Placement Technique: When inserting the three toothpicks in Step 2, aim for equal spacing—about ½ inch apar...
Frequently asked questions
Got questions about germinating your avocado seed?
You’re not alone! Here are answers to the most common queries to keep your little seedling on track.
How long does it take for avocado seeds to sprout in a bag?
Most avocado seeds sprout roots in 2–6 weeks, depending on temperature, humidity, and seed health. You’ll know it’s working when you see 1–2 inch roots peeking out of the bottom of the bag. Patience is key—some seeds take longer, especially if they’re older or dried out.
What if my avocado seed isn’t sprouting after 4 weeks?
Don’t panic! First, check if your seed is still firm and plump. If it’s shriveled or moldy, it’s likely dead. Try these fixes:
- Refresh the water: Dump the old water, rinse the seed, and refill with fresh, room-temperature water.
- Warm it up: Place the bag near a sunny window or use a seedling heat mat (70–80°F is ideal).
- Check for rot: If the seed smells foul or feels mushy, it’s rotting—start fresh with a new seed.
Do I need to keep the bag in direct sunlight?
Nope! Avocado seeds don’t need sunlight to germinate—they just need warmth and moisture. Keep the bag in a bright, indirect light spot (like a kitchen counter) to encourage root growth. Once roots appear, you can move it to a sunny windowsill to prep for transplanting.
Can I reuse the same water for the whole process?
It’s best to change the water every 2–3 days to prevent bacteria or mold. Stagnant water can smell funky or even rot your seed. Use a small amount of water—just enough to cover the seed’s bottom half (about 1–2 inches). Fresh water keeps things clean and oxygenated!
What do I do once the roots are 2–3 inches long?
Time to transplant your seedling! Here’s the quick plan:
- Rinse the roots gently to remove any leftover water.
- Plant the seed halfway into a pot with well-draining soil (like a mix of potting soil and perlite).
- Keep the soil moist but not soggy and place it in bright, indirect light.
- Wait for a sprout to emerge (could take 2–8 weeks).
Wrapping up and next steps
Germinating an avocado seed in a bag is a simple, rewarding process that brings life to your kitchen scraps! With just a few supplies—like toothpicks, water, and patience—you can watch roots sprout in just 2-3 weeks.
Whether you’re a beginner gardener or a plant enthusiast, this method proves that growing plants can be fun and accessible.
Now that you’ve mastered the basics, why not take the next step? Transplant your seedling into soil and nurture it into a full-grown avocado tree—your future homegrown harvest awaits! 🌱✨