
Lawn
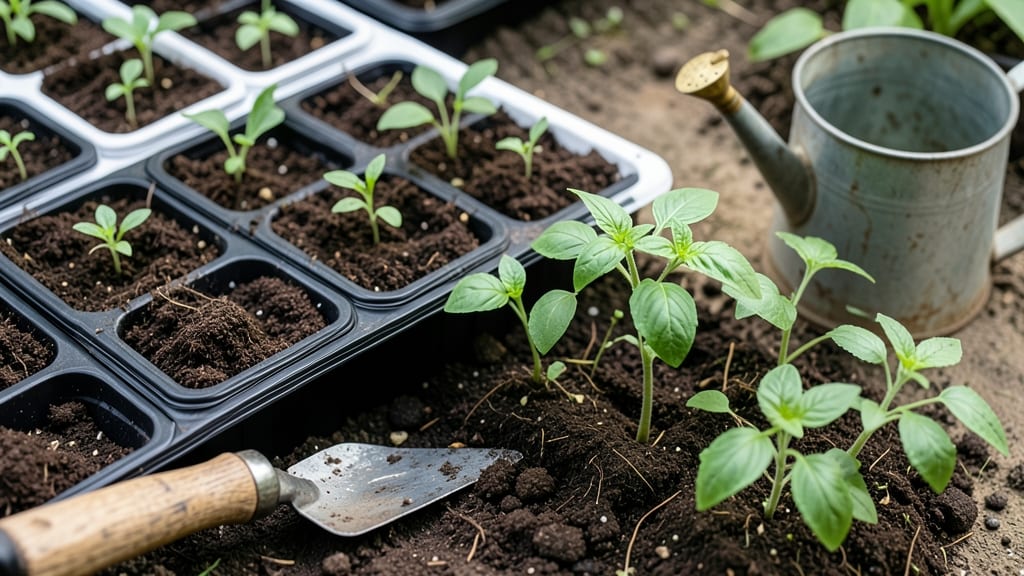
Deep seed trays give seedlings the room to grow strong roots before transplanting—no more leggy, weak starts that flop in the garden. 🌱 I’ve used them for tomatoes, carrots, and even asparagus, and the difference in plant vigor is night-and-day compared to shallow trays.
The secret? Depth matters, especially for plants with deep taproots or heavy foliage.
Start with trays that are at least 4-6 inches deep—this gives roots room to establish before they hit the bottom. Fill them with a lightweight, well-draining mix (50% peat or coco coir, 30% perlite, 20% compost) to prevent waterlogging.
Plant seeds just below the soil surface, and keep them consistently moist but never soggy. A humidity dome or plastic wrap speeds up germination, but remove it as soon as sprouts appear.
You’ll see bolder, faster-growing seedlings in just two weeks—no more waiting months for sturdy plants. The right depth also means fewer transplant shocks, since roots won’t get tangled or damaged when you move them outside. Perfect for root crops, perennials, and anything that struggles in shallow starts.
Watch for overcrowding (thin seedlings early!) and poor drainage (elevate trays if needed). With the right setup, these trays turn weak starts into garden-ready powerhouses—no black thumb required.
📚 In This Guide
- What you need
- Instructions
- Tips and common mistakes
- Wrapping up and next steps
What you need
- ● Deep seed trays: Choose trays that are at least 4-6 inches deep (standard 1020 trays work great!). You’ll need 1-2 trays depending on your seed volume.
- ● Seed starting mix: A lightweight, sterile potting mix designed for seeds (avoid garden soil—it’s too dense!). Aim for 1-2 cubic feet per tray.
- ● Seeds: Select fast-germinating varieties like lettuce, spinach, or marigolds for quick results. Plan for 10-20 seeds per tray (adjust based on seed size).
- ● Watering can or spray bottle: A gentle misting function is ideal to avoid disturbing seeds. A 1-quart spray bottle works perfectly.
- ● Clear plastic dome or plastic wrap: Creates a humidity-friendly environment to speed up germination. A large Ziploc bag or humidity dome fits most trays.
- ● Grow lights or sunny windowsill: Seeds need 12-16 hours of light daily. A LED grow light (12-15W per tray) is ideal if natural light is limited.
- ● Trowel or small hand shovel: For filling trays with soil without overpacking it.
- ● Labels and markers: Waterproof labels (or popsicle sticks + permanent marker) to track seed types and planting dates.
- ● Heating mat: Keeps soil warmer (70-75°F) for faster germination—great for slow starters like tomatoes.
- ● Bottom tray or saucer: Prevents water from leaking and keeps your setup tidy.
- ● Fertilizer (low-dose): A balanced, water-soluble fertilizer (5-10-5) can be added at the first true leaves stage.
- ● Fine mesh or screen: Covers trays to deter pests like fungus gnats if you’re dealing with humidity issues.
- ● Seedling heat gun or fan: Helps harden off seedlings before transplanting by simulating outdoor conditions.
How to use deep seed trays for fast, strong seedlings
Here's the method I swear by for quick germination and robust starts—no more weak, leggy seedlings.
🌱 Step 1: Prepare Your Deep Seed Trays and Growing Medium
Start with clean, 4-inch deep seed trays—this extra depth gives roots room to establish before transplanting. Fill each cell with a sterile seed-starting mix (never garden soil—it compacts and blocks airflow). I like to mix in a handful of perlite for extra drainage and to keep the mix light and fluffy. Moisten the mix until it feels like a wrung-out sponge—damp but not dripping.
Press the soil down gently with your fingers until the surface is firm but not packed. This prevents air pockets that could trap seeds too deep or leave gaps where roots won't grow. Tap the tray lightly on the table to settle everything evenly. Here's the thing—if the soil crumbles when you squeeze it, it's too dry. If it sticks together like clay, it's too wet. Aim for that perfect in-between.
🌱 Step 2: Sow Seeds at the Correct Depth and Spacing
Read the seed packet for depth guidelines, but as a rule, plant seeds twice as deep as their diameter. For tiny seeds like lettuce, that's just barely pressed into the surface. For larger seeds like beans, aim for ½ inch deep. I use a toothpick to poke a small hole, drop in the seed, then cover it lightly—just enough to block out light but not bury it too deep.
Space seeds ¼ inch apart in each cell. Crowding them leads to weak, tangled seedlings that fight for nutrients. If you're sowing multiple seeds per cell (a common practice), thin to the strongest seedling later. Water gently with a spray bottle until the soil surface looks uniformly moist. Don't drown the seeds—you'll know it's right when the soil looks damp but not glistening.
💧 Step 3: Provide Ideal Conditions for Germination
Cover the trays with a clear plastic dome or humidity lid to trap warmth and moisture. Place them in a spot where the soil stays at 70-75°F—a seedling heat mat helps if your home runs cooler. Germination speeds up dramatically in these conditions. Most seeds sprout within 5-10 days, but some (like peppers) can take 14-21 days. Check daily for moisture—mist lightly if the soil feels dry to the touch.
Here's where it gets critical: remove the dome the moment 50% of seeds have sprouted. Trapped humidity after germination invites damping-off, a fungal disease that collapses seedlings overnight. You'll see the first true leaves emerge within a week—that's your signal everything is working. Until then, patience is key.
☀️ Step 4: Move to Light and Maintain Even Moisture
As soon as seedlings break through the soil, move them to bright, indirect light—a south-facing window or grow light positioned 2-4 inches above the trays. Without enough light, seedlings stretch toward the source (called "legginess"), and they never recover. You'll know your setup is right when the stems stay thick and sturdy, with leaves spaced ½ inch apart. Rotate the trays daily so plants grow upright instead of leaning.
Water from the bottom by placing the trays in ½ inch of water for 10-15 minutes. This encourages roots to grow downward where they'll be strongest. Let the trays drain completely before returning them to their growing spot. Overwatering now leads to root rot, and you'll see it as yellowing leaves or mushy stems. Keep the soil evenly moist but never soggy—that's the sweet spot.
⏰ Step 5: Harden Off Before Transplanting
Two weeks before your last frost date, start hardening off the seedlings. Move them outside to a sheltered spot for 1-2 hours the first day, gradually increasing time by 1 hour daily over 10-14 days. This toughens them up for the outdoors. You'll see them adjust by standing taller and developing a deeper green color. Avoid full sun during this period—it burns tender leaves.
Transplant when seedlings show 3-4 true leaves and the soil is workable. Dig a hole twice as wide as the root ball to encourage roots to spread. Water deeply after planting to settle the soil and remove the tray—roots will grow into the surrounding earth within days. The deeper the tray, the stronger the starts, and that's why this method works.
Tips & tricks for deep seed trays
Here's what I learned after years of growing weak seedlings—these tricks make all the difference for rapid, resilient starts.
Soil Density Secret: When pressing down the sterile seed-starting mix in Step 1, aim for firmness similar to a well-used sponge. Too loose creates air pockets that trap seeds too deep, while too compacted blocks root growth. I tap the tray on the table after pressing to eliminate any lingering air gaps—this subtle step ensures consistent moisture and oxygen distribution throughout the 4-inch depth.
Germination Temperature Tip: Maintaining that 70-75°F soil temperature in Step 3 is crucial, but don't rely solely on your thermometer. Place your hand near the soil—if it feels warm but not hot, you're in the right zone. For cooler homes, I place trays directly on a seedling heat mat rather than under it, which creates a more even heat distribution. The moment seeds sprout, that's your cue to remove the dome immediately to prevent damping-off.
Light Transition Strategy: When moving seedlings to light in Step 4, start with just 2-3 hours daily of bright indirect light rather than full exposure. Gradually increase to full light over 3-4 days to avoid shocking tender seedlings. I use a grow light on a timer for 12 hours daily—this controlled approach prevents legginess while still providing the energy they need for strong stems.
Pro Tips for Deep Seed Trays
- Here's what I learned after years of growing weak seedlings—these tricks make all the difference for rapid, resilient...
- Soil Density Secret: When pressing down the sterile seed-starting mix in Step 1, aim for firmness similar to a well-u...
- Germination Temperature Tip: Maintaining that 70-75°F soil temperature in Step 3 is crucial, but don't rely solely on...
Frequently asked questions
Got questions about deep seed trays?
You’re not alone! Whether you’re a lawn-care newbie or a seasoned gardener, these answers will help you grow confident, healthy starts every time.
What’s the best depth for planting seeds in deep seed trays?
Most seeds should be planted at a depth 2–3 times their diameter. For example, tiny grass seeds need just ¼ inch of soil coverage, while larger seeds (like beans) can go 1–2 inches deep. Check your seed packet for specifics—over-deep planting can delay germination!
How long does it take for seeds to germinate in deep seed trays?
Germination time varies by seed type. Fast growers like lettuce or radishes sprout in 3–7 days, while grass seeds may take 7–21 days. Keep trays warm (70–85°F), moist, and in indirect light. Patience pays off—consistent moisture is key!
Can I reuse deep seed trays, or should I replace them?
Yes! Clean and disinfect trays with a 10% bleach solution (1 part bleach to 9 parts water) between uses to prevent mold and disease. Avoid plastic trays that degrade over time—opt for durable, stackable options for long-term reuse.
Why aren’t my seeds germinating in deep seed trays?
Common culprits include cold soil, dry conditions, or old seeds. Double-check moisture (soil should feel damp, not soggy), ensure warmth (use a heat mat if needed), and test seed viability by soaking a few in water—if they sink, they’re likely good!
Are deep seed trays better than regular seed trays for lawns?
Deep trays (6+ inches) give grass roots extra room to establish before transplanting, reducing shock and improving survival rates. They’re especially great for cool-season grasses (like fescue) that need deeper root systems for winter hardiness.
Wrapping up and next steps
Deep seed trays are your secret weapon for foolproof germination—giving your lawn a head start with strong, healthy seedlings that thrive from day one. 🌱 Whether you're a beginner or a seasoned gardener, these trays simplify the process, save space, and boost success rates.
Ready to transform your lawn? Grab your supplies, follow the steps, and watch those tiny seeds grow into lush, vibrant grass! Next up: plant those trays outdoors and prepare for a greener, greener future!