
Size
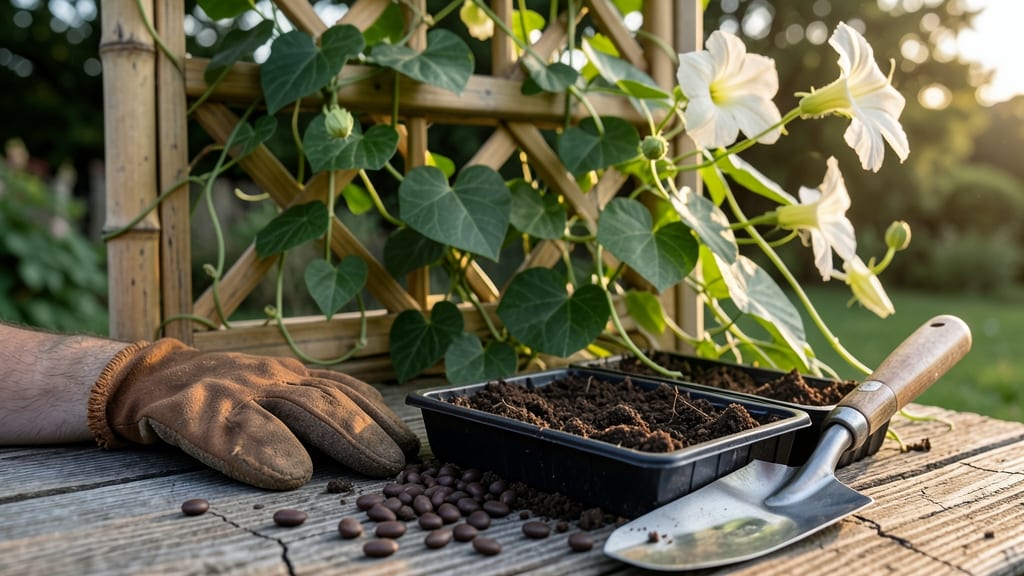
Growing moonflower seeds turns your garden into a twilight paradise with stress-free blooms that open only after sunset. 🌙 I’ve watched these delicate white trumpets unfurl like magic, their intoxicating fragrance filling the evening air—no fuss, just pure summer magic.
The secret lies in mimicking their native tropical habits: warmth, patience, and just enough water to keep them happy without drowning them. Moonflowers thrive in fast-growing vines that climb fences or trellises in under 3 months, but the real trick is starting seeds early.
Plant them ½ inch deep in well-draining soil when nighttime temps hit 60°F, and keep them cozy with a heat mat if your spring is chilly. Germination takes 7-14 days, but don’t rush—these seeds need consistency, not coddling.
Once sprouted, the care is simple: morning water, afternoon shade (especially in hot climates), and a little fertilizer boost when vines hit 3 feet. The biggest mistake? Letting them dry out—they wilt faster than you’d expect. But when those first blooms appear, it’s worth every drop of patience.
Perfect for small spaces or trellis corners, moonflowers add drama without demanding attention. Let’s get those seeds planted—they’ll thank you with a garden that comes alive after dark.
📚 In This Guide
- What you need
- Instructions
- Tips and common mistakes
- Wrapping up and next steps
What you need
- ● Moonflower seeds: 10–20 seeds (choose organic or heirloom varieties for best results).
- ● Biodegradable seed-starting pots or peat pellets: 1–2 per seed (or a seed tray with drainage).
- ● Potting mix: 1–2 gallons of well-draining, seed-starting mix (avoid garden soil—it’s too dense!).
- ○ Garden soil (optional but recommended): 5–10 gallons of nutrient-rich, loose soil for transplanting.
- ● Watering can or spray bottle: With a fine mist nozzle for gentle hydration.
- ○ Gloves (optional): To protect your hands from soil and prickly vines.
- ● Trowel or small shovel: For transplanting seedlings (4–6 inches wide works great).
- ○ Garden twine or stakes (optional): To support vines as they grow (3–4 feet tall).
- ○ Mulch (optional): Straw or shredded leaves to retain moisture and suppress weeds.
- ● Sunlight: A sunny spot (6+ hours of direct light daily). Moonflowers are fast-growing but need warmth!
- ● Warmth: Ideal soil temperature of 70–85°F (21–29°C) for germination.
- ● Patience: Germination takes 7–14 days—keep seeds moist and consistent!
How to grow moonflowers from seed to thriving vines
Moonflowers reward patience with stunning nighttime blooms—here’s how to coax them from tiny seeds into lush, fragrant vines.
🌱 Step 1: Start Seeds Indoors for Early Growth
Moonflower seeds need warmth to germinate, so begin them indoors 6-8 weeks before your last frost date. Fill small pots with sterile seed-starting mix (never garden soil) and plant seeds ½ inch deep. I like to use biodegradable pots to avoid transplant shock later. Keep the soil consistently moist but not soggy—moonflowers hate wet roots.
Place the pots in a warm spot (70-80°F) like on top of your fridge or under a heat mat. Germination takes 10-20 days, so don’t give up if nothing appears right away. Once sprouts emerge, move them to a sunny windowsill or under grow lights for 12-14 hours daily. You’ll know they’re happy when the first true leaves appear—small, heart-shaped, and deep green.
☀️ Step 2: Harden Off and Transplant After Frost
Moonflowers are frost-sensitive, so wait until after all danger of frost has passed before moving them outdoors. Start hardening them off 1-2 weeks before transplanting by placing them outside in a sheltered spot for 1-2 hours daily, gradually increasing time. Watch for wilted leaves—this means they’re not ready yet.
Choose a sunny location with well-draining soil and space to climb—these vines can reach 10-15 feet! Plant seedlings 12-18 inches apart in rows 3-4 feet apart to give them room to sprawl. Bury the stem deeper than the pot to encourage stronger root growth. Water deeply right after planting to settle the soil around the roots.
💧 Step 3: Provide Support and Consistent Watering
Moonflowers are vigorous climbers, so install a trellis, fence, or sturdy stake before planting. Gently weave the vines through the support as they grow—this prevents tangled stems later. Water deeply 1-2 times per week, aiming for 1 inch of water per week. Let the top 2 inches of soil dry out between waterings to prevent root rot.
Mulch around the base with 2-3 inches of organic mulch (like shredded leaves or straw) to retain moisture and suppress weeds. Avoid overwatering—yellowing leaves usually mean too much moisture. Fertilize lightly with a balanced, water-soluble fertilizer every 4-6 weeks during the growing season. Too much fertilizer leads to lush foliage but fewer blooms.
✂️ Step 4: Prune and Encourage Blooms
Pinch back the tips of young vines when they reach 12-18 inches tall to encourage bushier growth. Remove any yellow or diseased leaves immediately to keep the plant healthy. Deadhead spent blooms regularly—this redirects energy to new flowers. Moonflowers bloom only at night, so you won’t see them during the day, but their sweet, intoxicating fragrance will draw you outside after dark.
If vines grow too leggy, trim them back by ⅓ in early summer to promote denser foliage and more blooms. Avoid heavy pruning late in the season, as this can reduce fall flowering. With proper care, your moonflowers will reward you with large, silvery-white blooms that open at dusk and close by morning.
Tips & tricks for perfect moonflower growth
Here's what nobody tells you about growing moonflowers—tricks that'll turn your garden into a fragrant nighttime oasis.
Germination Warmth: The 70-80°F temperature range is non-negotiable for germination. I've found that placing pots on top of a refrigerator works perfectly—it's warm enough without requiring special equipment. If your home stays cooler than 65°F, consider using a seedling heat mat for consistent warmth. Remember, patience is key during the 10-20 day germination period—don't be tempted to move pots to cooler spots too soon.
Harden Off Gradually: When you start the 1-2 week hardening process, begin with just 1 hour outside in a sheltered spot. I like to place them near a south-facing wall where they get morning sun but are protected from harsh afternoon winds. Watch for those wilted leaves—they're your plant's way of saying "not ready yet." Gradually increase time outside by 30 minutes daily until they can handle full outdoor conditions.
Soil Science: Moonflowers despise soggy roots, so that well-draining soil requirement is crucial. If your garden soil is heavy clay, mix in 25% perlite or coarse sand to improve drainage. I've also had success using raised beds filled with a mix of 50% garden soil, 30% compost, and 20% coconut coir—this creates the perfect airy environment their roots love. The 2-3 inches of organic mulch helps maintain that ideal moisture balance while suppressing weeds.
Nighttime Blooming Secret: To maximize those stunning nighttime blooms, make sure your plants get full sun exposure during daylight hours. Moonflowers need 6-8 hours of direct sunlight daily to build the energy required for their dramatic nighttime display. If you notice fewer blooms, it might be time to move them to a sunnier location or provide additional grow light support during shorter summer days.
Pro Tips for Moonflower Seed Grow A Garden
- Here's what nobody tells you about growing moonflowers—tricks that'll turn your garden into a fragrant nighttime oasis.
- Germination Warmth: The 70-80°F temperature range is non-negotiable for germination. I've found that placing pots on ...
- Harden Off Gradually: When you start the 1-2 week hardening process, begin with just 1 hour outside in a sheltered sp...
Frequently asked questions
about growing moonflower seeds—because every gardener deserves a little clarity!How long does it take for moonflower seeds to germinate?
Moonflower seeds typically sprout within 7–14 days after planting, provided they’re kept in warm (70–85°F), moist soil. Pro tip: Soak seeds overnight in warm water to speed up germination! If you don’t see sprouts in 3 weeks, check moisture levels or try replanting fresh seeds.
When is the best time to plant moonflower seeds?
Plant moonflower seeds after the last frost when soil is at least 60°F—usually mid-to-late spring in most climates. They’re not frost-tolerant, so wait until nighttime temps stay above 50°F. For longer blooms, consider a second planting in early summer.
Can moonflower seeds grow indoors before transplanting?
Yes! Start seeds indoors 4–6 weeks before the last frost in biodegradable pots. Use a sunny windowsill or grow lights, keeping soil consistently moist. Warning: Moonflowers are fast-growing—transplant outdoors when they’re 2–3 inches tall to avoid overcrowding.
Why aren’t my moonflower vines blooming?
Moonflowers need full sun (6+ hours daily) and warmth to bloom. If vines are lush but flowerless, check for:
- Shade: Move plants to sunnier spots.
- Cool temps: They thrive in heat (75°F+).
- Over-fertilizing: Too much nitrogen = leaves, not flowers!
Are there alternatives to moonflower seeds for fast-growing vines?
If moonflowers don’t suit your zone, try these easy, fast-climbing annuals:
- Morning glories – Similar night-blooming beauty, drought-tolerant.
- Black-eyed Susans (vine type) – Bright yellow blooms, attracts pollinators.
- Cobaea scandens (Cup-and-Saucer Vine) – Unique trumpet flowers, loves shade.
Wrapping up and next steps
Growing moonflower seeds is a rewarding journey that brings dramatic, fragrant blooms to your garden with minimal fuss! Whether you're a beginner or seasoned gardener, these vines thrive with patience and basic care—just imagine those stunning night-blooming flowers lighting up your evenings. 🌙✨
Now that you’ve got the know-how, take the next step: grab those seeds, pick a sunny spot, and let nature do the rest. Your garden (and your neighbors!) will thank you for the magical display. Happy planting!