
Lawn
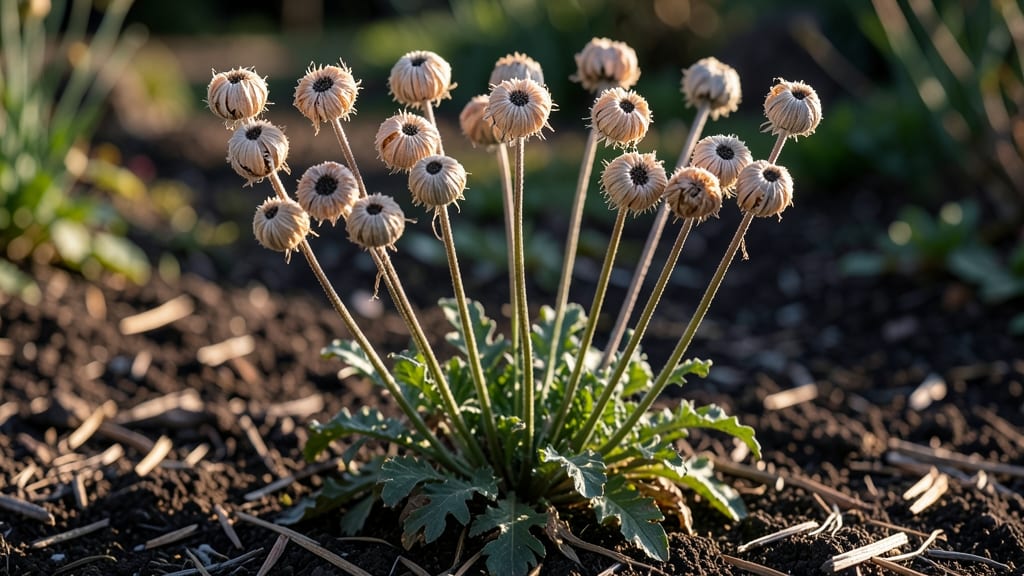
Twisting open anemone seed heads reveals the secret to growing your own plants for free. 🌱 I’ve collected seeds from these delicate-looking pods for years, and the process is simpler than it appears—no special tools or horticultural degree required.
The key is patience and knowing exactly when those dry, papery seed heads are ready to release their treasure.
You’ll need just a few supplies: sharp scissors or pruners, a paper bag for drying, and a dry, shaded spot to store them. Harvest the seed heads when they turn a uniform brown and begin to split open naturally—usually in late summer or early fall, depending on your climate.
The twist-resistant pods actually make collection easier once you know the trick: gently pinch the base and let the seeds fall into your hand.
Once dried, store the seeds in an envelope or small container in a cool, dark place until spring. Germination rates improve if you stratify them (mimicking winter) for 4-6 weeks in the fridge before planting.
Within 2-3 weeks of sowing, you’ll see those first tender green leaves pushing through the soil—proof that free plants are just a season away.
This method works for both Japanese and hybrid anemones, and you can even experiment with crossing varieties for unique blooms. The best part? No digging, no divisions—just nature’s way of multiplying your garden for next to nothing. Ready to try it?
📚 In This Guide
- What you need
- Instructions
- Tips and common mistakes
- Wrapping up and next steps
What you need
- ● Fresh anemone seed heads: 10–20 mature, dry pods (look for brown, papery heads with visible seeds inside).
- ● Pruning shears or clean scissors: Sharp, sterilized tools to snip stems without damaging the pods.
- ● Brown paper bags or breathable mesh bags: 3–5 bags (1–2 seed heads per bag) to allow airflow while drying.
- ● Newspaper or cardboard: A flat, clean surface for spreading pods to dry.
- ● Rubbing alcohol (70% isopropyl) & cotton swabs: For sterilizing tools to prevent mold or disease.
- ● Small envelopes or seed packets: 5–10 labeled envelopes (2x3 inches) for long-term storage.
- ● Pencil or permanent marker: For labeling dates and varieties.
- ● Drying rack or screen: Elevates pods for faster, even drying (great for humid climates).
- ● Desiccant packets (silica gel): Speeds up drying and prevents moisture buildup in storage.
- ● Magnifying glass: Helps spot and remove debris or chaff from seeds.
- ● Glove (lightweight gardening): Protects hands from prickly stems or sap.
- ● Spray bottle with water: For lightly misting stubbornly sticky pods if needed.
How to collect anemone seed heads without twisting or breaking
Here’s my foolproof method for harvesting anemone seed pods intact—no more frustrated snapping or lost seeds.
🌱 Step 1: Identify and Wait for Mature Seed Heads
Anemone seed heads are ready when the fluffy, papery seed clusters turn a uniform tan or light brown and begin to dry out completely. You’ll notice the outer bracts (those papery layers) curl back slightly—this signals the seeds are mature but still firmly attached. Avoid harvesting too early; green or moist pods will twist apart when you try to collect them.
Check your anemones in the late summer to early fall, typically 6-8 weeks after flowering. If you see seeds rattling inside the pod when you gently shake it, that’s your cue. I like to harvest on a dry, sunny morning—the pods are sturdier then and less likely to crumble.
✂️ Step 2: Cut the Stem at the Right Angle
Use clean, sharp bypass pruners (not scissors or dull shears) to cut the stem 1-2 inches below the seed head. Angle the cut slightly upward—this prevents water from pooling on the stem when you place the pods in your collection container. A straight cut risks splitting the stem, which can cause the seed head to twist off later.
Hold the stem firmly with one hand while cutting to avoid sudden jerks. If the pod feels loose or the stem snaps easily, it’s overripe—harvest it immediately to prevent seeds from scattering. I like to work in batches of 4-5 pods at a time to keep everything organized.
🪴 Step 3: Dry the Seed Heads Properly
Lay the cut seed heads in a single layer on a wire mesh screen or paper towels in a dry, well-ventilated area away from direct sunlight. Too much heat will cause the pods to crack prematurely. I use a small cardboard box with holes punched in the sides to create a mini drying chamber—this keeps airflow steady without letting seeds escape.
Turn the pods every 2-3 days to ensure even drying. They’re ready when the outer layers feel crisp and papery and the seeds inside rattle loudly when shaken. This usually takes 7-10 days, depending on humidity. If your home is damp, prop a small fan nearby to speed up the process.
💧 Step 4: Collect Seeds Without Twisting the Pods
Once fully dry, hold the seed head over a clean bowl or envelope and gently twist the base of the stem while pulling downward. The pod should release its seeds in one smooth motion—if it resists, the pods weren’t dry enough. I find it helps to tap the side of the pod lightly with a pencil to loosen stubborn seeds before twisting.
Discard any pods that split or crumble during collection—they’ll lose seeds and may introduce moisture to your collection. For stubborn pods, I use a small paintbrush to coax out seeds stuck in the crevices. Store the collected seeds in a paper envelope labeled with the variety and harvest date.
⏰ Step 5: Store Seeds for Future Planting
Place the envelopes in a cool, dark place (like a refrigerator drawer) where the temperature stays consistent between 35-45°F. Anemone seeds can remain viable for 1-2 years if stored properly. I like to add a tiny silica gel packet to the envelope to absorb excess moisture—this prevents mold and keeps seeds dry.
Before planting next season, stratify the seeds for 4-6 weeks in the fridge to mimic winter conditions. This step breaks dormancy and ensures better germination. Plant them ¼ inch deep in well-draining soil, and keep them moist until sprouts appear—usually in 3-4 weeks.
Tips & tricks for perfect anemone seed collection
Common pitfalls—and how to sidestep every one—when harvesting anemone seed pods.
Timing is Everything: The 6-8 week window after flowering is critical for harvesting. I’ve learned this the hard way—green pods twist apart like overripe fruit, while overripe ones crumble at the slightest touch. Look for that uniform tan color and the telltale rattle when shaken. Harvesting on dry, sunny mornings gives you the sturdiest pods, so plan ahead for weather.
Cutting Technique: That 1-2 inch angled cut below the seed head isn't just about aesthetics—it’s about physics. The upward angle prevents water pooling, which could rot your pods during drying. I use bypass pruners because they make clean cuts without crushing the stem. And here’s a pro move: hold the stem firmly with your non-dominant hand while cutting to avoid any sudden jerks that could twist the pod off.
Drying Strategy: The 7-10 day drying period can feel like forever, but rushing it causes premature cracking. I’ve found that a small cardboard box with holes punched in the sides creates the perfect airflow without letting seeds escape. Turn your pods every 2-3 days for even drying—this prevents one side from becoming brittle while the other stays damp. If your home is humid, a small fan nearby works wonders to speed things up.
Storage Wisdom: That 35-45°F refrigerator drawer isn’t just for keeping seeds cool—it’s about maintaining consistent conditions. I add a tiny silica gel packet to each envelope because even slight moisture can trigger mold. Labeling your envelopes with the variety and harvest date keeps your collection organized, especially if you’re saving multiple types of anemone seeds. Remember, proper storage extends viability to 1-2 years.
Pro Tips for Anemone Seed Heads
- Common pitfalls—and how to sidestep every one—when harvesting anemone seed pods.
- Timing is Everything: The 6-8 week window after flowering is critical for harvesting. I’ve learned this the hard way—...
- Cutting Technique: That 1-2 inch angled cut below the seed head isn't just about aesthetics—it’s about physics. The u...
Frequently asked questions
Got questions about harvesting or working with anemone seed heads?
Here are some of the most common ones—plus quick answers to keep your garden game strong!
When is the best time to collect anemone seed heads?
The ideal time is late summer to early fall (August–October), once the seed pods turn papery-brown and begin splitting open. Harvest them before seeds scatter naturally—this ensures the best viability for replanting.
How do I know if the seed heads are ready to harvest?
Look for dry, papery pods that feel crisp to the touch. If they’re still green or firm, wait a few days. Gently tap them—if seeds rattle inside, they’re ready! Avoid harvesting if it’s raining or humid to prevent mold.
Can I save seeds from store-bought anemones?
Yes, but with a caveat: Hybrid varieties (like ‘Honorine Jobert’) may not produce true-to-type offspring. For consistent blooms, opt for heirloom or open-pollinated cultivars. If you’re unsure, ask the nursery!
What do I do if my seed heads rot before drying?
This usually happens from high humidity or fungal issues. To prevent it:
- Harvest pods early in the day when dew is lowest.
- Spread them in a well-ventilated, dry spot (like a mesh bag or paper towels).
- Add a silica gel packet if your climate is damp.
Are there alternatives if my anemones don’t produce seed heads?
Try these low-maintenance swaps:
- Division: Dig up mature clumps in early spring/fall and replant sections.
- Cutting propagation: Root basal shoots in moist soil.
- Buy seeds online: Specialty nurseries (like Ranunculus.com) sell anemone seeds year-round.
Pro Tip:
Label your seed packets with the variety name and harvest date! Anemone seeds lose viability after 1–2 years, so fresh is best. Store them in a cool, dark place (like a fridge) in a sealed envelope.
Wrapping up and next steps
Anemone seed heads are a gardener’s secret weapon—easy to collect, twist-resistant, and packed with potential for next season’s blooms! 🌸 Whether you’re a beginner or a seasoned pro, their simple design makes seed harvesting effortless, saving you time and frustration.
Now that you know the best tools, techniques, and tips, there’s no reason not to give it a try.
Ready to take the next step? Start by gathering your supplies, head to your garden, and let those anemone seed heads work their magic. Happy harvesting—and may your future garden be even more vibrant than before! 🌿✨