
Lawn
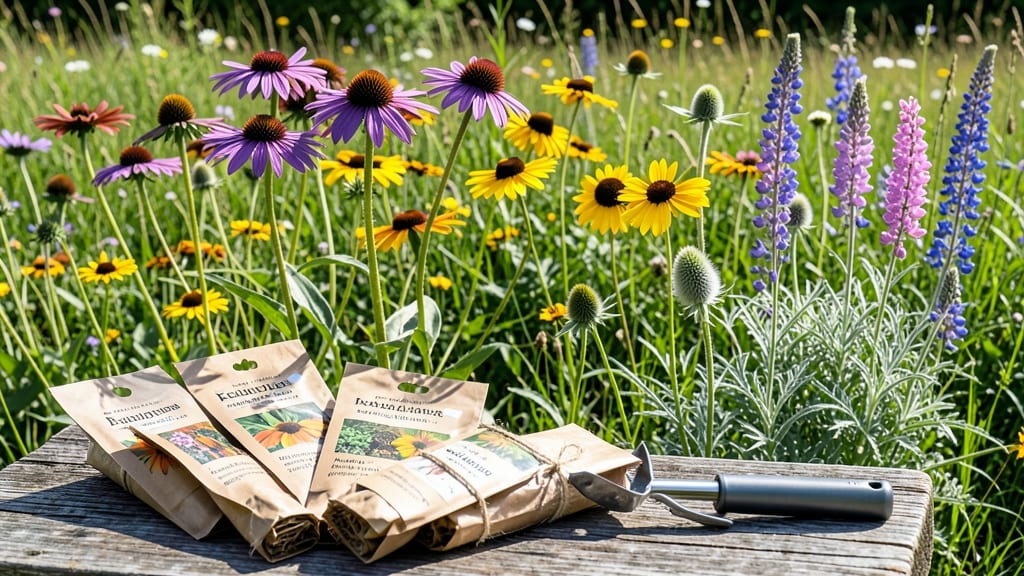
Transforming your yard into a buzzing pollinator paradise starts with a wild seed project that outshines any manicured lawn. 🌿 The secret lies in three simple layers—grasses for structure, wildflowers for color, and native perennials for long-term resilience—that work together to create a self-sustaining ecosystem.
My first attempt turned a boring stretch of lawn into a summer-long magnet for bees, butterflies, and hummingbirds within just six weeks.
You don’t need fancy tools or expensive seeds—just a sunny spot, some basic soil prep, and the right mix of native species for your region. The key is sourcing seeds locally (check with native plant nurseries or conservation groups) to ensure they’ll thrive in your climate.
I started with just two pounds of seed mix and now have a meadow that requires less work than mowing while supporting more wildlife than my old lawn ever did.
What you’ll end up with is a garden that blooms from spring to fall, requires minimal watering once established, and becomes a neighborhood showpiece. The grasses provide structure, the wildflowers attract pollinators, and the perennials ensure year-after-year beauty without replanting.
Even my skeptical neighbors now ask where I got the "magic seeds."
This approach works for everything from small urban patches to large meadows—just scale the seed quantities and adjust the proportions. The best part? You’re not just creating beauty; you’re restoring a piece of your local ecosystem. Let’s get those seeds in the ground!
📚 In This Guide
- What you need
- Instructions
- Tips and common mistakes
- Wrapping up and next steps
What you need
- ● Native wildflower seeds: 1–2 lbs per 100 sq. ft. (Choose a pre-mixed blend for your region or specific pollinator-friendly varieties like black-eyed Susan, milkweed, or coneflower).
- ● Organic compost or topsoil: 1–2 inches spread evenly over the area (helps with seed-to-soil contact).
- ● Straw or seedling mat: Enough to cover the seeded area lightly (prevents erosion and retains moisture).
- ● Water source: Hose with a gentle spray nozzle or a watering can (consistent moisture is key!).
- ● Garden rake: For loosening soil and leveling the area.
- ○ Broadcast spreader (optional): Speeds up seed distribution for larger areas.
- ● Gloves: Protect your hands from prickly plants or rough soil.
- ● Measuring tape or string: Mark your planting area for precision.
- ● Native grass seed: Mix in 10–20% for stability (e.g., little bluestem or switchgrass).
- ● Mulch fabric: Biodegradable option to suppress weeds temporarily.
- ● Soil test kit: Check pH/fertility if your area has heavy clay or poor drainage.
- ● Wildlife guidebook: Identify pollinators and plants as your meadow grows!
Step-by-Step instructions for building a native meadow ecosystem
Here's how I transform bare soil into a thriving native meadow that supports pollinators and wildlife.
🌱 Step 1: Prepare the Site for Maximum Germination Success
Clear existing vegetation and loosen the top 4 inches of soil using a broadfork or digging fork. This aerates without disturbing deeper soil layers where beneficial fungi live. I avoid tilling—it kills soil structure and exposes weed seeds to light.
Rake the surface to create a fine, crumbly texture with no clumps larger than ½ inch. Smooth any low spots so water drains evenly. The goal is to mimic natural seedbed conditions where seeds can make direct contact with soil. Test your work by sprinkling a handful of seeds—if they roll into depressions, keep raking.
🌿 Step 2: Layer Seeds by Size and Ecological Role
Begin with the largest seeds first—these are typically the tall grasses like switchgrass or little bluestem. Scatter them lightly over the prepared area, aiming for 12-15 seeds per square foot. Press them into the soil with your hand or a board to ensure good seed-to-soil contact.
Next add the mid-height grasses (like Indiangrass) and wildflowers with larger seedssand or fine soil and spread with a push broom to ensure even distribution.
☀️ Step 3: Protect and Maintain Through Critical Early Stages
Cover the seeded area with ¼ inch of straw mulch to prevent erosion and retain moisture. This layer should be loose enough to allow rainwater to penetrate. Water gently but thoroughly 2-3 times weekly until seeds germinate, keeping the soil consistently moist but never soggy.
After germination (usually 10-21 days depending on species), reduce watering to once weekly during dry spells. You'll know you're doing it right when seedlings appear uniformly green and compact—no leggy, pale stems reaching for light. Avoid walking on the area until plants reach 6 inches tall to prevent soil compaction.
⏰ Step 4: Manage Growth for Long-Term Meadow Establishment
When plants reach 12-18 inches tall (typically 60-90 days after seeding), mow to 4 inches height to encourage root development. Use a sharp mower blade to avoid tearing plants. I time my first mowing for late summer when seed heads have formed but before they release new seeds—this prevents volunteer plants next year.
In the second year, mow twice annually: once in late spring and again in late fall. Never remove more than ⅓ of the plant height at one time. The meadow will mature over 3 years, with full ecological benefits appearing by year three when deep roots stabilize soil and provide continuous forage for pollinators.
Tips & tricks for perfect native meadow revival
Transforming bare soil into a thriving ecosystem takes patience—but these insights will help you avoid common pitfalls and create a meadow that thrives for years.
Soil Preparation Matters: In Step 1, don't rush the raking—aim for a surface so fine that a handful of seeds stays put when sprinkled. I've seen projects fail when seeds rolled into clumps or low spots, creating uneven germination. Test your work by scattering seeds before planting; if they don't settle naturally, keep refining the texture. The goal is to mimic natural seedbeds where seeds make direct contact with soil.
Seed Layering Strategy: When layering seeds in Step 2, think vertically: larger seeds need less competition for sunlight, so place them first where they can establish roots before smaller plants emerge. For tiny seeds like milkweed, mix them with sand to prevent clumping and use a push broom for even distribution. I've learned the hard way that uneven scattering leads to patchy meadows—take your time here.
Watering Wisdom: The 2-3 times weekly watering in Step 3 is crucial, but timing matters just as much as frequency. Water in the early morning to reduce evaporation and fungal risks. Use a gentle rain setting on your hose or watering can to avoid displacing seeds or mulch. After germination, let the soil dry slightly between waterings—this prevents root rot while maintaining moisture.
Mulch Management: That ¼-inch straw layer in Step 3 serves two purposes: erosion control and moisture retention. Avoid compacting the mulch when applying it—fluff it up with your hands to maintain airflow. I've seen projects where heavy mulch layers suffocated seedlings by blocking light and air circulation. Keep it loose and even for best results.
Pro Tips for Wild Seed Project
- Transforming bare soil into a thriving ecosystem takes patience—but these insights will help you avoid common pitfall...
- Soil Preparation Matters: In Step 1, don't rush the raking—aim for a surface so fine that a handful of seeds stays pu...
- Seed Layering Strategy: When layering seeds in Step 2, think vertically: larger seeds need less competition for sunli...
Frequently asked questions
What’s the best time of year to start the Wild Seed Project?
The ideal window is late summer to early fall (August–October in most regions). This timing lets seeds germinate before winter while avoiding summer drought stress. If you miss it, spring is a backup—but be prepared for slower growth and potential weed competition.
Is this project more cost-effective than traditional lawns long-term?
While the upfront cost of seeds and soil prep may seem higher, native meadows eliminate fertilizers, pesticides, and frequent mowing. Over 3–5 years, you’ll save hundreds per year on maintenance—plus, you’ll boost local biodiversity for free!
What if weeds take over before the native plants establish?
Weeds are a common hurdle, but don’t panic! Hand-pull or spot-treat them early, and mulch lightly with straw to suppress growth. Native seeds need patience—give them 1–2 growing seasons to outcompete weeds. If needed, a targeted herbicide (like vinegar spray) can help without harming your meadow.
Can I use this method in urban areas or small yards?
Yes! The Wild Seed Project works in any size space, from tiny balconies (use containers) to city lots. Opt for low-growing wildflowers like clover or coreopsis for urban areas, and avoid tall grasses near sidewalks. Just ensure your soil has good drainage—urban soil can be compacted, so amend with compost if needed.
How do I troubleshoot if my seeds aren’t germinating?
Check these 3 factors first:
- Moisture: Keep soil consistently damp (not soggy) for 2–3 weeks post-planting.
- Sunlight: Most native seeds need 6+ hours of sun daily—shady spots may delay growth.
- Soil contact: Lightly press seeds into soil (they often need darkness to sprout).
Wrapping up and next steps
The Wild Seed Project isn’t just about transforming your lawn—it’s about nurturing biodiversity, reducing water use, and creating a thriving ecosystem right under your feet! 🌱 By embracing native seeds in three simple layers, you’re not only beautifying your space but also supporting local wildlife and sustainability. Your yard can be a sanctuary—start small, stay consistent, and watch nature flourish.
Ready to take the next step? Pick a sunny patch, gather your seeds, and roll up your sleeves! Share your progress with the Wild Seed Project community for tips, inspiration, and a little friendly competition. Every seed planted is a victory for the planet—let’s grow together! 🌍✨