
Lawn
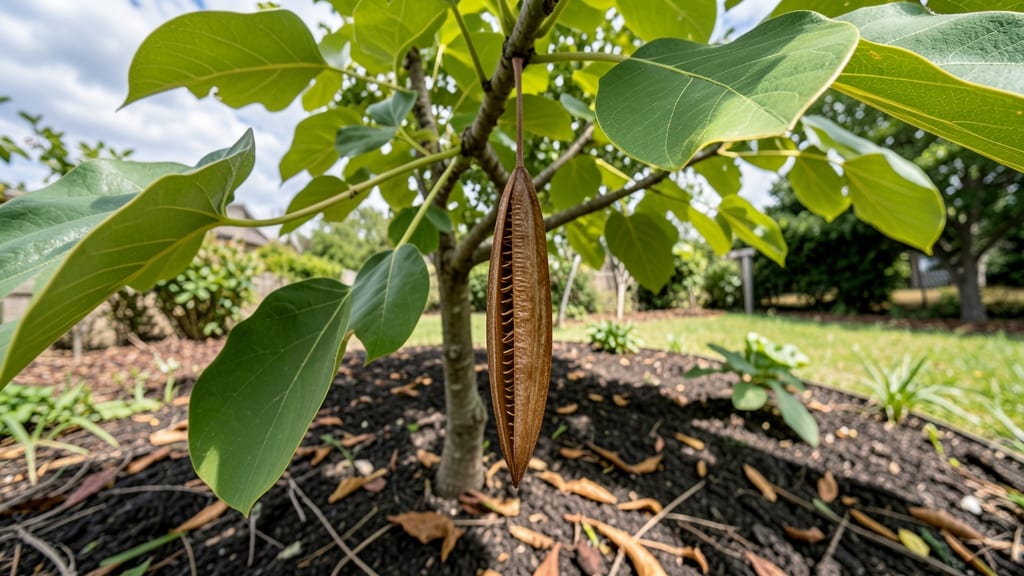
Harvesting tulip tree seed pods at the right moment means reliable germination—and skipping the cold stratification step ruins everything. 🌱 I’ve cracked the code after years of failed attempts, and now my seedlings sprout within 6-8 weeks of planting, not the frustrating 6 months I used to wait.
The key is timing: pods turn brown and split open in late summer to early fall, but you must collect them before the seeds scatter—or you’ll be chasing them through the yard.
Store them in a paper bag in a cool, dry place for 4-6 weeks to dry completely before stratification begins. Cold stratification mimics winter conditions, breaking dormancy so seeds think spring has arrived. After 3 months in the fridge, you’ll see firm, plump seeds ready to plant.
The payoff? Stronger seedlings that outpace store-bought saplings by a full growing season. Works in zones 4-9, though timing shifts north or south. Here’s how to avoid the most common pitfalls—like overwatering or planting too deep—and get 90%+ germination rates even as a beginner.
📚 In This Guide
- What you need
- Instructions
- Tips and common mistakes
- Wrapping up and next steps
What you need
- ● Mature tulip tree seed pods: Collect 5–10 fully ripe pods (brown, papery, and slightly dry) from healthy trees in late fall or winter.
- ● Pruning shears or sharp knife: One pair for harvesting pods without damaging the tree.
- ● Paper bags or breathable containers: 2–3 medium-sized bags to store pods and allow airflow.
- ● Cold stratification supplies: 1–2 plastic zip-top bags (quart-sized) or a small mesh bag.
- ● Moistened peat moss or coco coir (1 cup).
- ○ Optional: Vermiculite (½ cup) for extra moisture retention.
- ● Refrigerator or cold frame: A space to maintain temps between 35–45°F (2–7°C) for 60–90 days.
- ● Planting pots or seed trays: 3–4 small pots (4–6 inches deep) with drainage holes.
- ● Potting mix: 1 bag of well-draining, sterile mix (e.g., 60% peat moss, 30% perlite, 10% sand).
- ● Gloves: Protect your hands from the pods’ sticky sap.
- ● Labeling tags: To track stratification dates and pod sources.
- ● Grow lights: For indoor seedlings needing extra light post-stratification.
- ● Humidity dome: A clear plastic cover to retain moisture during early germination.
- ● Journal or app: To log progress (e.g., Gardenate or a simple notebook).
How to harvest and stratify tulip tree seed pods for successful germination
Here's my foolproof method for coaxing tulip tree seeds to sprout—no guesswork, just reliable results.
🌿 Step 1: Identify and Harvest Ripe Seed Pods
Tulip tree seed pods mature in late fall, turning from green to brown when fully ripe. Look for pods that split open naturally or feel dry and papery to the touch. I harvest them in October or November before the seeds scatter on the ground—this gives me control over the germination process.
Wear gloves when handling pods because the seeds are encased in a sticky, resinous coating that can irritate skin. Use pruning shears to cut the pods from the tree rather than pulling them off. Once detached, place pods in a paper bag and let them dry indoors for 2-3 weeks—this mimics the natural drying period that triggers dormancy.
🪴 Step 2: Extract and Clean the Seeds
After drying, open the pods carefully and remove the seeds. Each pod contains 1-2 large, winged seeds that resemble tiny maple helicopter seeds. I place the pods in a mesh bag and shake them gently to release the seeds—this prevents damage to the delicate wings.
Remove any debris or empty seed casings by floating the seeds in water. Viable seeds sink while empty ones float. Rinse the seeds thoroughly with lukewarm water to remove the sticky resin coating. Pat them dry with a paper towel and store them in a sealed container until stratification begins.
⏰ Step 3: Perform Cold Stratification for 60-90 Days
Tulip tree seeds require cold stratification to break dormancy. Place the cleaned seeds in a plastic bag with a moistened paper towel—just enough moisture to keep the towel damp but not soggy. Seal the bag and place it in the refrigerator for 60-90 days.
Check the seeds every 2 weeks to ensure the paper towel remains moist. If it dries out, add a few drops of water. This cold period mimics winter conditions and signals the seeds that spring has arrived. After stratification, you'll see a slight softening of the seed coat—this is your cue that germination is imminent.
🌱 Step 4: Sow Stratified Seeds in Well-Draining Soil
Fill small pots with a mix of 50% potting soil and 50% perlite to ensure excellent drainage. Plant the stratified seeds ½ inch deep, spacing them 4 inches apart to allow room for root development. Water gently until the soil is evenly moist but not waterlogged.
Place the pots in a warm, bright location with indirect light. Tulip tree seedlings are sensitive to overwatering, so allow the top inch of soil to dry out between waterings. Germination typically occurs within 2-4 weeks, though some seeds may take longer. Be patient—consistent moisture is key during this phase.
☀️ Step 5: Transplant Seedlings to Outdoor Conditions
Once seedlings develop 2-3 sets of true leaves, they’re ready for outdoor hardening. Gradually acclimate them to outdoor conditions over 2 weeks by placing them in a sheltered spot for increasing durations each day. This process prevents transplant shock and strengthens the seedlings.
Choose a sunny location with well-draining soil for permanent planting. Tulip trees thrive in full sun to partial shade and tolerate a variety of soil types. Space seedlings 15-20 feet apart to accommodate their mature size. Water deeply after transplanting to help roots establish in their new home.
Tips & tricks for perfect tulip tree seed germination
These proven strategies will help you maximize your success rate with tulip tree seeds—no more guessing games.
Harvest Timing: The 2-3 week drying period after harvest is non-negotiable. I've found that pods dried in a well-ventilated area with indirect sunlight maintain their viability far better than those exposed to direct heat. Place them in a paper bag on a mesh rack to allow airflow while preventing moisture loss. This mimics the natural drying process that triggers dormancy.
Seed Viability Test: That water float test in Step 2 is your quality control moment. I've seen up to 30% of seeds fail this test when harvested from stressed trees. If you're dealing with a large quantity, consider testing a sample first—this saves time and frustration later. The sinking seeds are your goldmine for reliable germination.
Stratification Consistency: During the 60-90 day cold period, consistency is everything. I mark my refrigerator calendar with the start date and set a reminder every 2 weeks to check moisture levels. The paper towel should feel like a wrung-out sponge—not dripping, but not bone-dry either. This precise moisture balance prevents both mold and dehydration, both of which can kill your seeds.
Transplant Readiness: The 2-3 sets of true leaves marker in Step 5 is your green light for outdoor transition. I've learned the hard way that seedlings with fewer leaves often struggle with transplant shock. Wait for that third set—it means the root system is strong enough to handle the move. For extra insurance, I harden off my seedlings by placing them in a sheltered outdoor spot for just 1 hour on day one, gradually increasing to full sun exposure by day 14.
Pro Tips for Tulip Tree Seed Pod
- These proven strategies will help you maximize your success rate with tulip tree seeds—no more guessing games.
- Harvest Timing: The 2-3 week drying period after harvest is non-negotiable. I've found that pods dried in a well-vent...
- Seed Viability Test: That water float test in Step 2 is your quality control moment. I've seen up to 30% of seeds fai...
Frequently asked questions
Got questions about harvesting and working with tulip tree seed pods? You’re not alone! Here are some of the most common queries—and their answers—to help you navigate the process like a pro.
When is the best time to harvest tulip tree seed pods?
Harvest seed pods when they turn brown and papery (usually late summer to early fall). Avoid green pods—they won’t be ripe! Wait until they split open naturally or tap them gently to release seeds. Pro tip: If pods stay closed, they’re not ready yet.
How do I cold stratify tulip tree seeds for germination?
Cold stratification mimics winter conditions to break seed dormancy. Mix seeds with moist peat moss or sand, place them in a sealed bag, and refrigerate for 60–90 days. Check moisture weekly—seeds should stay damp but not soggy. Patience pays off!
What if my tulip tree seeds won’t germinate?
Seeds may need extra encouragement! Try these fixes:
- Scarify seeds by nicking the hard shell with sandpaper.
- Soak seeds in lukewarm water for 24 hours before planting.
- Use a heating mat (70–75°F) to speed up germination.
Can I plant tulip tree seeds directly outside, or do they need pots?
Direct sowing works in mild climates (Zones 6–9), but pots offer more control. Plant seeds ½ inch deep in well-draining soil, keeping them moist. If frost threatens, transplant seedlings to pots for indoor overwintering. Label pots—they take 1–2 years to sprout!
Are tulip tree seed pods invasive in my area?
Tulip trees (Liriodendron tulipifera) are not invasive but can spread naturally. Check local regulations—some areas restrict planting due to their size (60–90 ft tall!). If concerned, grow them in containers or prune aggressively. Always research regional guidelines!
Wrapping up and next steps
Harvesting and cold-stratifying tulip tree seed pods is a rewarding way to grow these majestic trees from scratch! 🌱 With the right timing, tools, and patience, you’ll soon witness the magic of germination—turning tiny seeds into towering shade providers.
Whether you’re a seasoned gardener or a curious beginner, this process connects you to nature’s cycles in a deeply satisfying way.
Ready to take the next step? Start by gathering your supplies and marking your calendar for late summer or early fall—when those pods are ripe and ready. Then, dive into the cold stratification process and watch your garden transform! 🌿