
Lawn
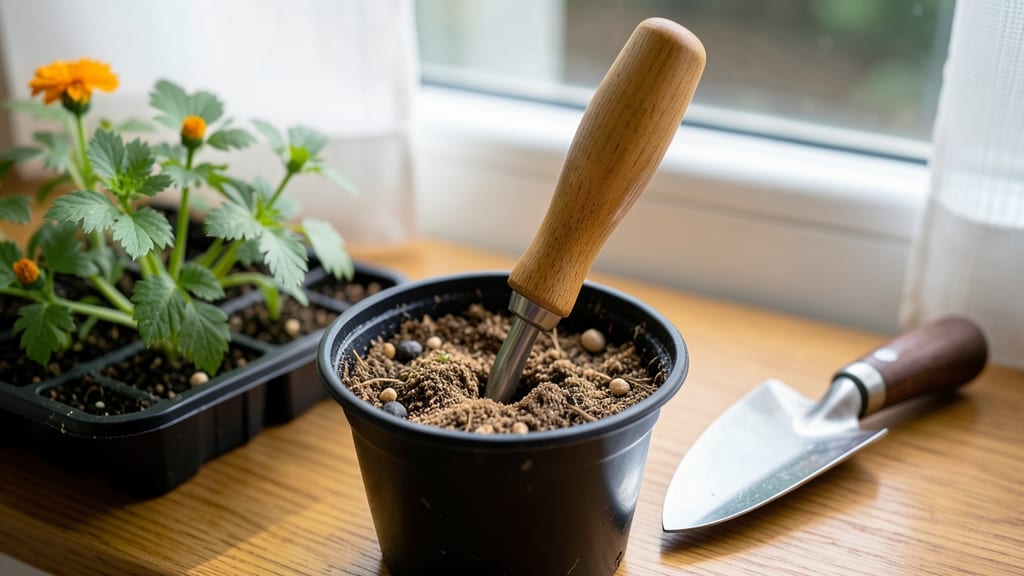
A seed dibber tool turns messy seed planting into perfectly spaced rows with just a few taps. 🌱 I spent years eyeballing seed placement until I tried one—now my rows look like they came from a catalog, not a chaotic afternoon.
The secret? This simple tool creates uniform holes for seeds, ensuring they get the right amount of space to grow without crowding.
You’ll need one that fits your hand comfortably, with a pointed end for poking holes and a flat base for stability. Plastic or wooden dibbers work for most seeds, while metal versions handle tougher soil.
The best part? It’s foolproof—no measuring, no guesswork, just consistent spacing every time. Even beginners get it right the first try.
With a dibber, you’ll see seeds germinate faster and stronger because they’re not competing for space. My carrots now grow straight and uniform, and my herbs stay bushy instead of leggy. The tool pays for itself in one season by reducing wasted seeds and thinning time.
For larger seeds like beans, try a dibber with wider spacing markers. For tiny seeds, a simple pencil works in a pinch. Either way, you’ll never go back to freehand planting once you’ve tried this game-changer for precision.
📚 In This Guide
- What you need
- Instructions
- Tips and common mistakes
- Wrapping up and next steps
What you need
- ● Seed Dibber Tool: 1 x Adjustable dibber (preferred for versatility) or 1 x fixed-depth dibber (for uniform spacing). Look for a durable, ergonomic handle (wood, metal, or plastic) and a pointed end (steel or brass).
- ○ Optional: A dibber with a measuring guide or laser pointer for extra precision.
- ● Seeds: Choose high-quality, fresh seeds suited to your climate and soil type. Quantities vary—check seed packets for spacing guidelines (e.g., 1 seed per dibber hole).
- ● Soil Prep Supplies: Garden trowel or spade (1 x medium-sized)
- ○ Garden fork (optional, for loosening compacted soil)
- ● Compost or organic fertilizer (1–2 gallons, depending on bed size)
- ● Watering can or hose with a gentle spray nozzle
- ○ Marking Tools (Optional but Helpful): Chalk line or string (for large planting areas)
- ● Stakes or flags (5–10, for marking rows)
- ● Measuring tape (1 x 25-foot)
- ● Weather: Choose a cloudy day or plant in the early morning/evening to avoid stressing seeds with direct sunlight.
- ● Soil Conditions: Ensure soil is loose, moist, and weed-free. Test moisture by squeezing a handful—it should hold shape but not be soggy.
- ● Spacing Plan: Research or sketch your planting layout. Most seeds need 1–3 inches of space between holes (adjust based on seed type).
- ○ Safety Gear (Optional): Garden gloves (1 pair, for comfort and hygiene)
- ● Knee pads (if you’ll be kneeling for extended periods)
Step-by-Step instructions for using a seed dibber tool
Here's how to master perfect spacing every time—no more guessing or uneven rows.
🌱 Step 1: Mark Your Planting Lines
Start by outlining your planting area with a straight edge or garden hose. For rows, use a level to ensure they're perfectly straight—this prevents crooked growth patterns later. I mark my lines with a stick or the dibber itself by pressing it lightly to create a shallow trench as a guide. For 4 servings, space rows 12-18 inches apart depending on plant maturity.
If you're planting in a grid pattern, use a measuring tape to mark 12-inch intervals along the first row, then use the dibber to poke holes at each mark. This ensures consistent depth and spacing from the start. Real talk: Skipping this step leads to crowded plants and uneven growth—don't skip it!
🌱 Step 2: Adjust the Dibber for Correct Depth
Most seed dibbers have adjustable depth markers. Set yours to twice the diameter of your seeds—this is the golden rule for germination success. For example, tomato seeds (¼ inch diameter) should go ½ inch deep, while larger seeds like beans (½ inch diameter) need 1 inch depth. Press the dibber firmly into the soil to create a clean, straight hole.
I like to test the depth by inserting the dibber, then checking with my finger. If the hole feels too shallow, adjust the stopper or marker. Too deep? You'll delay germination because seedlings struggle to reach the surface. Here's the thing—consistent depth prevents uneven sprouting and ensures all seeds get equal access to moisture.
🌱 Step 3: Plant Seeds with Precision
Drop 1-2 seeds per hole (depending on seed size) and cover lightly with soil using the dibber's flat end or your fingers. Press gently to secure seeds but avoid compacting the soil. For 4 servings, space seeds 1-3 inches apart in the row—check the seed packet for specific recommendations.
I tap the dibber gently around the hole to settle soil without disturbing the seeds. This prevents them from floating to the surface when you water. Watch for any seeds that sink too low—adjust by adding a pinch of soil to shallower holes. You'll see the difference in straight, uniform rows compared to hand-planted seeds that often cluster.
💧 Step 4: Water Gently and Monitor Germination
After planting, water the area with a fine spray nozzle to avoid displacing seeds. Keep the soil evenly moist but not soggy—this is critical for germination. Use your dibber to poke small holes in the soil surface if it crusts over after watering, as this helps seeds access air and moisture.
Germination times vary, but most seeds sprout within 7-14 days under ideal conditions (65-75°F soil temperature). Once seedlings emerge, thin to the strongest plant per dibber hole using small scissors. I always keep a notebook nearby to track which seeds sprouted where—it's surprising how many "failed" spots actually grow something!
✂️ Step 5: Maintain Spacing as Plants Grow
As seedlings mature, use the dibber to check spacing by pressing it into the soil between plants. If roots or stems are touching, it's time to thin or transplant. For larger plants like tomatoes or peppers, space them 18-24 inches apart—use the dibber to mark new positions before digging.
Here's where the dibber becomes a multi-tool: Press it into the soil around plants to loosen roots without disturbing them during thinning. This encourages stronger growth and prevents shock. You'll notice a dramatic difference in plant health compared to crowded, competing seedlings. Don't overlook this final step—it's what turns good planting into a thriving garden.
Tips & tricks for perfect precision planting with a seed dibber
These simple but game-changing tricks will transform your planting game from guesswork to garden perfection.
Line Marking Hack: For extra precision in Step 1, use a piece of string or twine stretched tightly between stakes to create perfectly straight rows. The dibber works best when your initial lines are flawless—this prevents the "crooked row syndrome" that frustrates every gardener. I've even used a laser level for large gardens where absolute straightness matters most.
Depth Verification: In Step 2, when adjusting your dibber's depth marker, test it on a piece of cardboard first. Cut a small hole at your target depth, then insert the dibber to ensure it hits the mark consistently. This prevents those frustrating "too shallow" or "too deep" surprises that can ruin germination rates. Remember, tomato seeds need exactly ½ inch—no more, no less!
Seed Placement Pro Tip: For Step 3, place your seeds on a small piece of scrap paper before dropping them into the holes. This makes it easier to handle tiny seeds without losing them in the soil. I've lost count of how many seeds I've misplaced trying to drop them directly—this simple trick saves time and frustration. Also, if you're planting multiple varieties, label your paper scraps to avoid mix-ups.
Germination Tracking: In Step 4, create a simple planting chart using your notebook. Record the date planted, seed type, and hole location (like "Row 3, Hole 5"). This becomes your garden's GPS system—when seedlings finally appear, you'll know exactly what they are and where they belong. I've found this especially helpful in crowded gardens where plants can look similar at first glance.
Pro Tips for Seed Dibber Tool
- These simple but game-changing tricks will transform your planting game from guesswork to garden perfection.
- Line Marking Hack: For extra precision in Step 1, use a piece of string or twine stretched tightly between stakes to ...
- Depth Verification: In Step 2, when adjusting your dibber's depth marker, test it on a piece of cardboard first. Cut ...
Frequently asked questions
Got questions about seed dibber tools? You’re not alone!
Whether you’re a gardening newbie or a seasoned pro, these answers will help you plant with confidence. Let’s dive into the most common queries—and how to tackle them like a pro.
What exactly does a seed dibber do?
A seed dibber is a simple tool designed to create precise, evenly spaced holes in soil for planting seeds. It helps maintain consistent spacing—critical for healthy plant growth and reducing overcrowding. Think of it as your secret weapon for perfectly aligned rows!
When is the best time to use a seed dibber?
Use a seed dibber anytime you’re planting seeds—whether you’re starting a vegetable garden, flower beds, or even lawn grass. The key is prepared soil: loosen the ground first, then dibble for even depth. Early spring or late summer (depending on your climate) are ideal for most plants.
Can I make a seed dibber at home if I don’t have one?
DIY options include:
- A wooden dowel or skewer (about 6 inches long)
- A pencil or chopstick with the tip sharpened
- Even a sturdy straw or pipe cleaner bent into a point
Why are my seeds not germinating evenly after using a dibber?
Uneven germination could stem from a few issues:
- Depth inconsistency: Keep holes the same depth (usually 2-3x the seed’s width).
- Soil moisture: Ensure soil is damp but not soggy before planting.
- Seed viability: Test seeds or use fresh ones for better results.
- Spacing errors: Overcrowding can lead to competition. Stick to recommended spacing guidelines.
Are seed dibbers only for small seeds, or can I use them for larger ones?
Seed dibbers work for all seed sizes! For larger seeds (like beans or peas), you might need a wider dibber or even your fingers to create bigger holes. Just adjust the tool or technique to match the seed’s needs—precision is key, regardless of size.
Wrapping up and next steps
Mastering the art of precision planting with a seed dibber tool transforms your garden into a thriving, well-organized oasis! 🌱 Whether you're a beginner or a seasoned gardener, this simple tool ensures your plants grow strong and healthy with perfect spacing.
Now that you’re equipped with the knowledge, grab your dibber and dive into your next planting project—your future harvest will thank you!
Next step: Start small—try a single row or a small bed to practice your technique. Before you know it, you’ll be planting like a pro! 🌟