
Lawn
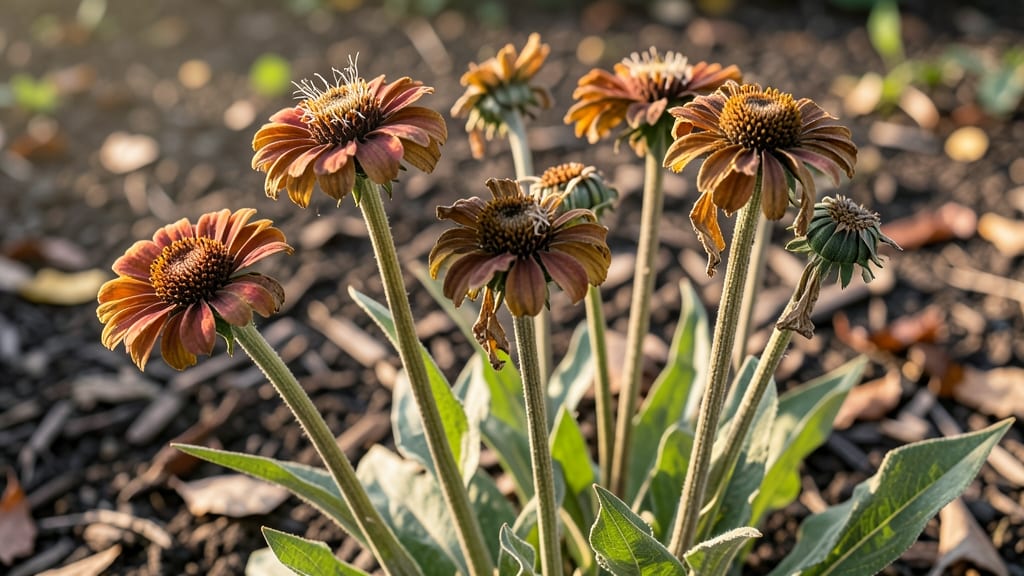
Zinnia seed heads hold the secret to next year’s garden magic—no twisty stems or wasted blooms. 🌻 I’ve saved seeds from my zinnia plants for three seasons now, and every year, they grow even more vibrant than the last.
The trick is harvesting them at the right stage and storing them properly, so you’re not left with brittle, empty pods.
You’ll need just a few simple tools: clean scissors, a paper bag or envelope for drying, and a dry, dark place to store your seeds. When zinnias fade, leave the seed heads on the plant until they turn brown and papery—this ensures full seed maturity.
Once dry, gently rub the heads to release the seeds, then store them in a cool, dry spot until planting time.
What you end up with is a stash of seeds ready to grow into bold, cheerful zinnias next summer. The process is simple enough for beginners, but the payoff is huge—free flowers, year after year, with no extra cost.
Plus, those dried seed heads add rustic charm to winter arrangements or even make great bird feeders.
Whether you’re saving seeds for next season or crafting with dried blooms, zinnias never disappoint. The key is patience and a little know-how—no fancy equipment needed. Let’s make those seed heads work for you!
📚 In This Guide
- What you need
- Instructions
- Tips and common mistakes
- Wrapping up and next steps
What you need
- ● Mature zinnia plants (fully bloomed with dried seed heads—look for brown, papery centers).
- ● Sharp pruning shears (bypass-style, 5–7 inches long, for clean cuts).
- ● Paper bags or breathable mesh bags (1–2 per plant, 1-gallon size, to prevent moisture buildup).
- ● Permanent marker (for labeling bags with plant names/varieties).
- ○ Glove (optional, to protect hands from prickly stems).
- ● Small hand trowel (for digging up stubborn roots if needed).
- ○ Desiccant packets (optional, for bags to absorb excess moisture).
- ○ Spray bottle with water (optional, for lightly misting seed heads if too dry).
- ○ Seed-saving envelope (optional, for storing seeds after extraction).
- ● Wait until seed heads are fully brown and dry (typically 4–6 weeks after flowering).
- ● Choose a dry, sunny day for harvesting to avoid humidity.
- ● Work in a clean, well-ventilated area to prevent mold.
How to harvest zinnia seed heads without twisting the stems
Here's the gentle method I use to collect seed heads that stay intact and dry perfectly for next year's garden.
🌱 Step 1: Wait Until Flowers Fade Completely
Harvest zinnia seed heads only after the petals have fully dropped and the center turns into a fluffy, papery mass. You'll see the stems turn woody and the seed head look like a tiny dandelion puff. Cutting too early means immature seeds that won't store well, while waiting too long risks the seed head scattering before you collect it.
Use clean, sharp garden shears to make the cut. I like to snip about 2 inches below the seed head—this leaves enough stem to handle without dropping the head. Avoid cutting when the seed head is wet from dew or rain, as moisture makes it more likely to crumble when drying.
✂️ Step 2: Bundle and Hang for Drying
Gather 4-6 stems together and wrap them tightly with twine or a rubber band. This keeps the seed heads from bouncing around and losing seeds during the drying process. Hang the bundles upside down in a dry, well-ventilated spot—like a garage, shed, or even a porch with good airflow.
Choose a location with indirect sunlight and temperatures between 60-75°F. Direct sun can overheat the seed heads and cause them to dry too quickly, while high humidity might encourage mold. You'll know they're properly dried when the seed head feels light as a feather and the seeds rattle inside when shaken.
🪴 Step 3: Store Seeds in Airtight Containers
Once the seed heads are completely dry, gently rub them between your fingers or use a fork to loosen the seeds. I like to place the dried heads in a paper bag and shake them over a bowl to catch the seeds. Store the seeds in a small, airtight container like a glass jar or envelope.
Label the container with the zinnia variety and the year collected. Keep the seeds in a cool, dark place—like a pantry or seed storage box. Zinnia seeds stay viable for about 3-5 years when stored properly, so don’t worry if you don’t plant them right away.
⏰ Step 4: Test Germination Before Planting Next Year
Before you plant your saved seeds, do a quick germination test. Place a few seeds between damp paper towels in a sealed plastic bag and keep them in a warm spot. Check for sprouts in about 7-10 days. If they sprout well, you’re ready to plant. If not, try storing the seeds in the refrigerator for another month before testing again.
This simple test ensures you’re not wasting time planting seeds that might not grow. Even if some seeds don’t sprout, you’ll still have plenty left for a successful garden next year.
Tips & tricks for perfect zinnia seed head harvesting
Here's what I've learned after years of collecting zinnia seeds without a single broken stem.
Timing is Everything: The most important part of Step 1 is patience. I can't stress enough how crucial it is to wait until the petals have completely fallen off and the center looks like a tiny dandelion puff. If you're unsure, give it one extra day—immature seeds won't store well, and you'll waste your effort. The woody stems are your best indicator that it's time to harvest.
Cutting Technique: When making your 2-inch cut below the seed head in Step 1, hold the stem firmly between your thumb and forefinger to stabilize it. This prevents any twisting that could damage the seed head. I've found that using clean, sharp garden shears makes all the difference—dull blades can crush stems and cause the seed heads to fall apart during drying.
Drying Conditions: For Step 2, I've had the best success with temperatures between 60-75°F and indirect sunlight. A well-ventilated area like a garage or shed works perfectly. If you're drying in a humid climate, consider using a small fan on low to improve airflow. The key is to let them dry slowly and evenly—this prevents the seed heads from shattering when you try to remove the seeds later.
Seed Extraction: In Step 3, when you're ready to extract the seeds, I recommend using a fork instead of your fingers for stubborn seed heads. Gently press the fork through the center and rub between your fingers to release the seeds. This method is especially helpful if your seed heads dried particularly well and the seeds are tightly packed. Place a bowl underneath to catch any seeds that might fall during the process.
Pro Tips for Zinnia Seed Heads
- Here's what I've learned after years of collecting zinnia seeds without a single broken stem.
- Timing is Everything: The most important part of Step 1 is patience. I can't stress enough how crucial it is to wait ...
- Cutting Technique: When making your 2-inch cut below the seed head in Step 1, hold the stem firmly between your thumb...
Frequently asked questions
Got questions about saving zinnia seed heads for next season? You’re not alone! Here are some of the most common queries—and their simple solutions.
When is the best time to harvest zinnia seed heads?
Harvest seed heads once they’ve dried on the plant (usually late summer to early fall). Look for papery, brown seed pods—this means they’re ready! Wait too long, and they may scatter seeds prematurely.
How do I know if the seed heads are fully mature?
Fully mature zinnia seed heads should be crispy to the touch and turn a light brown or tan color. Gently squeeze a pod—if seeds rattle inside, they’re ready! Avoid harvesting if pods are still green or moist.
Can I store zinnia seeds in paper envelopes?
Yes! Paper envelopes work great for short-term storage (up to 1 year). For longer viability (2+ years), use airtight containers with a desiccant packet to prevent moisture. Label each envelope with the variety and date.
What should I do if my seed heads get moldy or damp?
If seed heads develop mold, remove them immediately and discard. To prevent this, harvest on dry days and store seeds in a cool, dark, dry place (like a sealed jar with silica gel). Never store damp seeds!
Will these seeds grow true to the parent plant?
Most zinnia seeds will produce plants similar to the parent, but colors may shift slightly (especially in hybrids). For consistent results, save seeds from open-pollinated varieties like ‘Benary’s Giant’ or ‘Crystal.’
Wrapping up and next steps
Zinnia seed heads are a gardener’s secret weapon for effortless propagation—no twists, no fuss, just pure potential for next year’s vibrant blooms! 🌻 By mastering the simple steps of harvesting, drying, and storing seeds, you’re not just preserving beauty; you’re investing in future seasons of color and life.
Ready to turn your garden into a self-sustaining paradise?
Your next step? Grab those dried seed heads and start your seed-saving journey today—your future garden (and wallet!) will thank you! 🌱