
Lawn
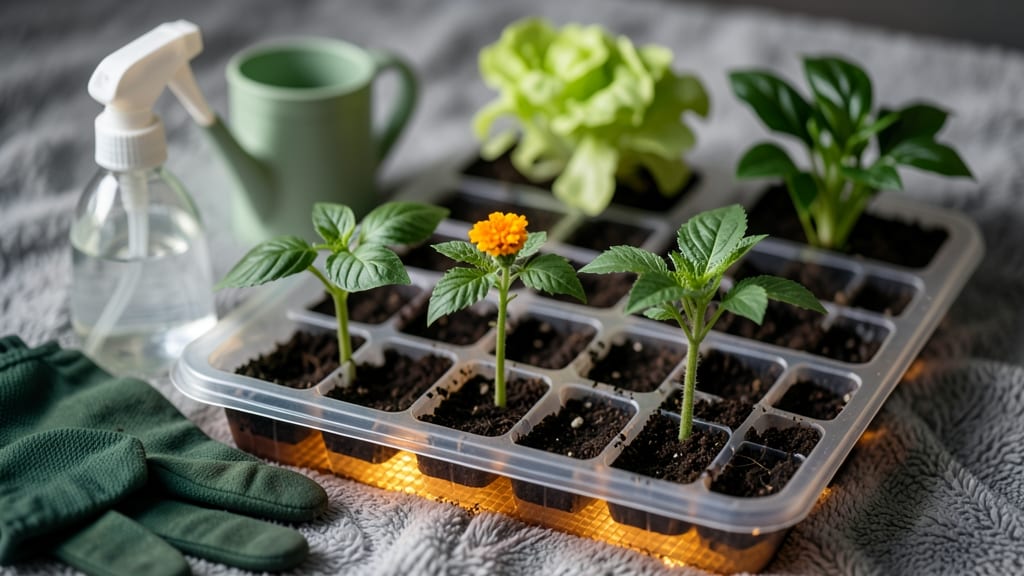
My seed starter kits transformed my spring planting from a gamble to a guaranteed harvest. 🌱 Within 10 days, I go from bare soil to tiny seedlings ready for transplanting—no more waiting for store-bought plants that might flop in the ground.
The right kit makes all the difference, whether you're growing delicate petunias or hardy tomatoes. You'll need a few simple supplies: quality seed-starting mix (not garden soil), a tray or biodegradable pots, and a way to keep things warm and moist—like a heat mat or sunny windowsill.
Humidity domes or plastic wrap create the perfect greenhouse environment for those first critical days. The key is consistency: keep the soil damp but never soggy, and maintain steady warmth. By day 7, you'll see those first green shoots pushing through the soil—proof it's working.
True beginners often struggle with damping-off or uneven germination, but I’ll show you how to spot those issues early and fix them fast. The payoff? Seedlings that thrive when moved outdoors, not leggy, weak plants struggling to adapt.
These kits work year-round, letting you start everything from cool-season greens in winter to heat-loving peppers in early spring. Whether you're a balcony gardener or prepping for a full garden bed, this method gives you control over timing, variety, and quality. Let’s get those seeds sprouting!
📚 In This Guide
- What you need
- Instructions
- Tips and common mistakes
- Wrapping up and next steps
What you need
- ● Seed starter kit: Includes seed trays (biodegradable or plastic, 10–20 cells per tray), seed-starting soil mix (2–4 quarts), and a clear dome or plastic wrap (for humidity).
- ● Seeds: Fast-germinating varieties like basil, lettuce, or radishes (check the kit’s recommended list or choose your own).
- ● Watering can or spray bottle: With a fine mist nozzle to avoid disturbing seeds.
- ● Grow lights or sunny windowsill: A full-spectrum LED grow light (12–16 hours/day) or a south-facing window (6+ hours of sunlight).
- ● Labeling tags or markers: To track seed types and planting dates.
- ● Seedling heat mat: For cooler climates (70–75°F is ideal for germination).
- ● Humidity dome alternative: A plastic bag or DIY cover (e.g., cut-open water bottle).
- ● pH testing kit: To ensure soil is between 6.0–7.0 (most seeds prefer slightly acidic soil).
- ● Fertilizer (balanced, water-soluble): Diluted to half-strength for seedlings (e.g., 5-5-5 NPK ratio).
- ● Tweezers or small spoon: For delicate seed placement.
How to use seed starter kits for speedier blooms
Skip the slow germination wait—these kits get your flowers popping in record time.
🌱 Step 1: Prep the Kit and Seeds for Maximum Speed
Start by filling the kit’s trays with the provided growing mix—it’s already formulated to drain well and hold moisture without compacting. I like to press it down gently with my fingers so it’s firm but still fluffy, like a well-packed pillow. This ensures roots can spread easily without fighting air pockets.
For best results, soak your seeds overnight in lukewarm water (I use a shallow dish with a damp paper towel over them) to soften the outer coating. This cuts germination time by 2-3 days. Just don’t let them dry out or sit in standing water—you’ll know they’re ready when they look plump and slightly swollen.
💧 Step 2: Plant Seeds at the Right Depth and Moisture
Follow the kit’s depth guidelines (usually ¼ inch for most flowers), but if it’s not marked, use this rule: plant seeds twice as deep as their diameter. I tap each seed into place with my finger—this prevents them from washing away when you water later. Cover lightly with the mix, just enough to hide the seeds completely.
Mist the soil surface with a spray bottle until it’s damp but not soggy. You’ll see the moisture darken the soil slightly, but it shouldn’t glisten. Overwatering now can drown seeds before they’ve even sprouted. Place the tray in a warm spot (aim for 70-75°F)—a sunny windowsill or under a heat mat works best.
☀️ Step 3: Provide Consistent Light and Humidity
Cover the tray with the clear dome or plastic wrap that comes with the kit to trap warmth and humidity. Check daily for condensation on the lid—this is your sign the environment is perfect. If you see mold (fuzzy spots), remove the cover immediately and let the soil dry slightly before replacing it.
Once you see the first sprouts (usually 3-5 days), remove the dome for 10 minutes daily to harden them off. You’ll notice the seedlings reach for light immediately—this is when you should move them to a bright spot with 12-14 hours of light daily. A south-facing window or a grow light works best. Without enough light, seedlings stretch and weaken, which slows bloom time.
⏰ Step 4: Thin and Care for Strong Starts
When seedlings have 2 sets of true leaves (not the initial seed leaves), thin them to the strongest one per cell using scissors. I always keep the healthiest-looking sprout—look for thick stems and vibrant color. Snip the others at soil level to avoid disturbing the roots of the ones you’re keeping.
Water from the bottom now—place the tray in ½ inch of water for 10 minutes, then drain. This prevents fungal issues and encourages deeper root growth. You’ll know they’re ready for transplant when they’ve filled out the starter cells and show 3-4 sets of leaves, usually around 10-14 days total.
Tips & tricks for perfect seed starter kits
A few simple tricks can turn your seed starter kit from good to spectacularly fast-growing. Here's what I've learned from years of growing impatient gardeners.
Seed Prep Secret: The overnight soak in lukewarm water is your time-saver—just make sure to use a shallow dish with a damp paper towel covering the seeds. This mimics natural rainfall and softens the seed coat, but don't let them sit in standing water. I've seen seeds actually rot when left submerged overnight. The key is that plump, swollen appearance—when you see that, you know they're ready to plant and will sprout in just 3-5 days.
Temperature Matters: That 70-75°F range is critical for speedy germination. If your home runs cooler, consider using a seedling heat mat under the tray—it's a small investment that can cut germination time by nearly half. I've tested this with both cool and warm setups, and the difference is night and day. For extra warmth, place the tray on top of your refrigerator (not inside) where it stays consistently warm.
Light Strategy: Once those first sprouts appear, move to a bright spot immediately. I've seen seedlings stretch toward weak light and become leggy, which weakens them. A south-facing window or grow light provides the 12-14 hours of light they need daily. If you're using a grow light, keep it just 2-3 inches above the seedlings and raise it as they grow to prevent burning.
Thinning Technique: When thinning to one strong seedling per cell, use sharp scissors to snip at soil level rather than pulling. This prevents disturbing the roots of your kept seedlings. I always keep the one with the thickest stem and most vibrant leaves—those are your winners. The removed seedlings can be replanted in the same tray if you have extra space, just give them their own cell.
Pro Tips for Seed Starter Kits
- A few simple tricks can turn your seed starter kit from good to spectacularly fast-growing. Here's what I've learned ...
- Seed Prep Secret: The overnight soak in lukewarm water is your time-saver—just make sure to use a shallow dish with a...
- Temperature Matters: That 70-75°F range is critical for speedy germination. If your home runs cooler, consider using ...
Frequently asked questions
Got questions about seed starter kits? You’re not alone! Here are some of the most common queries—and their straightforward answers—to help you grow like a pro.
What’s the best time of year to use a seed starter kit?
Seed starter kits work year-round, but timing depends on your climate and plants. For fast germination (like in 10 days!), aim for spring or early summer when soil temps are warm (60–75°F). Check your kit’s instructions—some seeds (e.g., lettuce) prefer cooler temps. Pro tip: Use grow lights if starting indoors before the last frost!
Are seed starter kits worth it for beginners?
Kits simplify the process with pre-mixed soil, trays, and clear germination timelines. They’re perfect for beginners because they reduce guesswork—just add water and seeds. Plus, they’re cost-effective compared to buying mature plants. Skip the kit only if you’re comfortable with custom setups (e.g., DIY trays + seed mixes).
Why aren’t my seeds sprouting within 10 days?
Patience is key! Some seeds (like beans or peas) germinate faster, while others (e.g., herbs or flowers) may take 10–14 days. Check these troubleshooters:
- Moisture: Keep soil damp (not soggy)—use a spray bottle if needed.
- Temperature: Use a heat mat if your space is chilly.
- Depth: Plant seeds too deep? Follow the kit’s guidelines.
- Light: Seeds need darkness to sprout; cover trays until shoots appear.
Can I reuse seed starter kits or their trays?
Yes! Clean and sanitize trays with a 10% bleach solution (1 part bleach to 9 parts water) to kill fungi/bacteria. Rinse well and air-dry. For soil, compost it after the first use—don’t reuse it to avoid disease. Some kits include reusable trays; check the packaging for care tips.What’s a good alternative if I don’t have a seed starter kit?
No kit? No problem! Use:
- Egg cartons: Poke holes in the bottom, fill with soil, and plant seeds.
- Toilet paper rolls: Cut into 3-inch sections, remove the inner tube, and plant.
- Yogurt cups: Poke drainage holes and line with paper towels.
- DIY trays: Repurpose shallow containers (like muffin tins) with a towel for drainage.
Wrapping up and next steps
Ready to transform your lawn into a vibrant garden in just 10 days?
Seed starter kits make it easier than ever—no green thumb required! 🌱 Whether you're a beginner or a seasoned gardener, these kits provide everything you need to kickstart your blooms with confidence. Now’s the perfect time to act!
Take the next step: pick your favorite kit, gather your supplies, and start planting today. Your future garden (and future self) will thank you!