
Propagation
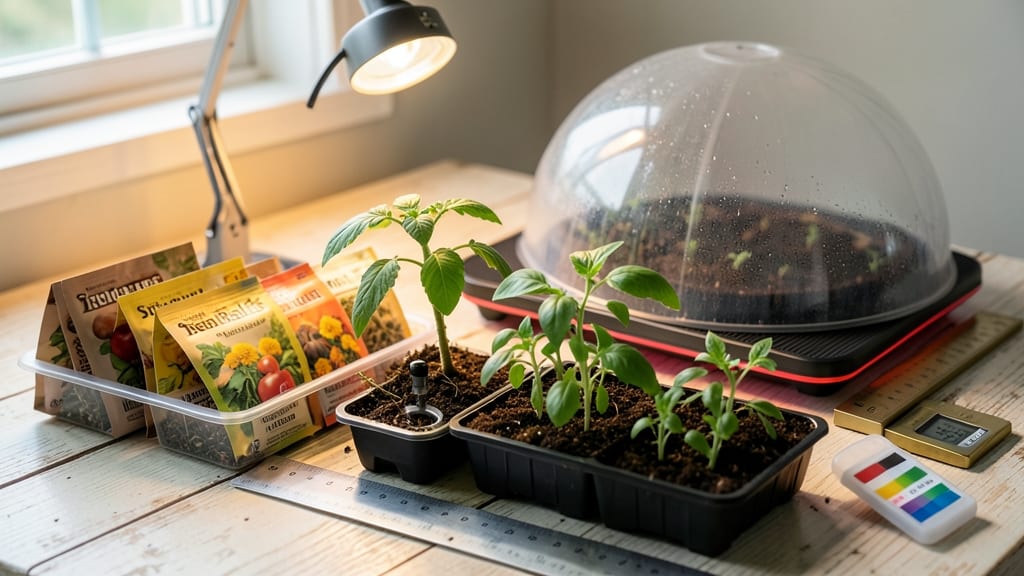
Seed germination requirements aren't as mysterious as they seem—just science you can control. 🌱 The right temperature, moisture, and light transform a dry seed into a hungry sprout, and I’ve cracked the code after years of trial (and a few failed trays of wilted seedlings).
Most seeds need warmth—between 60-80°F—to kickstart growth, while moisture keeps them snug like a cozy blanket. Light? Only after they’ve sprouted; too much too soon can dry them out. That’s why my tomato seeds now pop up reliably in 7-10 days, not the 3 weeks I once waited.
You’ll spot the difference in strong, stout seedlings ready for transplanting, not leggy, weak sprouts. The secret is matching each seed type to its ideal conditions—carrots hate light, basil thrives in it, and peppers need heat. Troubleshooting? Check your soil temperature first, then moisture, and finally light.
Most germination issues vanish when you nail these three basics. Let’s get those seeds moving!
📚 In This Guide
- What you need
- Instructions
- Tips and common mistakes
- Wrapping up and next steps
What you need
- ● Seeds: Choose high-quality, fresh seeds (check the packet for viability dates). Quantity: Adjust based on your project (e.g., 10–50 seeds for testing).
- ● Growing Medium: Paper Towels or Coffee Filters: 2–4 sheets per batch (absorbent but breathable).
- ● Seedling Trays or Small Pots: 2–4" deep, with drainage holes (e.g., 6–12 cell trays). Quantity: 1 tray per 10–20 seeds.
- ● Soil Mix (for transplanting): Lightweight, sterile potting mix (e.g., 50% peat/coir + 50% perlite/vermiculite). Quantity: 1–2 gallons.
- ● Water: Room-temperature, filtered or distilled water (avoid chlorine). Quantity: 1–2 cups per batch.
- ● Spray Bottle: 8–16 oz with a fine mist nozzle (for gentle hydration).
- ○ Clear Plastic Dome or Ziploc Bag: To retain humidity (optional but helpful for delicate seeds).
- ○ Heat Mat (Optional): Germination mat set to 70–85°F (for warm-season seeds like peppers or tomatoes).
- ● Grow Lights or Sunny Window: Full-spectrum LED or fluorescent lights (12–16 hrs/day) or a south-facing window.
- ● Thermometer & Hygrometer: To monitor temperature (65–75°F ideal) and humidity (70–90% RH).
- ● Labels & Marker: Waterproof labels to track seed types and planting dates.
- ● Research: Know your seeds’ specific requirements (e.g., light vs. dark germination, scarification needs).
- ● Clean Workspace: Disinfect tools and containers with 10% bleach solution (1 part bleach to 9 parts water) to prevent mold.
- ● Patience: Germination times vary (e.g., beans sprout in 5–10 days; orchids take months!).
- ● Backup Plan: Start extra seeds in case of failure (e.g., 20% more than needed).
Step-by-step guide to germinating seeds reliably
Here's how I've learned to break down the science into simple, foolproof actions.
🌱 Step 1: Understand Your Seed's Specific Needs
Every seed has unique requirements, so start by checking the packet for details about light, temperature, and moisture. Some seeds, like lettuce, need light to germinate, while others, like beans, prefer darkness. I always write these details on a sticky note and place it near my seed trays—this prevents me from mixing up conditions later.
Most seeds germinate best in soil temperatures between 65-75°F. Use a seedling heat mat if your home runs cooler, especially in spring or fall. You'll see faster, more uniform sprouts when conditions match the seed's natural environment. For example, pepper seeds need warmth around 80°F, while carrots prefer cooler 60-70°F.
💧 Step 2: Prepare the Ideal Moisture Environment
Moisture is the most critical factor—too little and seeds won't wake up, too much and they'll rot. Fill your seed trays or pots with moistened seed-starting mix (not garden soil), leaving about 1/4 inch space at the top. I like to water the mix thoroughly a day before planting so it's evenly damp but not soggy.
After planting, cover the tray with plastic wrap or a humidity dome to trap moisture. Check daily and mist the soil surface if it feels dry to the touch. The goal is to keep the soil consistently moist, like a wrung-out sponge. Overwatering now can lead to damping-off, a fungal disease that kills seedlings overnight—so resist the urge to drown them.
☀️ Step 3: Control Light and Temperature for Best Results
Light requirements vary by seed type, but most need indirect light until they sprout. Place your trays near a bright window or under grow lights set to 12-16 hours daily. If using a heat mat, position it under the tray to maintain 70-75°F soil temperatures. I use a small thermometer probe in the soil to monitor—it's worth the investment to avoid guesswork.
Once you see the first signs of germination (tiny sprouts breaking through the soil), remove any covers and move seedlings to brighter light. Watch for leggy growth—this happens when light is too weak or too far away. If stems stretch toward the light source, lower the grow lights to within 2-4 inches of the seedlings immediately.
⏰ Step 4: Monitor and Adjust for Consistent Germination
Germination times vary widely—some seeds sprout in 3-5 days (like radishes), while others take 2-3 weeks (like tomatoes). Track your progress by marking the planting date on each tray. If only a few seeds sprout after 2 weeks, they may need warmth, moisture, or light adjustments.
Thin seedlings as soon as they develop their first true leaves (not the initial seed leaves). Use small scissors to snip unwanted sprouts at soil level rather than pulling—this prevents disturbing the roots of remaining plants. Keep the soil moist but not waterlogged during this phase, and avoid moving the trays unless absolutely necessary.
🌿 Step 5: Transition to Independent Growth
Once seedlings have 2-3 sets of true leaves and look sturdy, they're ready for their next phase. Harden them off by gradually exposing them to outdoor conditions over 7-10 days. Start with 1-2 hours daily in a shaded, sheltered spot, then increase exposure time and sunlight.
You'll know they're ready for transplanting when they've developed strong stems and vibrant color. Avoid transplanting on sunny days—overcast days reduce stress on the seedlings. Water thoroughly after transplanting to help them establish in their new home. This transition phase is where many seedlings fail, but with patience, you'll build resilient plants.
Tips & tricks for perfect seed germination
These science-backed strategies will help you achieve reliable, healthy sprouts every time—no guesswork required.
The Temperature Factor: If your home stays below 65°F, invest in a seedling heat mat set to maintain 70-75°F soil temperatures. I place mine under my seed trays and use a small thermometer probe to verify—this consistency is what separates thriving seedlings from failed attempts. For pepper seeds specifically, aim for 80°F since they're heat-lovers, while cooler 60-70°F works perfectly for carrots and other cool-season crops.
Moisture Management: The key to consistent moisture is checking soil daily with your finger. It should feel like a wrung-out sponge—not bone dry, not soggy. I've learned the hard way that overwatering leads to damping-off, so I mist lightly when the top inch feels dry. For extra insurance, place a humidity dome over your trays, but remove it immediately once germination begins to prevent fungal growth.
Lighting Strategy: Position your grow lights 2-4 inches above seedlings once they sprout to prevent leggy growth. I use a simple timer to maintain 12-16 hours of light daily—this mimics natural daylight cycles. Watch for stems stretching toward light as your first warning sign that they need more intensity or less distance. A south-facing window works in a pinch, but artificial lights give you more control over consistent conditions.
Harden Off Gradually: When transitioning seedlings outdoors, I start with just 1-2 hours in partial shade on day one, then increase by 1-2 hours daily. This slow adaptation prevents shock and builds resilience. On windy days, I use a small mesh bag to protect them while they adjust. The goal is to have them fully hardened off after 7-10 days—this is when they're truly ready for transplanting.
Pro Tips for Seed Germination Requirements
- These science-backed strategies will help you achieve reliable, healthy sprouts every time—no guesswork required.
- The Temperature Factor: If your home stays below 65°F, invest in a seedling heat mat set to maintain 70-75°F soil tem...
- Moisture Management: The key to consistent moisture is checking soil daily with your finger. It should feel like a wr...
Frequently asked questions
Got questions about seed germination? You’re not alone!
Here are some of the most common queries—and their science-backed answers—to help you grow confidently.
How long does it take for seeds to germinate?
Germination time varies by seed type. Fast growers like radishes or beans sprout in 3–7 days, while slow starters (e.g., tomatoes or roses) may take 2–4 weeks. Check the seed packet for specifics—consistent moisture, warmth (65–85°F), and darkness (for most seeds) speed up the process.
Can seeds germinate in cold weather?
Most seeds need warmth to germinate (exceptions: cold-hardy veggies like peas or spinach). If your soil is below 50°F, start seeds indoors under grow lights or use a heat mat. For outdoor planting, choose frost-tolerant varieties or wait until soil temps rise.
What if my seeds won’t sprout?
Don’t panic! First, check for moisture (soil should feel damp, not soggy). Old seeds (1+ years) may fail—test viability by soaking a few in water. If using pepper or tomato seeds, they often need light to germinate. Try scarifying (lightly nicking the seed coat) or soaking in warm water overnight.
Do all seeds need light to germinate?
No! Most seeds (90%) germinate best in darkness (e.g., beans, carrots, cucumbers). Only light-dependent seeds (like lettuce or petunia) need exposure after planting. Cover trays with a lid or bury seeds ½–1 inch deep to block light until sprouts appear.
Can I reuse old seeds?
It depends! Store seeds in a cool, dry place (e.g., fridge or airtight container) to extend viability. Vegetable seeds typically last 1–5 years (e.g., onions: 1 year; peppers: 2–3 years). Flower seeds often degrade faster. Test a few—if germination drops below 50%, it’s time for fresh stock!
Wrapping up and next steps
Mastering seed germination requirements is your ticket to a thriving garden! Whether you’re nurturing delicate herbs or hardy vegetables, understanding moisture, temperature, light, and soil conditions ensures strong, reliable sprouts. 🌱 With the right approach, you’ll turn tiny seeds into lush plants—one step at a time.
Ready to put your knowledge into action? Start small—try germinating a few seeds indoors or in a controlled environment before scaling up. Happy growing! 🌟