
Lawn
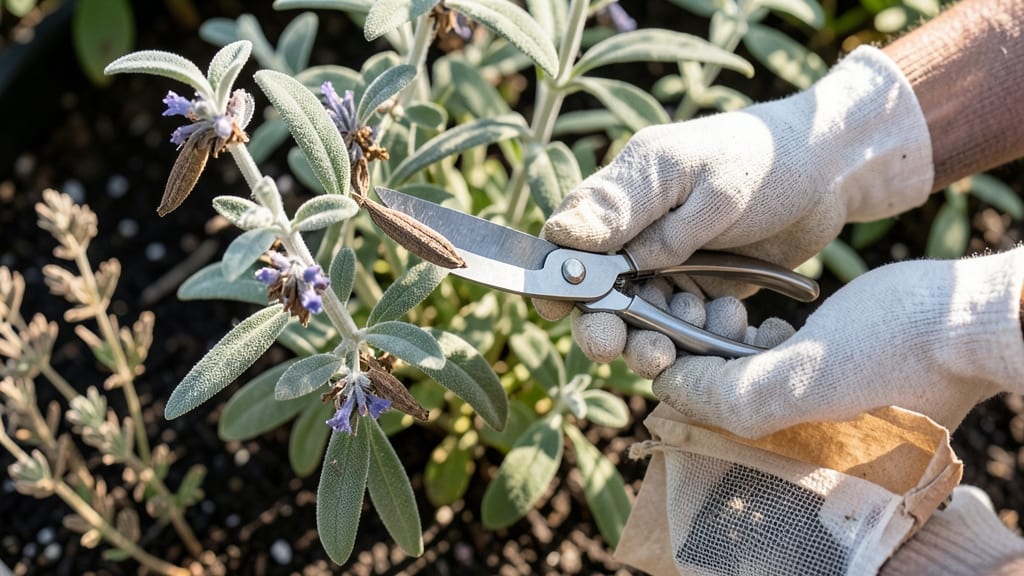
Collecting sage seed pods means you’ll never buy seeds again—and your garden will smell like a sunlit kitchen all summer. 🌿 The key is timing: harvest pods when they turn from green to brown but before they split open, usually in late summer or early fall.
Perennial sage produces more reliable seeds than annual varieties, so focus on established plants for the best results.
Drying pods properly is everything—spread them in a single layer on a tray with good airflow, out of direct sunlight. Store them in a paper bag (not plastic) in a cool, dark place until they rattle when shaken.
This method keeps seeds viable for 2-3 years, ready to plant whenever you’re ready for that classic sage fragrance in your garden.
Germination takes patience but pays off: scatter seeds on moist soil, barely covering them, and keep the surface damp. Most seeds sprout within 2-4 weeks if kept at 70-75°F.
Thin seedlings to 12 inches apart for bushy growth, and you’ll have fragrant sage plants that thrive for years—no twisty seed packets required.
Pro tip: Encourage seed production by letting some flowers go to seed while pruning others for harvest. This two-for-one approach gives you both fresh sage and seeds for next season. Perfect for gardeners who love self-sufficiency and the satisfying crunch of dried pods between their fingers.
📚 In This Guide
- What you need
- Instructions
- Tips and common mistakes
- Wrapping up and next steps
What you need
- ● Sage seed pods: 1–2 pods (ensure they’re fully dried and intact for best results). Pro tip: 💡 Harvest from organic, pesticide-free sage plants for the purest release!
- ○ Gloves (optional but recommended): A pair of nitrile or cotton gloves to protect your hands from sticky resin.
- ● Small bowl or container: A shallow dish (ceramic, glass, or silicone) to catch the seeds and resin.
- ● Soft cloth or paper towels: For wiping up any residue or cleaning hands.
- ● Scissors or pruning shears: Sharp, clean tools to carefully snip the seed pods open.
- ○ Labeling supplies (optional): A small label and marker to tag your collected seeds if saving for future use.
- ● Magnifying glass: Helps spot and remove tiny seeds from the pods with precision.
- ● Fine-tip tweezers: For gently extracting seeds without damaging them.
- ● Air-tight container: A small jar or resealable bag to store seeds if you’re not using them immediately.
- ○ Natural solvent (optional): A few drops of rubbing alcohol (70% isopropyl) on a cotton swab to clean tools between uses.
- ● A well-ventilated area—sage resin can be potent, so avoid enclosed spaces!
- ● Patience: Sage seed pods release their contents gradually; don’t rush the process!
- ● Outdoor access (if harvesting fresh pods): Ensure you’re in a legal, pesticide-free zone to forage.
How to extract and save sage seeds using pods
Harvesting sage seeds this way keeps the process simple and zero-waste—no tools needed beyond what you already have.
🌿 Step 1: Identify and Harvest Mature Sage Pods
Wait until the sage plant's seed pods turn from green to tan or light brown—this signals they're fully mature and ready for seed collection. I usually check in late summer to early fall, depending on your climate. Gently twist the pods between your fingers until they release seeds naturally; don't cut or force them open.
If pods resist, place them in a paper bag for a few days. The seeds will eventually drop out on their own. This method prevents damage to the delicate seeds while keeping everything contained. You'll know they're ready when the pods feel dry and papery to the touch.
🪴 Step 2: Separate Seeds from Pod Debris
Empty the contents of the bag onto a clean, flat surface like a white paper plate or sheet of paper. The seeds will be small, dark, and oval-shaped, while the pod fragments will be lighter and more fibrous. Use a fine-mesh sieve (if you have one) to sift out the debris, or gently blow away the lighter pieces with a straw.
For stubborn bits, I like to use a soft paintbrush to sweep seeds into a small pile while leaving behind the chaff. This step ensures only clean, viable seeds remain—critical for successful germination later. Store seeds in a small envelope or airtight container labeled with the date and variety.
💧 Step 3: Dry and Store Seeds for Future Planting
Spread the seeds in a single layer on a paper towel or clean cloth. Let them air-dry in a cool, dry place for 3-5 days, stirring occasionally to prevent moisture buildup. Proper drying prevents mold and extends seed viability. You'll know they're fully dry when they feel crisp to the touch and no longer stick together.
Once dry, transfer seeds to a paper envelope or glass jar with a desiccant packet (like those used for coffee or tea) to absorb any lingering moisture. Store in a dark, cool pantry—sage seeds can last 2-3 years this way. Label clearly with the date and variety to avoid confusion when it's time to plant.
⏰ Step 4: Test Germination (Optional but Recommended)
Before committing to a full planting, test a few seeds by placing them between damp paper towels in a sealed plastic bag. Keep them in a warm spot (70-75°F) and check daily for sprouts, which should appear in 7-14 days. This step confirms your seeds are viable and gives you confidence in timing future plantings.
If germination rates are low (fewer than 50% sprouting), store the remaining seeds in the freezer for another year—the cold can sometimes "reset" viability. Sage seeds are hardy, but this extra step ensures you're not wasting time with old or damaged seeds.
Tips & tricks for perfect sage seed extraction
Here's what I learned after harvesting sage seeds for years—these small details make all the difference between viable seeds and wasted effort.
Timing is Everything: The color change from green to tan or light brown is your only reliable indicator for maturity. I've found that checking in late summer gives me the best results, but if you miss that window, early fall still works. The key is patience—don't rush the pods. If they're still green, they won't release seeds properly, and forcing them will damage the delicate seeds inside.
Gentle Handling: Twisting the pods between your fingers works best when they're completely dry. I've ruined seeds by trying to force open still-green pods, so always wait until they feel papery. For stubborn pods, the paper bag method is foolproof—it mimics how seeds would naturally disperse in the wild, without any risk of damage. Just be patient and give them a few days.
Storage Wisdom: The 3-5 day drying period is non-negotiable for preventing mold. I've learned the hard way that rushing this step leads to seeds that won't germinate. Spread them in a single layer and stir occasionally to ensure even drying. Once completely dry, the desiccant packet in your storage container is your best friend—it keeps seeds viable for years by preventing moisture buildup.
Germination Test: The 70-75°F warm spot for germination testing is crucial for accurate results. I keep mine on top of my fridge, which stays consistently around 72°F. If you don't see sprouts within 14 days, don't give up—store the remaining seeds in the freezer for another year. The cold often "resets" viability, and I've successfully germinated seeds that were two years old after this treatment.
Pro Tips for Sage Seed Pods
- Here's what I learned after harvesting sage seeds for years—these small details make all the difference between viabl...
- Timing is Everything: The color change from green to tan or light brown is your only reliable indicator for maturity....
- Gentle Handling: Twisting the pods between your fingers works best when they're completely dry. I've ruined seeds by ...
Frequently asked questions
about sage seed pods—your go-to for quick, eco-friendly lawn care solutions!When do sage seed pods naturally release their seeds?
Sage seed pods typically release seeds in late summer or early fall (August–October), when temperatures drop and moisture levels change. This mimics their natural lifecycle, ensuring optimal germination for your lawn. If you need earlier release, gently rub the pods between your hands or place them in a warm, dry spot for a few days.
How long does it take for sage seed pods to decompose?
Sage seed pods break down naturally over 6–12 months, depending on soil conditions. In warm, moist environments, they decompose faster. For quicker results, till the pods into the soil or use them as mulch—they’ll enrich the earth as they disappear!
Can I use sage seed pods in place of traditional grass seed?
Yes! Sage seed pods are a zero-waste alternative for ground cover, especially in drought-resistant or native plant gardens. However, they won’t replace traditional grass seed for lawns needing high traffic or fast growth. Pair them with clover or moss for a low-maintenance, eco-friendly blend.
What if my sage seed pods aren’t opening?
Pods may stay closed due to excess moisture or low temperatures. Try drying them in a sunny spot for a few days or lightly nick the seams with scissors. If they’re still stubborn, check for pests or mold—discard any that look discolored or mushy.
Are sage seed pods safe for pets and wildlife?
Sage seed pods are non-toxic and pose no harm to pets or local wildlife. In fact, birds and small animals may interact with them naturally. Just avoid over-fertilizing nearby areas to keep ecosystems balanced.
Wrapping up and next steps
Discovering sage seed pods as a natural, zero-waste solution to twist ties is a game-changer for eco-conscious gardeners! 🌿 These pods offer a simple, sustainable way to secure lawn bags without plastic waste—perfect for reducing your environmental footprint while keeping your yard tidy.
Whether you're a seasoned gardener or just starting out, this method is easy, cost-effective, and aligns with a greener lifestyle.
Ready to give it a try? Grab a handful of sage pods, gather your lawn bags, and start experimenting today! Every small step toward sustainability counts—let your yard be a testament to thoughtful, waste-free living. 🌱✨