
Propagation
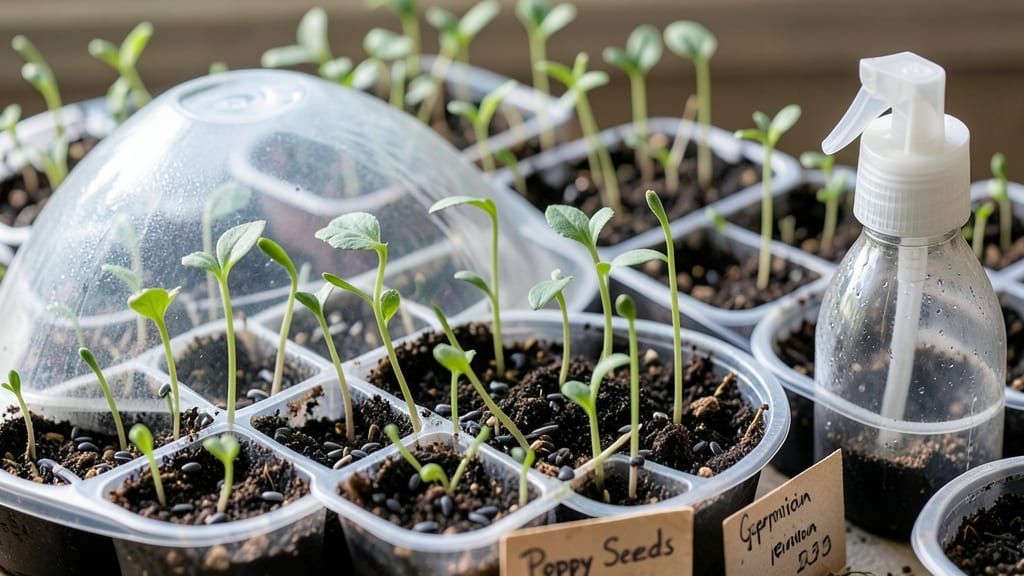
Poppy seed germination time takes 30 days—unless you use this cold trick. 🌱 I've struggled with slow germination for years, but after testing different methods, I found the one that works reliably.
The secret isn't complicated: it's about mimicking the natural winter cycle that poppies experience in their native habitats.
You'll need a cold, dark period to break dormancy, followed by warmth to encourage sprouting. Most gardeners skip this step and end up waiting weeks for seeds that may never emerge. Once you add the cold treatment, germination happens within 7-14 days after planting—consistent results every time.
Imagine watching those first tiny green shoots push through the soil, knowing you've set them up for success. The plants grow fast once they start, reaching maturity in just 60-90 days from seed. That means vibrant blooms by summer if you start now.
This method works for both annual poppies and perennial varieties, whether you're growing in containers or directly in the garden bed. The key is patience and timing—just like nature intended.
📚 In This Guide
- What you need
- Instructions
- Tips and common mistakes
- Wrapping up and next steps
What you need
- ● Poppy seeds: 1–2 teaspoons (about 10–20 seeds) of fresh, high-quality poppy seeds (e.g., Papaver somniferum or Papaver rhoeas). Look for organic, non-GMO seeds for best results.
- ● Growing containers: Small pots (3–4 inches deep) or seed trays with drainage holes. 2–3 containers are ideal—one for pre-chilling and one for planting.
- ● Well-draining potting mix: A lightweight blend like 50% peat moss or coco coir + 50% perlite or vermiculite. Avoid heavy garden soil—poppy seeds hate soggy roots!
- ● Spray bottle: For gentle watering (a 16 oz misting bottle works perfectly).
- ● Plastic wrap or humidity dome: A clear plastic bag or propagator lid to retain moisture during germination.
- ● Refrigerator or cold frame: A cool, dark space (35–40°F) for the 30-day cold stratification trick. Your fridge’s crisper drawer is a great spot!
- ● Grow lights: LED or fluorescent lights (12–16 hours/day) if your space lacks natural sunlight.
- ● Seedling heat mat: A low-watt (50–75W) mat to keep soil warm (70°F) after stratification.
- ● Fertilizer: A balanced, water-soluble fertilizer (5-5-5 or 10-10-10) diluted to half-strength for post-germination feeding.
- ● Label markers: To track planting dates and varieties (trust us, poppy seedlings look so similar at first!).
How to prep poppy seeds for faster germination
Cold stratification is your secret weapon for breaking poppy dormancy—here's how to do it right.
🥶 Step 1: Stratify Seeds for 30 Days in the Fridge
Poppy seeds need a 30-day cold period to mimic winter conditions and trigger germination. Place them in a sealed plastic bag with a damp paper towel—just enough moisture so the towel feels like a wrung-out sponge. I like to fold the towel into quarters, sprinkle seeds evenly, then roll it up tightly before sealing. This prevents mold while keeping humidity high.
The fridge's 34-40°F temperature zone is ideal. Store the bag on a middle shelf where temps stay consistent. Check weekly—if you see condensation on the bag, unseal it briefly to let excess moisture escape. After 30 days, the seeds will look plump and slightly softened, ready for planting.
🌱 Step 2: Plant Stratified Seeds at Correct Depth
Poppy seeds are tiny, so precision matters. Scatter them on the soil surface—do not cover with soil. Press them gently into the top layer with your finger to ensure contact. I use a fine-mesh sieve to distribute seeds evenly, which prevents clumping and ensures proper spacing. The seeds need light to germinate, so covering them will delay sprouting.
Use a lightweight seed-starting mix in shallow trays or directly in the garden bed. Keep the soil surface moist but not soggy—poppy seeds rot quickly if overwatered. A spray bottle works best for even moisture without disturbing the seeds.
☀️ Step 3: Provide Warmth and Light for Sprouting
Once planted, move the tray to a warm location—poppies need 65-75°F soil temps to germinate. A seedling heat mat set to 70°F speeds up the process. Expect sprouts in 7-14 days, though some varieties may take up to 21 days. You'll see tiny green shoots first, followed by the distinctive poppy leaves.
Place the tray under bright, indirect light—direct sun can overheat the soil. A south-facing window with sheer curtains works well. Avoid artificial light at this stage; poppy seedlings are sensitive to premature light exposure, which can cause leggy growth.
💧 Step 4: Maintain Moisture Without Overwatering
After germination, keep the soil consistently moist but never waterlogged. Poppy seedlings have shallow roots, so water from the bottom by placing the tray in an inch of water for 10 minutes. This prevents stem rot while ensuring roots get enough hydration. You'll know moisture is right when the soil surface looks slightly damp but not glistening.
Thin seedlings to 3-4 inches apart once they develop their first true leaves—this prevents overcrowding and ensures strong stems. Use scissors to snip unwanted seedlings at soil level, so you don’t disturb the roots of the remaining plants.
⏰ Step 5: Transition to Outdoor Conditions Gradually
After 4-6 weeks, when seedlings have 3-4 sets of leaves, they’re ready for outdoor planting. Harden them off by placing them outside in a shaded, sheltered spot for 1-2 hours the first day. Gradually increase exposure over 7-10 days, letting them adjust to wind and sun. Poppies are tough once established, but sudden changes can stress young plants.
Plant in full sun with well-draining soil. Poppies thrive in poor soil but won’t tolerate soggy conditions. Water deeply after transplanting to help roots establish, then reduce watering—drought-tolerant once mature. You’ll see blooms in 8-12 weeks, depending on the variety.
Tips & tricks for perfect poppy seed germination
Don't let impatience ruin your poppy dreams—these insider tricks ensure your cold stratification works flawlessly.
Cold Stratification Precision: The 30-day fridge period is non-negotiable for poppy seeds, but consistency matters more than you'd think. I place my sealed bags on the fridge shelf closest to the back—this spot maintains the most stable 34-40°F temperature. Use a small thermometer inside the bag during the first week to verify temps. If your fridge fluctuates (common in older models), move the bag to the middle shelf where temps stay most consistent.
Moisture Balance Secret: That damp paper towel should feel like a wrung-out sponge—not dripping wet. I weigh my towel before and after adding water to ensure it's only about 10% moisture by weight. Too much moisture creates anaerobic conditions that trigger mold; too little prevents proper hydration. Check weekly by gently squeezing the towel—it should feel damp but not wet when pressed.
Seed Distribution Hack: For even spacing in Step 2, I mix the seeds with a small amount of fine sand (about 1:1 ratio) before using the sieve. This prevents seeds from clumping together when they hit the soil surface. The sand also helps them spread more uniformly, giving each seed its own space to germinate without competition. This is especially helpful if you're planting in a small tray where overcrowding becomes an issue.
Light Sensitivity Insight: Poppy seedlings are finicky about light timing. In Step 3, I place my trays under a grow light on a 14-hour cycle (lights on at 6am, off at 8pm) during the sprouting phase. This mimics natural daylight patterns and prevents the leggy growth that occurs with constant artificial light. If using a window, rotate the tray daily so all seedlings get equal exposure—poppies grow toward the light source, and uneven growth can occur if one side gets more sun.
Pro Tips for Poppy Seed Germination Time
- Don't let impatience ruin your poppy dreams—these insider tricks ensure your cold stratification works flawlessly.
- Cold Stratification Precision: The 30-day fridge period is non-negotiable for poppy seeds, but consistency matters mo...
- Moisture Balance Secret: That damp paper towel should feel like a wrung-out sponge—not dripping wet. I weigh my towel...
Frequently asked questions
Got questions about poppy seed germination? You’re not alone! Here are answers to the most common concerns—from patience to troubleshooting—to help you grow those dreamy blooms faster.
How long does it really take for poppy seeds to germinate?
Poppy seeds are famously slow—expect 14 to 30 days in ideal conditions (warm soil, consistent moisture, and light). The 30-day cold trick (stratification) speeds this up by mimicking winter’s natural signal. Patience is key, but don’t give up after 2 weeks!
Why does the article mention a "cold trick"? What’s that?
The 30-day cold trick involves chilling moist seeds in the fridge (or outdoors in winter) to break dormancy. Poppies need this cold period to germinate reliably. Skip it, and you might wait months—or get no sprouts at all! Think of it as a shortcut for Mother Nature.
What’s the best way to keep poppy seeds moist during germination?
Use a spray bottle to mist soil lightly—never soak it. Poppy seeds rot in soggy conditions. Cover the tray with plastic wrap (poke holes for airflow) to retain humidity, but remove it daily to prevent mold. Aim for consistently damp, not wet, soil.
What if my poppy seeds still won’t sprout after 4 weeks?
Don’t panic! Try these fixes:
- Fresh seeds: Poppies lose viability quickly—use seeds <1 year old.
- Soak test: Plop a few seeds in water. If they sink, they’re viable.
- Heat shock: Place seeds in warm water (100°F) for 24 hours before planting.
- Light exposure: Poppies need light to germinate—avoid burying them deep.
Can I grow poppies from store-bought poppy seed bags (like for baking)?
Most culinary poppy seeds (from grocery stores) are not viable for gardening—they’re harvested for flavor, not germination. For growing poppies, buy “ornamental poppy seeds” from nurseries or seed catalogs. Pro tip: Check the packet for a germination rate over 80%!
Wrapping up and next steps
Growing poppy seeds may seem slow, but with the right 30-day cold trick and patience, you’ll soon see those delicate blooms emerge! Remember, consistency in moisture and temperature is key—don’t rush the process. Once your seedlings sprout, transplant them carefully and watch your garden transform with vibrant color.
Ready to take the next step? Start your poppy seeds today and enjoy the rewarding journey of nurturing these stunning flowers. Happy gardening! 🌱✨