
Propagation
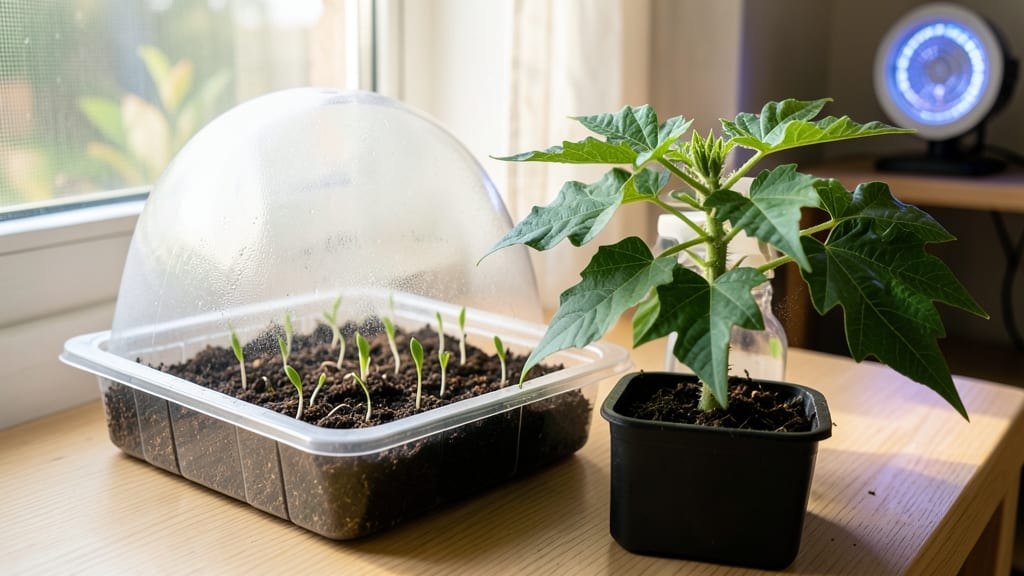
Papaya seed germination requires precise moisture control—too dry and they sleep, too wet and they rot. 🌱 I’ve learned that patience and a humid setup are the keys to breaking through that stubborn outer shell and getting those first green shoots within 10-14 days. The trick isn’t just planting; it’s creating the perfect tropical microclimate right on your windowsill or countertop.
Start by soaking seeds overnight in warm water to soften the tough outer layer—this cuts germination time in half. Use a mix of 50% perlite and 50% peat moss for drainage while keeping roots moist, and place your tray inside a sealed plastic bag or propagator.
The goal is 80% humidity and 75-85°F temperatures, mimicking the papaya’s native jungle conditions.
Once sprouts appear, thin to the strongest seedling and move it to bright, indirect light. Within 3-4 weeks, you’ll have a sturdy seedling ready for transplanting—no weak, leggy growth if you keep the moisture consistent.
The payoff? A thriving papaya tree that produces fruit in just 12-18 months, all from a single seed.
For tropical climates, this method works year-round; cooler zones may need a heat mat in winter. The biggest mistake? Letting the soil dry out—papaya seeds will not forgive neglect. Keep that humidity up, and you’ll be harvesting fruit from your own jungle in a pot sooner than you think.
📚 In This Guide
- What you need
- Instructions
- Tips and common mistakes
- Wrapping up and next steps
What you need
- ● Fresh papaya seeds: 10–15 seeds (harvested from a ripe, organic papaya for best results).
- ● Germination tray or seedling pots: 6–8 small pots (3–4 inches in diameter) or a shallow tray with drainage holes.
- ● Seed-starting mix: 2–3 cups of sterile, well-draining potting soil (avoid garden soil—it may contain pathogens).
- ● Spray bottle (8–16 oz): For gentle watering without disturbing seeds.
- ● Plastic wrap or clear lid: To create a humidity dome (e.g., a plastic bag or a humidity cover for the tray).
- ○ Clear plastic container (optional): For a DIY humidity chamber (e.g., a takeout container with ventilation holes).
- ● Grow lights or sunny windowsill: A south-facing window or a 12–16" LED grow light for 12+ hours of light daily.
- ○ Thermometer (optional): To monitor soil temperature (ideal range: 75–85°F).
- ● Tweezers or toothpick: For carefully placing seeds without crushing them.
- ● Small hand trowel: To gently press seeds into the soil.
- ○ Rubbing alcohol (70%+) and paper towels: For sterilizing seeds or tools (optional but recommended).
- ● Fertilizer (balanced, water-soluble): Diluted to half-strength for seedlings (e.g., 5-5-5 NPK ratio).
- ○ Humidity tray (optional): A shallow tray filled with pebbles and water to elevate pots for consistent moisture.
Step-by-Step instructions for germinating papaya seeds
Here's how to coax those stubborn papaya seeds into sprouting reliably—no guesswork, just science-backed moisture control.
🌱 Step 1: Prep Seeds for Maximum Germination Speed
Papaya seeds have a thick outer coating that slows water absorption, so we'll soften it first. Remove seeds from the fruit and rinse off any pulp under lukewarm water. Place them in a small bowl and cover completely with filtered water for 24 hours. You'll see the coating swell and soften—this is your signal the seeds are ready.
After soaking, gently rub the seeds between your fingers to remove any remaining papery husk. This step prevents mold buildup later. I like to spread them on a paper towel to air-dry slightly for 30 minutes—just until they feel slightly tacky but not wet. Dry seeds stick to the germination medium better and won't slide around.
💧 Step 2: Set Up the Moisture-Controlled Germination Chamber
Line a shallow container (like a plastic takeout tray) with a damp paper towel—it should feel like a wrung-out sponge. Arrange the prepped seeds 1 inch apart on the towel, ensuring they lie flat. Cover with another damp paper towel, then place the entire setup inside a sealed plastic bag with a few small holes punched in the sides. This creates 90% humidity while allowing airflow.
Place the bag in a warm location (80-85°F)—a seedling heat mat under a kitchen counter works perfectly. Check daily for condensation on the bag's interior. If you see water droplets, the humidity is ideal. If the towel dries out (test by touching—it should feel damp but not soggy), mist lightly with room-temperature water and reseal.
☀️ Step 3: Monitor for Sprouts and Adjust Conditions
Germination typically occurs in 7-14 days, but you'll spot the first signs much earlier. Watch for the seed coats to split open—this is your cue that roots are emerging. Once you see tiny white root tips (¼ inch long), it's time to transfer them to soil. I recommend using a sterile seed-starting mix in small pots (2-3 inches deep) to prevent damping-off.
Keep the soil surface consistently moist but never waterlogged. Papaya seedlings are sensitive to root rot, so only water when the top ½ inch feels dry to touch. Place pots in bright, indirect light (no direct sun yet)—a grow light on a 12-hour cycle works best. You'll know the light is right when seedlings grow straight up instead of stretching toward it.
🌿 Step 4: Transplant and Support Early Growth
Once seedlings develop 2-3 true leaves (the second set after the initial seed leaves), they're ready for their first transplant. Choose a slightly larger pot (4-6 inches) with drainage holes. Gently remove the seedling, keeping the root ball intact, and plant it 1 inch deeper than it grew before. This encourages stronger stem development.
Papaya seedlings grow fast but need support early. I stake each one with a 3-inch bamboo stake** immediately after transplanting. The vining habit starts early, and a little guidance now prevents tangled stems later. Keep the soil moist but reduce watering slightly—overwatering at this stage causes yellowing leaves, which is a common rookie mistake.
Tips & tricks for perfect papaya seed germination
These moisture-controlled secrets will help you transform stubborn papaya seeds into thriving sprouts with minimal fuss.
Soaking Science: The 24-hour soak isn't just about softening the seed coat—it's about breaking dormancy. I've found that using filtered water instead of tap water prevents chlorine buildup that can inhibit germination. After soaking, if you notice any seeds floating, they're likely non-viable—discard them. The good ones will sink to the bottom.
Humidity Hack: Maintaining that 90% humidity in Step 2 is critical, but here's the trick: if you don't have a humidity dome, create one using a clear plastic container with a tight lid (just punch a few holes). The condensation you'll see on the inside is your visual confirmation you've got the right moisture levels. This setup works just as well as commercial germination domes.
Lighting Strategy: For the bright, indirect light in Step 3, I recommend positioning your seedlings about 6 inches below a standard fluorescent bulb. Papaya seedlings are sensitive to direct sunlight at this stage—it can cause leaf scorch. You'll know you've got the right setup when the seedlings grow straight up rather than leaning toward the light source, which indicates proper light intensity.
Transplant Timing: The moment those tiny white root tips reach ¼ inch in Step 3, that's your cue to move to soil. Waiting too long risks root circling, which stunts growth. When transplanting into your 2-3 inch pots, press the soil gently around the roots to eliminate air pockets—this helps prevent transplant shock. The 1-inch deeper planting in Step 4 isn't just about stem strength; it also helps stabilize the young plant.
Pro Tips for Papaya Seed Germination
- These moisture-controlled secrets will help you transform stubborn papaya seeds into thriving sprouts with minimal fuss.
- Soaking Science: The 24-hour soak isn't just about softening the seed coat—it's about breaking dormancy. I've found t...
- Humidity Hack: Maintaining that 90% humidity in Step 2 is critical, but here's the trick: if you don't have a humidit...
Frequently asked questions
Got questions about germinating papaya seeds?
You’re not alone! Here are answers to the most common queries to help you grow strong, healthy papaya plants with ease.
How long does it take for papaya seeds to germinate?
Papaya seeds typically germinate in 7–21 days, depending on temperature (ideal: 75–90°F) and moisture. Keep the soil consistently damp but not soggy—germination speeds up in warm, humid conditions. Patience is key, but you’ll often see sprouts within 2 weeks if conditions are perfect!
What if my papaya seeds aren’t sprouting after 3 weeks?
If no sprouts appear after 21 days, check these fixes:
- Temperature: Move seeds to a warmer spot (e.g., near a sunny window or under a heat mat).
- Moisture: Ensure the soil stays evenly moist—not dry or waterlogged.
- Viability: Test a few seeds in warm water; if they float, they’re likely dead. Try fresh seeds!
If all else fails, papaya seeds lose viability quickly, so source new ones from a ripe fruit.
Can I germinate papaya seeds in water instead of soil?
Yes! Soak seeds in lukewarm water for 24–48 hours to speed up germination. Change the water daily to prevent mold. Once sprouts (1–2 inches) appear, transplant them into moist potting mix. This method works well for quick starts but requires careful monitoring to avoid rot.
Do papaya seeds need light to germinate?
Nope! Papaya seeds germinate best in darkness—light can dry them out or hinder early growth. Cover the container with a damp paper towel or place it in a dark, warm spot (like a cabinet) until sprouts emerge. Once they’re 1–2 inches tall, move them to bright, indirect light.
Can I grow papaya from store-bought fruit?
Store-bought papaya seeds work, but choose ripe, organic fruit for the best results. Avoid seeds from unripe or treated produce, as they may not germinate well. Rinse seeds thoroughly to remove fruit residue, then follow your preferred germination method (soil or water).
Why are my papaya seedlings turning yellow or moldy?
Yellowing or mold usually signals overwatering or poor drainage. Let the soil dry slightly between waterings and use a pot with drainage holes. If mold appears, reduce moisture and consider repotting in fresh, sterile soil. Yellow leaves can also mean nutrient deficiency—fertilize lightly with a balanced mix once true leaves form.
Wrapping up and next steps
Growing papaya from seed is a rewarding journey that blends patience with science—especially when you master moisture-controlled sprouting. By following the right techniques, you’ll unlock fast, reliable germination and nurture thriving plants with minimal fuss.
Whether you’re a gardening novice or a seasoned green thumb, this method makes it easier than ever to cultivate your own tropical fruit tree!
Ready to take the next step? Start with just a few seeds—experiment with the moisture levels and timing you learned here, then expand your garden as confidence grows. Happy planting! 🌱