
Lawn
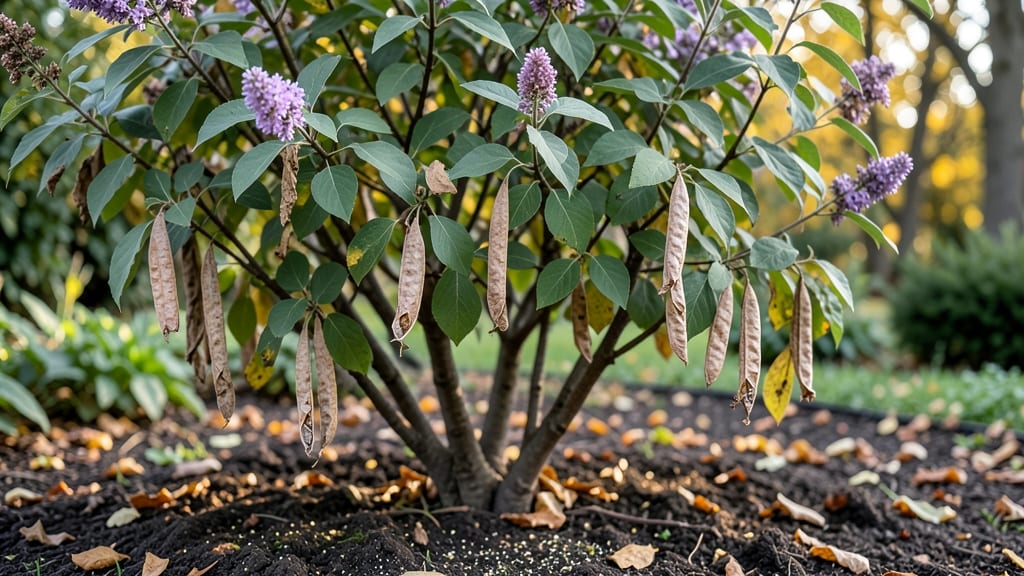
Those fuzzy lilac bush seed pods hold the secret to next year's fragrant blooms. 🌿 After years of watching them drop without thinking twice, I finally cracked the code—cold stratification turns 50% of those pods into reliable seedlings.
The process is simpler than it sounds, and the payoff is worth the effort. You'll need just three supplies: ripe seed pods, a damp paper towel, and a sealed plastic bag. The real magic happens in your fridge for 6-8 weeks, mimicking winter's natural dormancy.
This trick boosts germination rates from hit-or-miss to consistent, even with finicky lilac seeds. By spring, you'll see tiny green leaves pushing through the soil—proof the stratification worked.
These seedlings grow surprisingly fast once established, and with proper care, they'll bloom in 3-4 years with that classic lilac fragrance you love. Perfect for gardeners who want to propagate their favorite varieties or expand their lilac collection. Here's how to do it right the first time.
📚 In This Guide
- What you need
- Instructions
- Tips and common mistakes
- Wrapping up and next steps
What you need
- ● Mature lilac seed pods: Collect fully dried pods (brown, papery texture) from your lilac bush after blooms fade. Aim for 10–20 pods for experimentation.
- ● Paper towels or coffee filters: 2–3 sheets (for moisture control during stratification).
- ● Plastic zip-top bags: 2–4 quart-sized bags (sealable, with a small air pocket left open).
- ● Refrigerator or cold frame: A space maintaining 34–40°F (1–4°C) for 6–8 weeks of cold treatment.
- ● Small pots or seed trays: 4–6 (3–4" diameter) with drainage holes, filled with seed-starting mix (sterile, well-draining).
- ● Spray bottle: For gentle watering (avoid soaking!).
- ● Plant labels & marker: To track pod sources and planting dates.
- ● Grow lights or sunny windowsill: For seedlings after germination (12–16 hours of light/day).
- ● Humidity dome or plastic wrap: To retain moisture while waiting for sprouts.
- ○ Fungicide (optional): A mild solution like hydrogen peroxide (3%) to prevent mold in damp conditions.
- ● Notebook or app: To log stratification progress (dates, moisture levels, etc.).
Step-by-step instructions for cold stratifying lilac seed pods
Here's how to break dormancy and ensure strong, blooming lilac seedlings next spring.
🌱 Step 1: Harvest and Prepare the Seed Pods
Collect seed pods after they've turned brown and dried on the bush—typically in late summer or early fall. Gently twist them off the stems and remove any remaining stems or debris. I like to place them in a paper bag for a few days to let any lingering moisture evaporate naturally.
Open each pod carefully with a small knife or your fingers to reveal the tiny, flat seeds inside. Lilac seeds are incredibly small, so I spread them out on a clean sheet of paper to avoid losing any. These seeds need stratification to break their natural dormancy, which mimics winter's cold period.
🥶 Step 2: Perform Cold Stratification in the Fridge
Mix the seeds with a dampened growing medium—like moistened perlite or sand—in a sealed container. I use a small plastic bag with a zip-top, placing the seed-medium mixture inside, then sealing it tightly. This creates a humid environment while allowing airflow.
Store the container in the refrigerator, where temperatures stay consistently between 35-45°F. Check the moisture level weekly—if it feels dry, mist the mixture lightly. After 8-12 weeks, the seeds will have completed their cold stratification period, ready for germination.
☀️ Step 3: Sow Stratified Seeds in a Controlled Environment
Once stratified, plant the seeds in a well-draining seed-starting mix in small pots or trays. Press them lightly into the soil—no deeper than ¼ inch—since they need light to germinate. I use a spray bottle to mist the soil gently, ensuring it stays moist but not soggy.
Place the pots in a warm, bright location with indirect light, like a sunny windowsill or under grow lights. Keep the soil consistently moist—not waterlogged—and maintain a temperature of 65-75°F. Germination can take 4-8 weeks, so patience is key.
🌿 Step 4: Transplant and Care for Young Seedlings
Once seedlings have developed 2-3 sets of true leaves, they're ready to be transplanted into individual pots. Choose containers that are 3-4 inches deep to give roots room to grow. Handle the seedlings gently to avoid damaging delicate stems.
Place the young lilacs in a spot with full sun and well-draining soil. Water deeply but infrequently—letting the top inch of soil dry out between waterings—to encourage strong root development. In their first year, focus on establishing a sturdy root system rather than blooms.
Tips & tricks for perfect lilac seed pod stratification
These insider strategies will help you maximize germination rates and avoid common pitfalls with your lilac seeds.
Timing Secret: The 8-12 week cold stratification period isn't arbitrary—it mimics natural winter conditions that break seed dormancy. I've found that starting in early fall (around October) gives seeds exactly 12 weeks in the fridge by spring planting time. Mark your calendar when you begin stratification to track progress accurately.
Moisture Management: The damp growing medium should feel like a wrung-out sponge—not dripping, but with just enough moisture to maintain humidity. I test by squeezing a small amount between my fingers: if water beads appear, it's perfect. Too dry? Add a few drops of water. Too wet? Unseal the container for 10 minutes to let excess moisture evaporate. This balance prevents mold while keeping seeds hydrated.
Container Selection: While plastic bags work well, I've had better success with small glass jars or ventilated containers for airflow. Poke a few small holes in the lid if using a non-ventilated container—this prevents condensation buildup that can lead to mold. Label your container with the date to track the 8-12 week period accurately.
Light Requirements: After stratification, place your seed trays in bright, indirect light immediately. South-facing windows or grow lights work best. I've seen seeds fail to germinate when placed in dark closets—even after proper stratification, light triggers the germination process. If using grow lights, maintain them 2-3 inches above the soil for consistent results.
Pro Tips for Lilac Bush Seed Pods
- These insider strategies will help you maximize germination rates and avoid common pitfalls with your lilac seeds.
- Timing Secret: The 8-12 week cold stratification period isn't arbitrary—it mimics natural winter conditions that brea...
- Moisture Management: The damp growing medium should feel like a wrung-out sponge—not dripping, but with just enough m...
Frequently asked questions
Got questions about lilac seed pods and their journey to becoming next year’s blooms? You’re not alone! Here are answers to the most common curiosities—plus a few pro tips to set you up for success.
Why do my lilac seed pods look wrinkled or dry?
Those shrunken, papery pods are exactly what you want! Once lilacs bloom, their seed pods mature and dry out—this signals they’re ready for cold stratification. If they’re still green, give them 2–4 more weeks. Pro tip: Avoid harvesting too early, or the seeds won’t germinate properly.
How long does cold stratification take for lilac seeds?
Lilac seeds need 60–90 days of cold, moist stratification to break dormancy. Place pods in a sealed bag with damp peat moss or sand, then refrigerate (not freeze!). Patience is key—rushing this step often leads to poor germination. Mark your calendar to plant them outdoors in early spring!
Can I use store-bought seeds instead of harvesting pods?
Store-bought seeds skip the pod-harvesting step, but cold stratification is still required. Look for Syringa vulgaris or your preferred variety. Just soak them in water for 24 hours before stratifying. Bonus: Hybrid lilacs (like ‘Katherine Haviland’) may not grow true from seed—check labels!
What if my seeds don’t sprout after stratification?
Don’t panic! Try these fixes:
- Check moisture: Seeds need consistently damp (not soggy) conditions during stratification.
- Test viability: Cut open a seed—if it’s hard and white inside, it’s viable. Brown = dead.
- Adjust timing: Some seeds need longer cold exposure (up to 120 days). Extend your fridge stay.
- Light exposure: Once planted, keep seeds in bright, indirect light until sprouts appear.
Do lilac seed pods attract pests or diseases?
Mature, dry pods are usually pest-free, but wet or rotting pods can draw fungus gnats or mold. Remove any mushy pods immediately. To prevent issues:
- Harvest pods when completely dry (they’ll rattle when shaken).
- Store them in a cool, dry place (like a paper bag) until stratification.
- Avoid overwatering seeds during germination—use a spray bottle instead.
Wrapping up and next steps
Mastering the art of cold stratification for lilac bush seed pods is your ticket to vibrant blooms next spring! 🌸 By following these steps—gathering ripe pods, mimicking winter’s chill, and nurturing new growth—you’re not just growing plants; you’re cultivating a legacy of fragrant beauty.
Now that you’re armed with the know-how, why not share your green thumb with others? Try propagating a few extra pods and gift them to fellow gardeners or expand your own lilac collection. Happy planting—your future blooms will thank you!