
Propagation
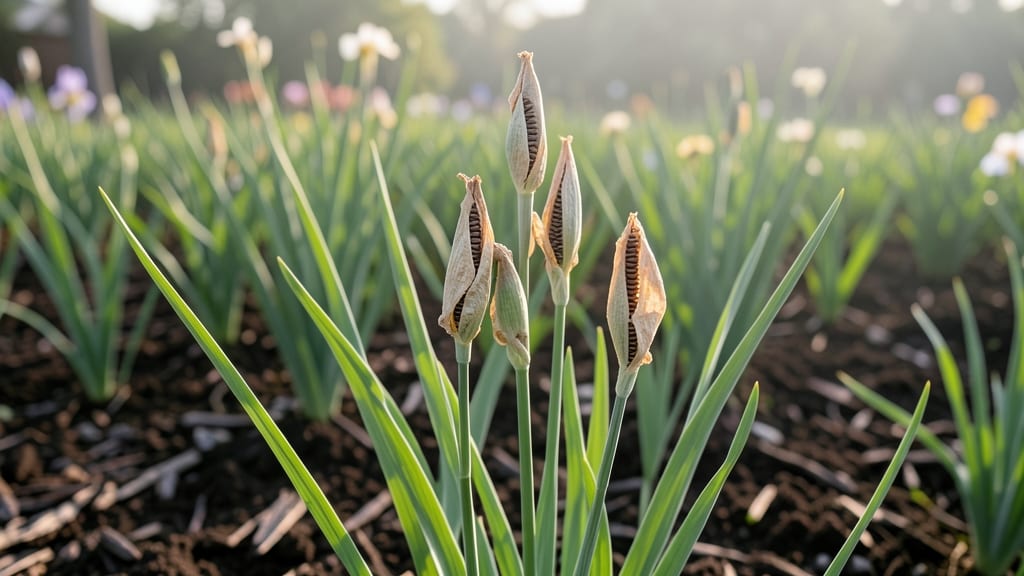
Harvesting iris seed pods just got easier than you think. 🌿 Those twisty, stubborn pods don’t have to be a battle—with the right timing and technique, you’ll collect seeds without tearing up your garden or your patience.
The secret starts with spotting mature pods: they turn from green to tan and develop a papery texture. Once they’re dry but not brittle, gently twist them off (no pruners needed). Store them in a paper bag until they open naturally—this prevents premature seed loss and keeps things simple.
You’ll end up with plump, viable seeds ready for sowing. The germination process is slow but rewarding: start them indoors in late winter for spring planting, and keep the soil consistently moist but never soggy.
Young seedlings need patience—they’ll take 2-3 years to bloom, but the wait is worth it for those stunning, homegrown irises. Works for bearded, Siberian, and Louisiana irises alike. Here’s how to make it foolproof—no gardening degree required.
📚 In This Guide
- What you need
- Instructions
- Tips and common mistakes
- Wrapping up and next steps
What you need
- ● Mature iris seed pods: Look for fully brown, dried pods (usually late summer to early fall). Aim for at least 10-15 pods for a good harvest.
- ● Pruning shears or sharp scissors: A pair with clean, sharp blades to avoid crushing pods. Sterilize with rubbing alcohol before use.
- ● Paper bags or brown lunch bags: 2-3 medium-sized bags (one per harvest batch) to collect seeds without crushing them.
- ● Labeling tags & permanent marker: To track seed varieties (e.g., "Bearded Iris – Purple Majesty").
- ○ Gloves (optional but recommended): Protects hands from thorns and potential skin irritation.
- ● Fine-mesh sieve or colander: For separating seeds from chaff. A ¼-inch mesh works best.
- ● Small plastic containers with lids: 2-4 containers (e.g., spice jars) for storing seeds in a cool, dry place.
- ○ Desiccant packets (optional): Helps keep seeds dry if storing long-term.
- ● Wait until pods are completely dry and brown (squeezing should release seeds easily).
- ● Harvest on a dry, sunny day to minimize moisture and mold risk.
- ● Check local regulations—some areas restrict iris seed collection from wild populations.
How to harvest iris seed pods without the twist struggle
Here's my foolproof method for collecting iris seed pods—no stubborn stems or messy drops.
🌱 Step 1: Identify and Wait for Mature Seed Pods
Iris seed pods develop after flowering, starting as small green bulbs that swell over 6-8 weeks. Wait until they turn brown and papery—this means they're fully mature and ready for harvest. The pods should feel dry and crisp when gently squeezed, like a brittle paper bag.
Don’t rush—harvesting too early means immature seeds that won’t germinate. I always check pods in late summer or early fall, depending on my climate. If you see moisture inside when you crack one open, wait another week or two.
✂️ Step 2: Cut Stems at the Base
Use clean, sharp pruning shears to snip the stem ½ inch above the ground. This prevents damage to the rhizome and keeps the plant healthy for next year. Hold the stem steady—twisting can snap the pod off unevenly, making it harder to work with.
Place the cut stems in a bucket or basket. Avoid overcrowding; you’ll need space to handle them later. If pods are still tightly closed, leave them in a dry, shaded spot for 3-5 days to finish drying out naturally.
🪴 Step 3: Extract Seeds and Clean Pods
Once pods are completely dry, lay them on a clean towel or newspaper. Gently twist each pod open—it should split along its seam like a pod of peas. If it resists, let it dry another day. Remove the seeds inside and set them aside in a small container.
I like to sift the seeds through a fine mesh strainer to remove any debris or chaff. Store the clean seeds in a paper envelope (not plastic—it traps moisture) and label with the iris variety and harvest date. Keep them in a cool, dry place until ready to plant.
💧 Step 4: Store Seeds Properly for Germination
Iris seeds need a cold stratification period to break dormancy. Place the envelope of seeds in a sealed plastic bag with a bit of damp sand or vermiculite (if you have it). Store the bag in your refrigerator’s crispier drawer for 3-4 months—this mimics winter conditions.
After stratification, sow seeds in well-draining potting mix at a depth of ¼ inch. Keep the soil lightly moist but never soggy. Germination can take 2-4 weeks, so be patient. Thin seedlings to 4-6 inches apart once they have 2-3 true leaves.
🌿 Step 5: Transplant Seedlings for Long-Term Growth
When seedlings are 4-6 inches tall and have developed 4-5 leaves, they’re ready for their permanent spot. Choose a location with full sun to partial shade and well-draining soil. Dig a hole slightly larger than the root ball and space plants 12-18 inches apart.
Water deeply after transplanting to help roots establish. Mulch around the base with 2-3 inches of organic mulch to retain moisture and suppress weeds. Iris seedlings grow slowly at first, so don’t expect blooms for 2-3 years—but the wait is worth it for those striking flowers.
Tips & tricks for perfect iris seed pod harvesting
Here's what nobody tells you about making iris seed collection effortless—these tricks save time and frustration.
Timing Secret: The 6-8 week development period for iris seed pods is critical, but don't rely solely on the calendar. Check pods daily during the last two weeks—mature pods will feel dry and crisp like brittle paper when gently squeezed. If you harvest too early, seeds won't germinate properly. I've learned this the hard way after wasting seasons on immature pods that produced nothing.
Tool Tip: Invest in a pair of sharp pruning shears specifically for iris harvesting. The clean cut just ½ inch above ground prevents rhizome damage and makes seed pod extraction much easier later. I keep a dedicated pair in my gardening toolbox labeled "Iris Only" to avoid cross-contamination with other plants. This simple habit has saved me from struggling with stubborn stems that resist clean cuts.
Drying Strategy: If your pods aren't opening naturally after cutting, don't force them—this is where patience pays off. Place stems in a dry, shaded spot for 3-5 days to finish drying. I use an old cardboard box lined with newspaper in my garage where humidity is low. The extra drying time prevents seed loss during extraction and makes those brittle pods much easier to open without tearing.
Storage Wisdom: Paper envelopes are your best friend for iris seed storage. Unlike plastic, they allow moisture to escape while keeping seeds protected from pests. I label each envelope with the iris variety and harvest date using a fine-tip permanent marker. This simple system has prevented me from mixing varieties and ensures I can track germination rates by variety over time.
Pro Tips for Iris Seed Pods
- Here's what nobody tells you about making iris seed collection effortless—these tricks save time and frustration.
- Timing Secret: The 6-8 week development period for iris seed pods is critical, but don't rely solely on the calendar....
- Tool Tip: Invest in a pair of sharp pruning shears specifically for iris harvesting. The clean cut just ½ inch above ...
Frequently asked questions
Got questions about harvesting iris seed pods without the usual fuss? You’re not alone! Here are some common queries—and straightforward answers—to help you navigate the process like a pro.
When are iris seed pods ready for harvesting?
Timing is everything! Iris seed pods typically ripen late summer to early fall (August–October, depending on your climate). Look for pods that turn from green to a papery, tan-brown color and split open slightly at the seams—that’s your cue! If they’re still firm or green, give them a few more weeks.
How do I harvest iris seed pods without damaging the plant?
Gently twist or snip pods at the base using clean scissors or pruners—avoid tugging to prevent pulling up the rhizome. Leave the foliage intact until it yellows naturally (next spring) to ensure the plant stores energy for next year. Pro tip: Harvest on a dry day to reduce mold risk!
Can I harvest iris seeds from store-bought irises?
Unfortunately, most garden-center irises (especially bearded irises) are sterile hybrids and won’t produce viable seeds. For seed pods, focus on native or species irises (like Iris germanica or Iris sibirica). Check the plant tag or ask the nursery—seed production is rare in commercial varieties!
How long do harvested iris seeds stay viable?
Freshness matters! Iris seeds are short-lived—plant them within 1–2 weeks of harvest for the best germination rates. If you must store them, dry the seeds completely (1–2 weeks in a cool, dark place) and keep them in a sealed container in the fridge for up to 6 months. After that, viability drops sharply.
What if my iris pods rot or mold before ripening?
Overly wet conditions or fungal issues (like Botrytis) can cause pods to rot. To prevent this:
- Improve airflow around plants by spacing them 12–24 inches apart.
- Water at the base (not overhead) and avoid soggy soil.
- Remove any pods showing black or fuzzy spots immediately.
Wrapping up and next steps
Harvesting iris seed pods doesn’t have to be a frustrating twist-and-turn battle—with the right tools and techniques, you can collect seeds effortlessly and nurture your next batch of vibrant blooms! 🌱 Whether you’re a seasoned gardener or just starting out, patience and gentle handling are key to unlocking the potential of these delicate pods.
Now that you’re armed with the know-how, why not give it a try? Grab your pruners, find those ripe pods, and let nature’s magic unfold. Happy harvesting—and may your garden flourish with new life! 🌸