
Lawn
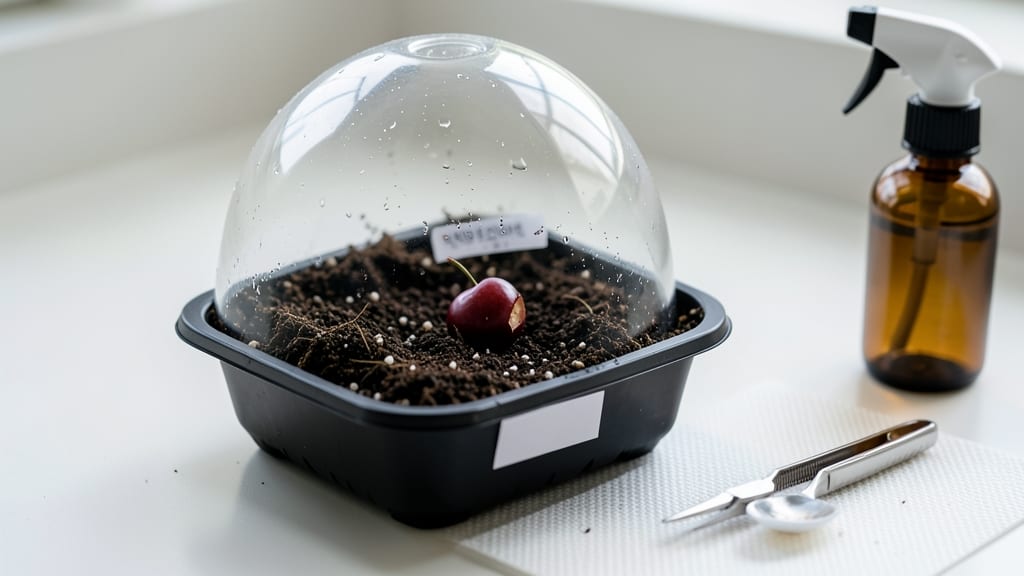
Preparing a cherry seed for planting starts with a cold stratification trick that mimics winter’s natural process—because those seeds won’t sprout without it. 🌱 I’ve tried skipping this step, and every time, my seeds sat stubbornly dormant while neighbors’ trees sprouted effortlessly.
The secret lies in breaking dormancy the right way, whether you’re growing sweet cherries (Prunus avium) or tart (Prunus cerasus). You’ll need three things: fresh, plump seeds (never dried-out store-bought), a damp paper towel or peat moss, and a refrigerator for 6-12 weeks.
The goal? Trick the seed into thinking winter’s passed so it’ll focus on growth instead of survival. Skip this, and you’ll waste months waiting—or worse, never see a sprout. Even then, expect 2-3 months of patience before germination begins.
What you’ll end up with is a tiny seedling that’s tougher than store-bought saplings, though it may not look like your favorite cherry tree. Seed-grown cherries often surprise with unexpected colors or flavors—part of the fun!
For true-to-type results, grafting is the way to go, but this method unlocks the magic of growing from scratch. Fair warning: This isn’t a fast process, and viability drops after 1-2 years of storage.
Start with fresh seeds, follow the cold treatment precisely, and you’ll have your first true leaves by next spring. Here’s how to do it right—no guesswork.
📚 In This Guide
- What you need
- Instructions
- Tips and common mistakes
- Wrapping up and next steps
What you need
- ● Fresh cherry seeds: 5–10 seeds (from pitted, fully ripe cherries—avoid hybrid or processed varieties).
- ● Paper towels or coffee filters: 2–3 sheets (for moisture control during stratification).
- ● Plastic zip-top bag: 1 (quart-sized or larger, with a resealable closure).
- ● Small container: 1 (for mixing seeds with moist medium—think yogurt cup or shot glass).
- ● Refrigerator: 1 (with a crisp drawer for cold stratification, ~34–40°F/1–4°C).
- ● Planting pots: 2–3 (3–4" diameter, with drainage holes and well-draining soil mix).
- ● Potting soil: 1 bag (sterile, seed-starting mix or 50% perlite/sand + 50% peat moss).
- ● Spray bottle: 1 (for gentle watering).
- ○ Plastic wrap or humidity dome: 1 (optional, to retain moisture during germination).
- ● Seedling heat mat: 1 (speeds up germination if indoor temps dip below 60°F/15°C).
- ● Grow lights: 1–2 (LED or fluorescent, 12–16 hours/day for seedlings).
- ● Fertilizer: Balanced water-soluble (5-5-5 or 10-10-10, diluted to half-strength).
- ● Label markers: 2–3 (to track seed varieties and planting dates).
- ● Pruning shears: 1 (for trimming sprouts to encourage bushier growth).
Step-by-Step instructions for preparing cherry seeds for planting
Here's how to break dormancy and boost germination rates using a simple cold treatment.
🌱 Step 1: Harvest and Clean the Seeds
Extract seeds from fully ripe cherries by slicing the fruit in half and scraping the pit free. Rinse the pits thoroughly under cool water to remove all fruit residue—this prevents mold during stratification. I like to soak them for 30 minutes in a bowl of water to ensure no pulp remains clinging to the seed coat.
Let the pits air-dry completely for 24 hours on a paper towel. This step is crucial—moisture trapped between pits will cause them to rot before stratification begins. Place them in a single layer on the towel and leave them undisturbed in a warm, dry spot. You'll know they're ready when the outer shell feels dry to the touch.
❄️ Step 2: Perform Cold Stratification
Place the dried pits in a sealed plastic bag with a damp paper towel at the bottom. This creates a humid environment that mimics winter moisture without drowning the seeds. I use a quart-size ziplock bag and add just enough water to saturate the towel—not soak it. Seal the bag and place it in your refrigerator's crisper drawer.
Keep the bag at 35-40°F for 8-12 weeks. Check monthly to ensure the towel remains damp but not soggy. If condensation forms inside the bag, open it for 30 minutes to let excess moisture escape. This cold treatment breaks the seed's dormancy, which is why cherry seeds often fail to germinate when planted directly.
🌱 Step 3: Test for Germination Readiness
After stratification, remove the pits and gently tap them on a hard surface. A seed ready to plant will make a hollow sound when tapped—this indicates the embryo has broken free from the hard shell. Discard any pits that remain solid or show signs of mold. I like to soak these ready seeds in warm water for 12 hours before planting to soften the shell further.
Plant the stratified seeds 1 inch deep in well-draining soil, spacing them 6 inches apart in individual pots. Use a seed-starting mix with perlite to prevent rot. Keep the soil consistently moist but never waterlogged—cherry seedlings are delicate and prone to damping-off if conditions are too wet.
☀️ Step 4: Provide Warmth and Light
Place the pots in a warm location with bright, indirect light immediately after planting. I use a seedling heat mat set to 70-75°F to maintain consistent warmth. Germination typically occurs within 4-8 weeks, though some seeds may take longer. Watch for the first sign of growth—a small crack in the pit's shell followed by a tiny green shoot.
Once seedlings emerge, move them to a sunny windowsill or under grow lights for 14-16 hours of light daily. Thin to the strongest seedling per pot if multiple sprouts appear. Cherry seedlings grow slowly at first, so be patient—rushing their development leads to weak, leggy plants that struggle when transplanted outdoors.
⏰ Step 5: Transplant When Strong Enough
Wait until seedlings develop 2-3 sets of true leaves and reach 4-6 inches tall before transplanting. This usually takes 3-4 months from planting. Harden off the seedlings by gradually exposing them to outdoor conditions over 10-14 days—start with 1 hour in partial shade and increase daily.
Plant outdoors in full sun after the last frost date, spacing saplings 15-20 feet apart to allow for mature tree size. Mulch heavily around the base to retain moisture and protect roots. Remember, cherry trees from seed may take 5-7 years to bear fruit, but the process is rewarding for those willing to wait.
Tips & tricks for perfect cherry seed germination
The secret to reliable cherry seed germination lies in patience and precision. Here are the key details that make all the difference in your seed-starting journey.
The Cleaning Secret: In Step 1, when you're soaking those pits for 30 minutes, add a drop of dish soap to the water. This helps break down any remaining fruit oils that could inhibit germination. After soaking, use a paper towel to gently scrub any stubborn residue from the pits—this extra step prevents mold during the critical drying phase. The 24-hour drying period is non-negotiable, but placing the pits on a wire rack instead of a flat towel allows air to circulate better on all sides.
Stratification Setup: For Step 2, I've found that using a small mesh produce bag (the kind that holds greens) instead of a ziplock works better for larger quantities of pits. The mesh allows for better airflow while still maintaining humidity. When checking the damp towel monthly, run your finger through it—it should feel like a wrung-out sponge, not a dripping washcloth. The 35-40°F range is crucial because it mimics natural winter conditions that cherry seeds require to break dormancy.
Germination Test: The hollow-sound test in Step 3 is foolproof, but I've learned to tap each pit twice—once gently and once with slightly more force. If it doesn't sound hollow on the second tap, it's not ready. For the optional 12-hour warm water soak, use water that's just warm to the touch (around 85°F)—hotter water can damage the embryo. This pre-planting soak helps soften the shell just enough to encourage faster germination without over-stressing the seed.
Lighting Strategy: When providing warmth and light in Step 4, I recommend using a simple LED grow light bulb instead of a heat mat if your space doesn't get bright indirect light. These bulbs provide the right spectrum for seedling growth while also emitting minimal heat. The 14-16 hours of light is ideal, but if you're using natural light, rotate your pots daily so all seedlings get equal exposure. This prevents them from growing toward one side and becoming leggy.
Pro Tips for How Do You Prepare A Cherry Seed For Planting
- The secret to reliable cherry seed germination lies in patience and precision. Here are the key details that make all...
- The Cleaning Secret: In Step 1, when you're soaking those pits for 30 minutes, add a drop of dish soap to the water. ...
- Stratification Setup: For Step 2, I've found that using a small mesh produce bag (the kind that holds greens) instead...
Frequently asked questions
Got questions about turning cherry pits into saplings? Here are some common ones—and their answers—to help you grow with confidence!
How long does cold stratification take for cherry seeds?
Cold stratification typically requires 6 to 12 weeks in the refrigerator. The exact time depends on the cherry variety and moisture levels in your growing medium. Monitor the seeds weekly—if they sprout before the end of the period, you can plant them immediately!
Can I skip cold stratification and plant cherry seeds directly?
While possible, skipping stratification drastically reduces germination rates (often below 20%). The natural cold period mimics winter conditions, breaking seed dormancy. If you’re impatient, try soaking pits in warm water for 24 hours first, but expect slower or weaker results without stratification.
What’s the best soil mix for germinating cherry seeds?
Use a light, well-draining mix like 50% peat moss or coco coir and 50% perlite or sand. Avoid heavy garden soil—it can suffocate seeds or cause rot. A sterile medium (like seed-starting mix) minimizes disease risk while keeping moisture balanced.
Why aren’t my cherry seeds sprouting after stratification?
Check these common issues:
- Improper stratification: Ensure seeds stayed moist (not soggy) and cold (33–41°F).
- Old or damaged pits: Use fresh, firm seeds—old or cracked ones may not germinate.
- Poor planting depth: Seeds need 1–2 inches of soil cover; too shallow = drying out.
- Temperature shock: Let seeds acclimate to room temp for 24 hours before planting.
Will a cherry tree grown from seed taste like store-bought cherries?
Probably not! Seed-grown trees may take 5–10 years to fruit (if they do at all), and the flavor often differs from grafted varieties. For reliable, flavorful cherries, buy a named cultivar from a nursery. Seed-grown trees are better for ornamental or experimental growing!
Wrapping up and next steps
Preparing cherry seeds for planting is all about patience and the right technique—especially that cold stratification trick!
By following these steps, you’ll boost germination rates and give your future cherry tree the best start. 🌱 Whether you’re growing from a pit or a seed, consistency is key, and soon you’ll be rewarded with a thriving sapling.
Ready to take the next step? Once your seeds sprout, transplant them into pots with well-draining soil and keep them in a sunny spot. Before you know it, you’ll be nurturing a tree that could one day bear delicious fruit—or even shade your garden! 🍒✨