
Size
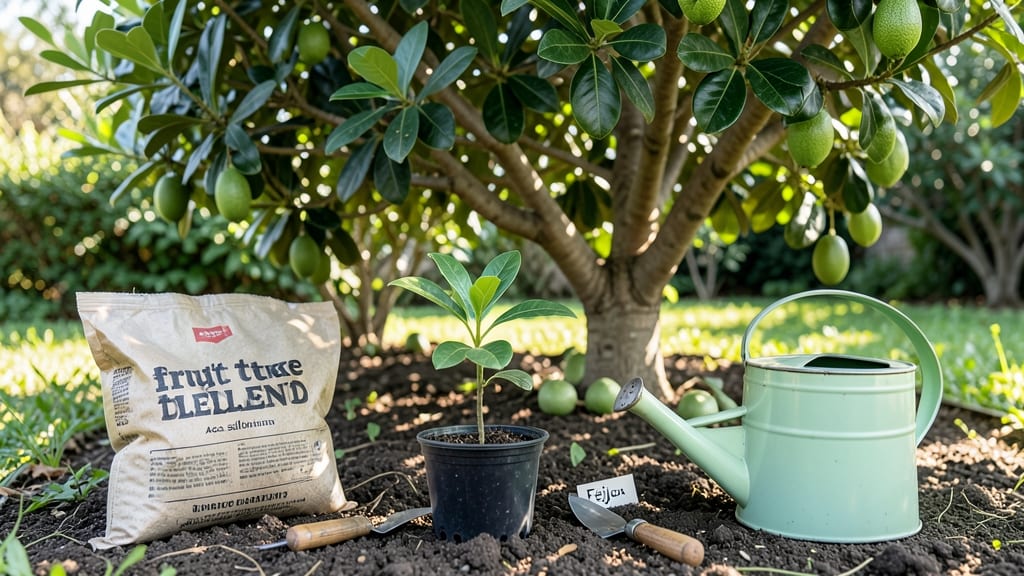
Growing feijoas from seed means frost-free feijoa trees in your garden next summer. 🌱 The trick isn't just planting—it's tricking those tropical seeds into thinking winter's already passed. I've learned that feijoas need cold stratification to break dormancy, and doing it right means faster germination and stronger seedlings.
Start with fresh seeds (they lose viability fast) and a mix of potting soil and perlite for drainage. Plant them just ¼-inch deep in small pots, then pop them in the fridge for 6-8 weeks—this mimics winter's chill.
After that, move them to a warm, bright spot (65-75°F) where they'll sprout in 2-4 weeks. Patience here pays off—rushing this step often leads to weak, slow-growing seedlings.
Once sprouted, keep the soil moist but never soggy, and give them bright indirect light until they're 4-6 inches tall. That's when you can transplant them outside in spring, choosing a spot with full sun and shelter from strong winds.
The first year focuses on root growth, so don't expect blooms—just sturdy plants ready to fruit in 3-5 years.
Here's the secret: feijoas hate transplant shock, so harden them off gradually before moving outdoors. And if your climate gets cold winters, grow them in containers you can bring inside. The payoff? Homegrown feijoas taste nothing like store-bought—sweet, tangy, and bursting with flavor. Worth every step!
📚 In This Guide
- What you need
- Instructions
- Tips and common mistakes
- Wrapping up and next steps
What you need
- ● Feijoa seeds: 5–10 fresh, plump seeds (harvested from ripe fruit, cleaned and dried for 1–2 days).
- ● Cold stratification setup: 1 small paper towel or coffee filter (or a dampened seed-starting mat).
- ● 1 ziplock bag or airtight container (with tiny ventilation holes).
- ○ 1–2 ice cube trays (optional, for organized stratification).
- ● Potting mix: 1 bag (5–10 quarts) of well-draining seed-starting mix (or a 50/50 blend of potting soil + perlite).
- ● Containers: 1–2 small pots (3–4 inches deep) or a seed tray with drainage holes.
- ● 1–2 plastic wrap sheets (to retain humidity).
- ● Basic tools: 1 small hand trowel or spoon (for transplanting seeds).
- ● 1 spray bottle (for gentle watering).
- ○ 1 fine-mist sprayer (optional, for humidity control).
- ○ Optional (but helpful!): Grow lights or a sunny windowsill (south-facing, if possible).
- ● Heating mat (70–75°F) for faster germination.
- ● Humidity dome or clear plastic wrap (to create a mini greenhouse).
- ● Label markers (to track seed varieties if testing multiple types).
- ● Patience: Feijoa seeds need 6–12 weeks of cold stratification before germination!
- ● Space: A cool, dark spot (like a fridge crisper drawer) for stratification.
- ● Warmth: A cozy indoor spot (65–75°F) for post-stratification growth.
Step-by-Step guide to cold stratifying feijoa seeds for reliable growth
Here's how to break dormancy and coax feijoa seeds into vigorous, blooming plants next season.
🌱 Step 1: Harvest and Clean the Seeds
Extract seeds from fully ripe feijoa fruit—look for the deep purple-black color that signals maturity. Rinse them thoroughly under cool water to remove all fruit residue, then let them air-dry on a paper towel for 24 hours. The goal is to remove moisture without drying out the seed's outer shell completely.
I like to spread them in a single layer on the towel, then gently roll them with another towel to remove any lingering pulp. Store them in a sealed container with a desiccant packet until stratification. Feijoa seeds have a tough outer coat that needs this extra prep to soften before germination.
❄️ Step 2: Prepare the Cold Stratification Mix
Fill a quart-sized container with a mix of 50% moistened peat moss and 50% perlite—this creates the ideal airy, moisture-retentive medium. The peat holds water while the perlite prevents compaction. Moisten the mix until it feels like a damp sponge when squeezed, but no water should drip out.
I use a spray bottle to avoid oversaturating the mix, which can lead to mold. Place the container in a ziplock bag to maintain humidity during stratification. This step mimics the natural winter chilling period feijoa seeds need to break dormancy.
🌿 Step 3: Stratify the Seeds for 6-8 Weeks
Arrange the cleaned seeds 1 inch apart in the prepared mix, pressing them lightly into the surface. Place the container in your refrigerator's crisp drawer (around 35-40°F) for 6-8 weeks. This cold treatment simulates winter conditions and triggers germination hormones inside the seed.
Check the mix every 2 weeks—it should remain consistently moist but not soggy. If the surface dries out, mist lightly with water. You won’t see germination yet, but the seeds are actively preparing for spring growth. Real talk: Patience here is key—skipping stratification means seeds may never sprout.
☀️ Step 4: Sow Stratified Seeds Indoors
After stratification, transfer the container to a warm, bright spot (around 65-70°F) and keep the mix moist. Germination typically begins in 2-4 weeks, though some seeds may take longer. Use a clear plastic dome or plastic wrap to retain humidity until you see sprouts.
Once seedlings emerge, remove the dome immediately to prevent fungal growth. Place them under grow lights for 14-16 hours daily—feijoa seedlings need strong light to develop sturdy stems. You’ll know they’re thriving when the first true leaves appear (not the initial seed leaves).
🪴 Step 5: Transplant and Overwinter Young Plants
When seedlings reach 3-4 inches tall (usually 3-4 months after sowing), transplant them into 4-inch pots with well-draining potting mix. Feijoa plants dislike soggy roots, so ensure pots have drainage holes. Keep them in partial shade for the first week to reduce transplant shock.
Here’s the thing—feijoa seedlings grow slowly at first. Overwinter them indoors near a south-facing window or under grow lights until spring. They’ll need 6-8 hours of sunlight daily to prevent leggy growth. Next spring, you’ll see new growth—this is when they start building the energy for future blooms.
Tips & tricks for perfect feijoa seed stratification
These little-known strategies will help you maximize germination rates and grow feijoa plants that thrive from day one.
Seed Prep Matters: In Step 1, when you're air-drying those seeds for 24 hours, don't rush it! The goal is to remove surface moisture while keeping the seed coat slightly pliable. I've found that placing them on a screen instead of a towel speeds up drying without over-drying. This prep work is what softens that tough outer shell just enough for the stratification process to work its magic.
Temperature Precision: The 35-40°F range in Step 3 might seem narrow, but it's critical. If your fridge runs cooler than 35°F, consider using a seedling heat mat set to low under the container. Too cold slows metabolic activity, while too warm can trigger premature germination before the seeds are ready. Think of it like winter in their native habitat—just enough chill to wake them up without shocking them.
Moisture Management: During the 6-8 week stratification period, I've learned that consistency is everything. The mix should feel like a wrung-out sponge—if it's too wet, you risk mold; too dry, and the seeds won't activate. I use a spray bottle with a fine mist setting to check moisture every 2 weeks. Pro tip: Place a small cup of water in the ziplock bag with your container to maintain humidity without over-saturating the mix.
Lighting Strategy: Once you move to Step 4, those 14-16 hours of grow light aren't just about photosynthesis—they're about setting up your seedlings for success. I recommend using full-spectrum LED grow lights positioned 6-8 inches above the seedlings. This mimics natural sunlight intensity and prevents that leggy growth you might see with weaker light sources. The key is to keep the lights close enough to be effective, but not so close they overheat the delicate seedlings.
Pro Tips for Feijoa Seed Grow A Garden
- These little-known strategies will help you maximize germination rates and grow feijoa plants that thrive from day one.
- Seed Prep Matters: In Step 1, when you're air-drying those seeds for 24 hours, don't rush it! The goal is to remove s...
- Temperature Precision: The 35-40°F range in Step 3 might seem narrow, but it's critical. If your fridge runs cooler t...
Frequently asked questions
Got questions about growing feijoa from seed? You’re not alone! Here are answers to the most common queries to help you navigate the process like a pro.
How long does cold stratification take for feijoa seeds?
Cold stratification typically takes 6–12 weeks for feijoa seeds. Place them in a damp paper towel or moist sand in the fridge (34–40°F) to break dormancy. Patience is key—some seeds may sprout sooner, while others need the full timeline. Check periodically for signs of germination!
Can I skip cold stratification and grow feijoa seeds without it?
While possible, skipping stratification reduces success rates. Feijoa seeds have a natural dormancy period, and bypassing it may result in slower, weaker growth or no germination at all. If you’re impatient, try soaking seeds in warm water for 24 hours first, but cold treatment is still the gold standard.
How long does it take for feijoa seeds to germinate after stratification?
After stratification, germination usually occurs within 2–8 weeks. Keep the soil consistently moist (not soggy) and warm (around 70°F). A heat mat can speed up the process. If no sprouts appear after 8 weeks, the seeds may not have survived—don’t give up, try another batch!
What’s the best soil mix for feijoa seedling growth?
Use a well-draining, slightly acidic mix (pH 5.5–6.5) like:
- 50% peat moss or coco coir
- 30% perlite or vermiculite
- 20% compost or worm castings
Why aren’t my feijoa seeds sprouting? Troubleshooting tips
If your seeds refuse to germinate, check these common issues:
- Improper stratification: Ensure seeds stayed moist and cold (not frozen).
- Old or damaged seeds: Feijoa seeds lose viability over time—use fresh ones!
- Poor soil conditions: Too dry or compacted soil can suffocate sprouts.
- Temperature fluctuations: Keep soil warm (70–75°F) post-stratification.
Wrapping up and next steps
Growing feijoa from seed is a rewarding journey that blends patience with the joy of nurturing life from scratch! 🌱 With the right cold stratification techniques and a little care, you’ll soon be enjoying fragrant blooms and sweet, tangy fruits in your garden.
Whether you’re a seasoned gardener or just starting out, this process is a fantastic way to expand your green thumb and create something truly unique.
Ready to take the next step? Start by planting your stratified seeds in well-draining soil and keep an eye out for those first tender sprouts. Before you know it, you’ll be harvesting feijoas straight from your own backyard—what’s not to love? Happy growing! 🌿✨