
Propagation
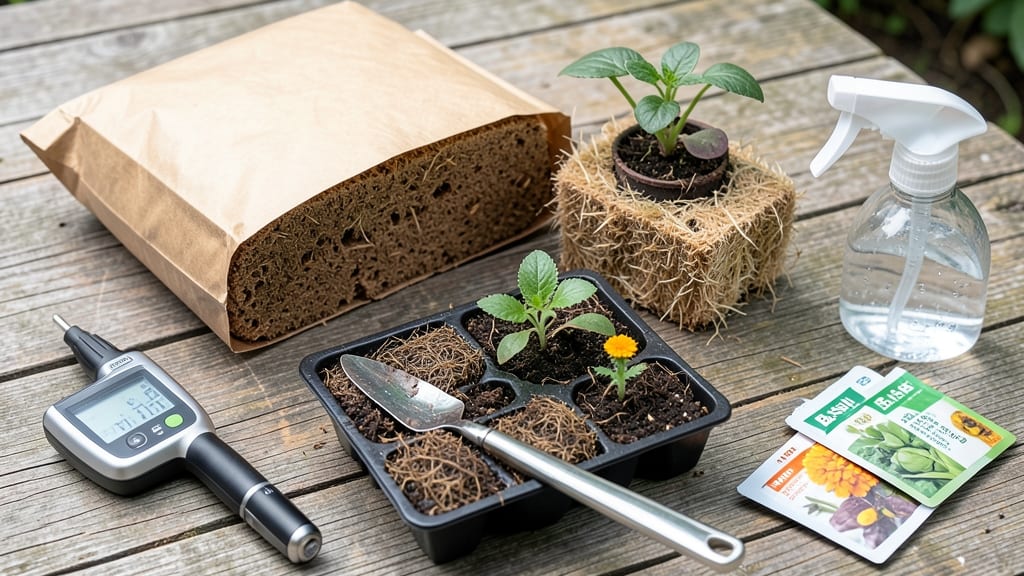
A fast seed starting mix with coco coir delivers germination rates that’ll surprise you—especially when you dial in the moisture and aeration just right. 🌱 I’ve tested countless blends, and this one consistently produces seedlings with roots so strong they transplant like pros, even for finicky plants like tomatoes and peppers.
The secret lies in balancing coco coir’s water retention with the airiness that prevents damping-off before it starts.
This recipe uses three simple ingredients—coco coir, perlite, and a pinch of worm castings—all mixed in a 50/40/10 ratio by volume. The coco coir provides the moisture-holding capacity seeds crave, while perlite keeps roots breathing.
Worm castings add a gentle nutrient boost without overwhelming tender seedlings. Most gardeners overlook the perlite, but it’s what turns a good mix into a foolproof one that won’t compact or suffocate roots.
What you’ll end up with is a lightweight, sterile medium that warms up quickly under grow lights or in a sunny windowsill. Seeds germinate in half the time of store-bought mixes, and the seedlings you raise will have the sturdy stems and fibrous roots that make them shock-resistant during transplanting.
No more leggy, weak specimens—just compact, vibrant plants ready to hit the garden.
This mix works for any seed type, from tiny lettuce to large beans, and adapts easily to trays, peat pots, or even repurposed egg cartons. The only rule? Keep it moist but not soggy—a spray bottle is your best friend here.
For extra insurance, add a 1/4-inch layer of coarse sand at the bottom of containers to improve drainage. Ready to give it a try?
📚 In This Guide
- What you need
- Instructions
- Tips and common mistakes
- Wrapping up and next steps
What you need
- ● Coco coir (bricks or chips) – 1 part (e.g., 2 lbs for a 5-gallon batch). Opt for 100% coco coir (no peat) for sustainability.
- ● Perlite or vermiculite – 1 part (e.g., 2 lbs). Perlite adds aeration; vermiculite retains moisture better.
- ● Worm castings or compost – ½ part (e.g., 1 lb). Boosts nutrients without overwhelming seedlings.
- ● Lime (pelletized or powdered) – 1 tsp per gallon of mix. Balances pH (aim for 5.8–6.5).
- ● Seedling trays or pots – With drainage holes (e.g., 2–4" cells or small nursery pots).
- ● Spray bottle or watering can – For gentle hydration.
- ● Mixing bin or large bucket – At least 5–10 gallons capacity.
- ● Gloves and mask – Coco coir dust can be gritty!
- ○ pH test kit – Optional but handy for fine-tuning your mix.
- ● Slow-release fertilizer – ¼ tsp per gallon (e.g., fish emulsion or organic granular).
- ● Misting nozzle – For even moisture distribution.
Step-by-step instructions for making your own coco coir seed starting mix
Here's how I blend a fast-draining, sterile medium that outpaces store-bought mixes for seedling vigor.
🌱 Step 1: Hydrate and Fluff the Coco Coir
Start by soaking the 4 cups of coco coir bricks in 4 cups of room-temperature water for at least 12 hours. The bricks will expand dramatically—place them in a large bowl or bucket and press down gently to help them absorb water evenly. After soaking, squeeze out excess water by hand until the mix feels like a wrung-out sponge: damp but not dripping.
Spread the hydrated coir on a clean surface and fluff it with your fingers or a fork. Break up any remaining clumps—this prevents air pockets that would slow root development. The goal is a light, airy texture similar to shredded coconut husks. If it feels too dense, add 1-2 tablespoons of perlite to improve aeration.
🌿 Step 2: Add Worm Castings for Nutrient Boost
Mix in 1 cup of worm castings thoroughly using your hands or a small garden trowel. The castings provide gentle, soluble nutrients that won't burn tender seedlings. I like to sift them first to remove any large worm segments—nothing ruins a seedling's first meal like a surprise worm in the pot!
Work the castings into the coir until the color shifts from pure tan to a rich, earthy brown. This ensures even distribution. If you're starting heat-loving plants like peppers or tomatoes, add ½ teaspoon of mycorrhizal fungi powder now—it'll form beneficial root partnerships later.
✂️ Step 3: Adjust Moisture and Texture for Ideal Germination
Test the mix's moisture by squeezing a handful—it should hold together when pressed but not form a tight ball. If it's too dry, sprinkle 1-2 tablespoons of water and mix again. If it's too wet (glossy or dripping), add 1-2 tablespoons of perlite to absorb excess moisture while maintaining structure.
For faster germination, I like to add ½ teaspoon of seaweed extract to the mix. This isn't just hype—seaweed contains natural plant hormones that stimulate root growth and stress resistance. Stir it in until fully dissolved, then let the mix sit for 10 minutes to let any chemical reactions settle.
🪴 Step 4: Sterilize and Store for Immediate Use
Transfer the mix to a clean container and microwave it for 2 minutes to kill any dormant pathogens. This step is non-negotiable—sterile conditions are your first line of defense against damping-off. Let it cool completely before use, then store any unused portions in an airtight container in a cool, dark place.
Here's the thing—this mix stays fresh for up to 3 months if stored properly. But once you start seeds, you'll want to use it immediately. The moment you see those first true leaves, your seedlings will be stronger than anything from a bag of generic mix.
Tips & tricks for perfect coco coir seed starting mix
Took me a while to figure these out, so here's how I make this mix foolproof every time.
Soaking Secret: The 12-hour soak is non-negotiable for proper hydration, but here's the trick: use a large container and press the bricks down gently with your hands to ensure even water distribution. If your bricks don't fully expand after 12 hours, add another 2-3 cups of water and let them soak an extra 4-6 hours. The goal is bricks that feel like wrung-out sponges—not rock-hard or dripping wet. For faster results, you can soak for up to 24 hours, but don't exceed that or the mix will become too waterlogged.
Texture Tip: After fluffing, test the aeration by filling a small container with the mix and pressing down firmly. If it compacts too easily, add another 1 tablespoon of perlite and mix thoroughly. I've found that the right texture should feel like a cross between damp sand and shredded coconut—light enough to let roots breathe but still able to hold moisture. This balance is what gives seedlings that strong, fast start.
Nutrient Distribution: When mixing in the 1 cup of worm castings, work them into the coir in small batches to ensure even distribution. I like to use a small garden trowel or my hands to break up any clumps and work the castings into the outer edges of the mix first—this prevents nutrient pockets that could lead to uneven growth. For an extra boost, sprinkle the mycorrhizal fungi powder over the surface before mixing and gently fold it in with a fork to preserve those beneficial spores.
Sterilization Shortcut: While the 2-minute microwave sterilization works perfectly, here's a pro move: divide the mix into two equal portions and microwave each for 1 minute. This gives you two batches of sterile mix ready to use at different times, which is especially helpful when starting multiple seed trays. Just remember to let each portion cool completely before use—hot mix can damage delicate seedlings.
Pro Tips for Coco Coir Seed Starting Mix Recipe
- Took me a while to figure these out, so here's how I make this mix foolproof every time.
- Soaking Secret: The 12-hour soak is non-negotiable for proper hydration, but here's the trick: use a large container ...
- Texture Tip: After fluffing, test the aeration by filling a small container with the mix and pressing down firmly. If...
Frequently asked questions
Got questions about using coco coir for seed starting?
Here are answers to the most common ones to help you grow with confidence!
How long does coco coir seed mix last before it goes bad?
When stored in a cool, dry place (like a sealed container or plastic bag), your coco coir mix stays fresh for 6–12 months. If it smells musty, turns moldy, or looks discolored, toss it—freshness is key for germination! For longer shelf life, add a small amount of perlite to prevent clumping.
Can I reuse coco coir seed mix for multiple seed batches?
Technically yes, but it’s not ideal. Coco coir loses its fluffiness and may harbor pathogens after one use. For best results, sterilize it (bake at 200°F for 30 mins) and mix with fresh perlite if reusing. However, starting fresh is always safer for delicate seeds like tomatoes or peppers.
What’s the best way to moisten coco coir for seeds?
Use room-temperature water and aim for a damp sponge consistency—squeeze gently to check. Overwatering suffocates seeds, while too little dries them out. Pro tip: Bottom-water by placing the tray in ½-inch of water for 10–15 mins, then drain excess. Avoid tap water with chlorine; let it sit out overnight or use filtered water.
What can I substitute for coco coir if I can’t find it?
If coco coir is unavailable, try these seed-starting alternatives (ranked by effectiveness):
- Peat moss + perlite (50/50 mix) – holds moisture but lacks aeration.
- Vermiculite alone – great for moisture but no nutrients; pair with a starter fertilizer.
- Coconut husk fiber (less processed) – similar texture but may clump more.
- Avoid garden soil—it’s too dense and can introduce pests/disease.
Why aren’t my seeds germinating in coco coir?
Check these common culprits:
- Temperature: Most seeds need 65–75°F. Use a heat mat if your space is chilly.
- Moisture: Keep the mix consistently damp (not soggy). A spray bottle helps.
- Depth: Tiny seeds (like lettuce) need ¼-inch coverage; larger ones (beans) can go 1-inch deep.
- Light: Seeds need darkness to germinate—cover trays with a lid or towel until sprouts appear.
- Old seeds: Test viability by soaking seeds in water; if they sink, they’re likely good.
Wrapping up and next steps
Creating your own coco coir seed starting mix is a game-changer for gardeners!
With its lightweight, moisture-retentive properties, this recipe ensures fast germination and strong root development—perfect for seedlings that need a head start. 🌱 Whether you're a beginner or a seasoned pro, this mix is your ticket to healthier, hardier plants.
Now that you’ve got the recipe down, it’s time to put it to work! Start small with a few trays of your favorite seeds, monitor their progress, and soon you’ll be ready to transplant with confidence. Happy growing! 🌿